Report Setup
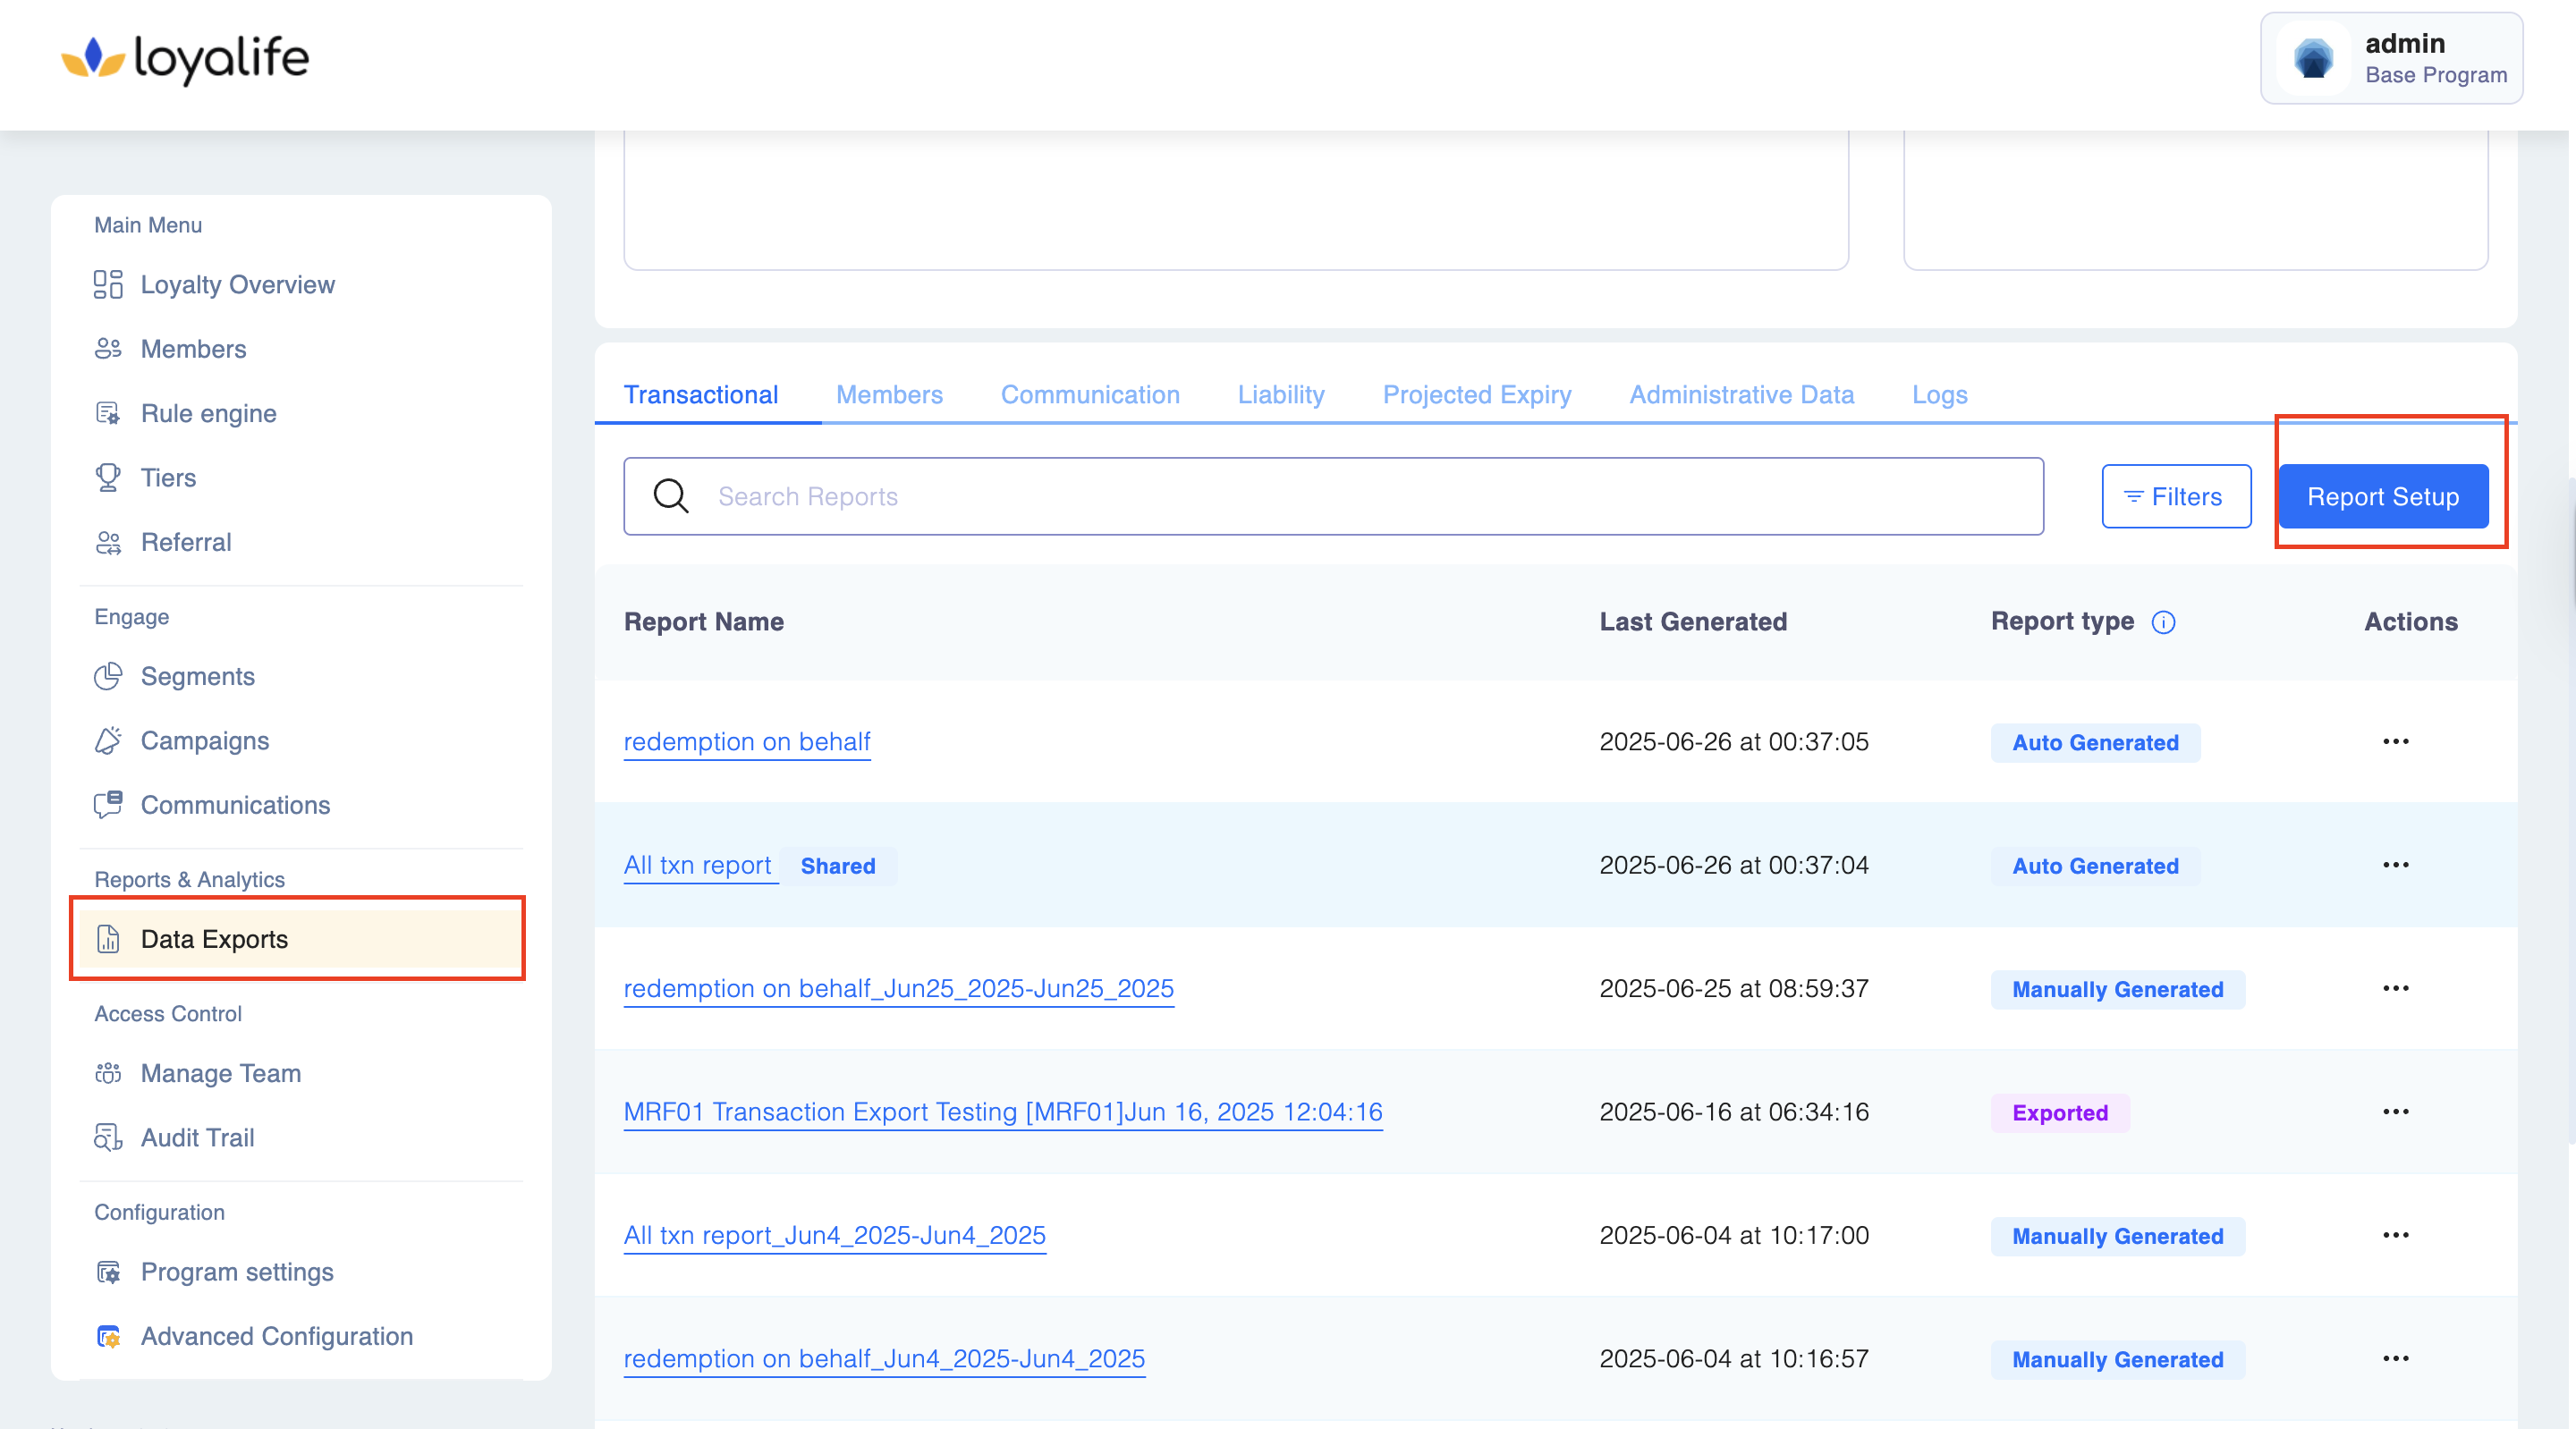
Step 1: Access Report Setup To begin, navigate to Reports & Analytics >> Data Exports. From the dashboard, click the Report Setup button in the top-right corner.
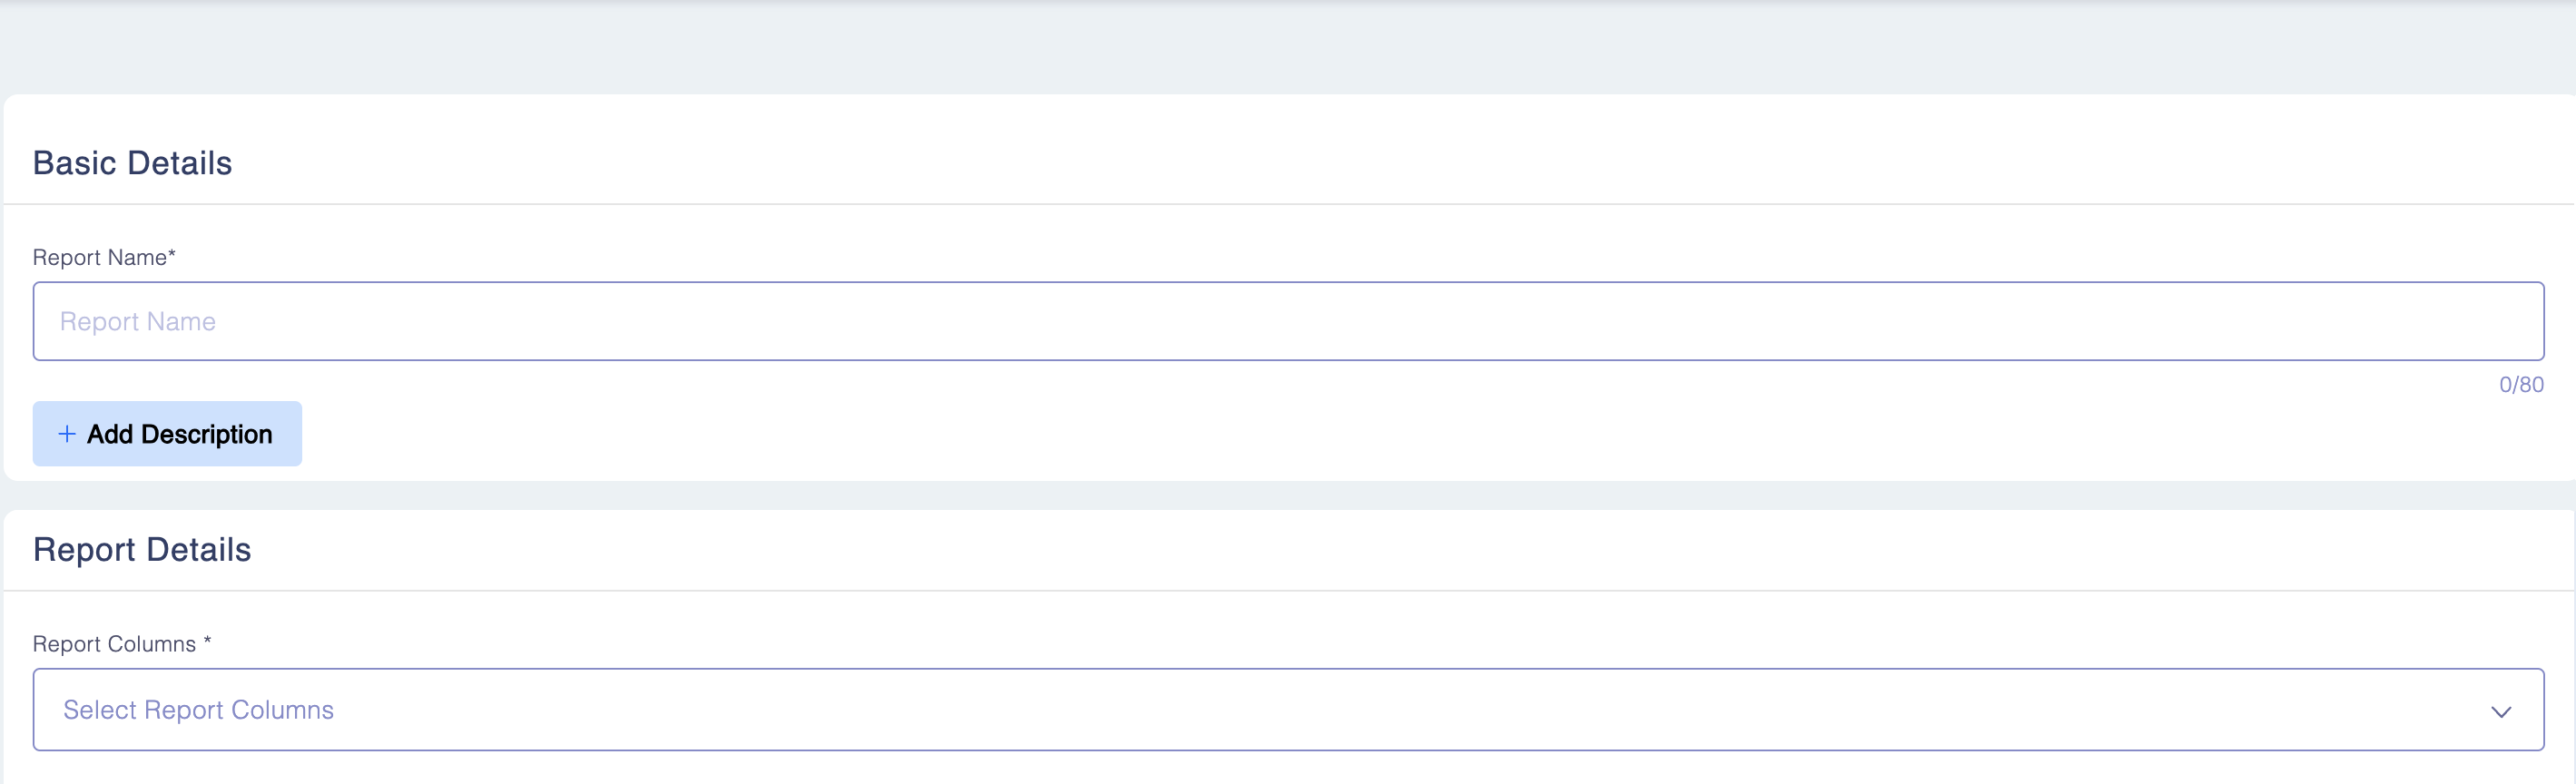
Step 2: Configure Report Parameters Follow these steps to define your data set:
- Basic Details: Enter a clear Report Name and Description so other users can identify the content of the export.
- Columns: Select the data points you want to include from the column drop-down menu.
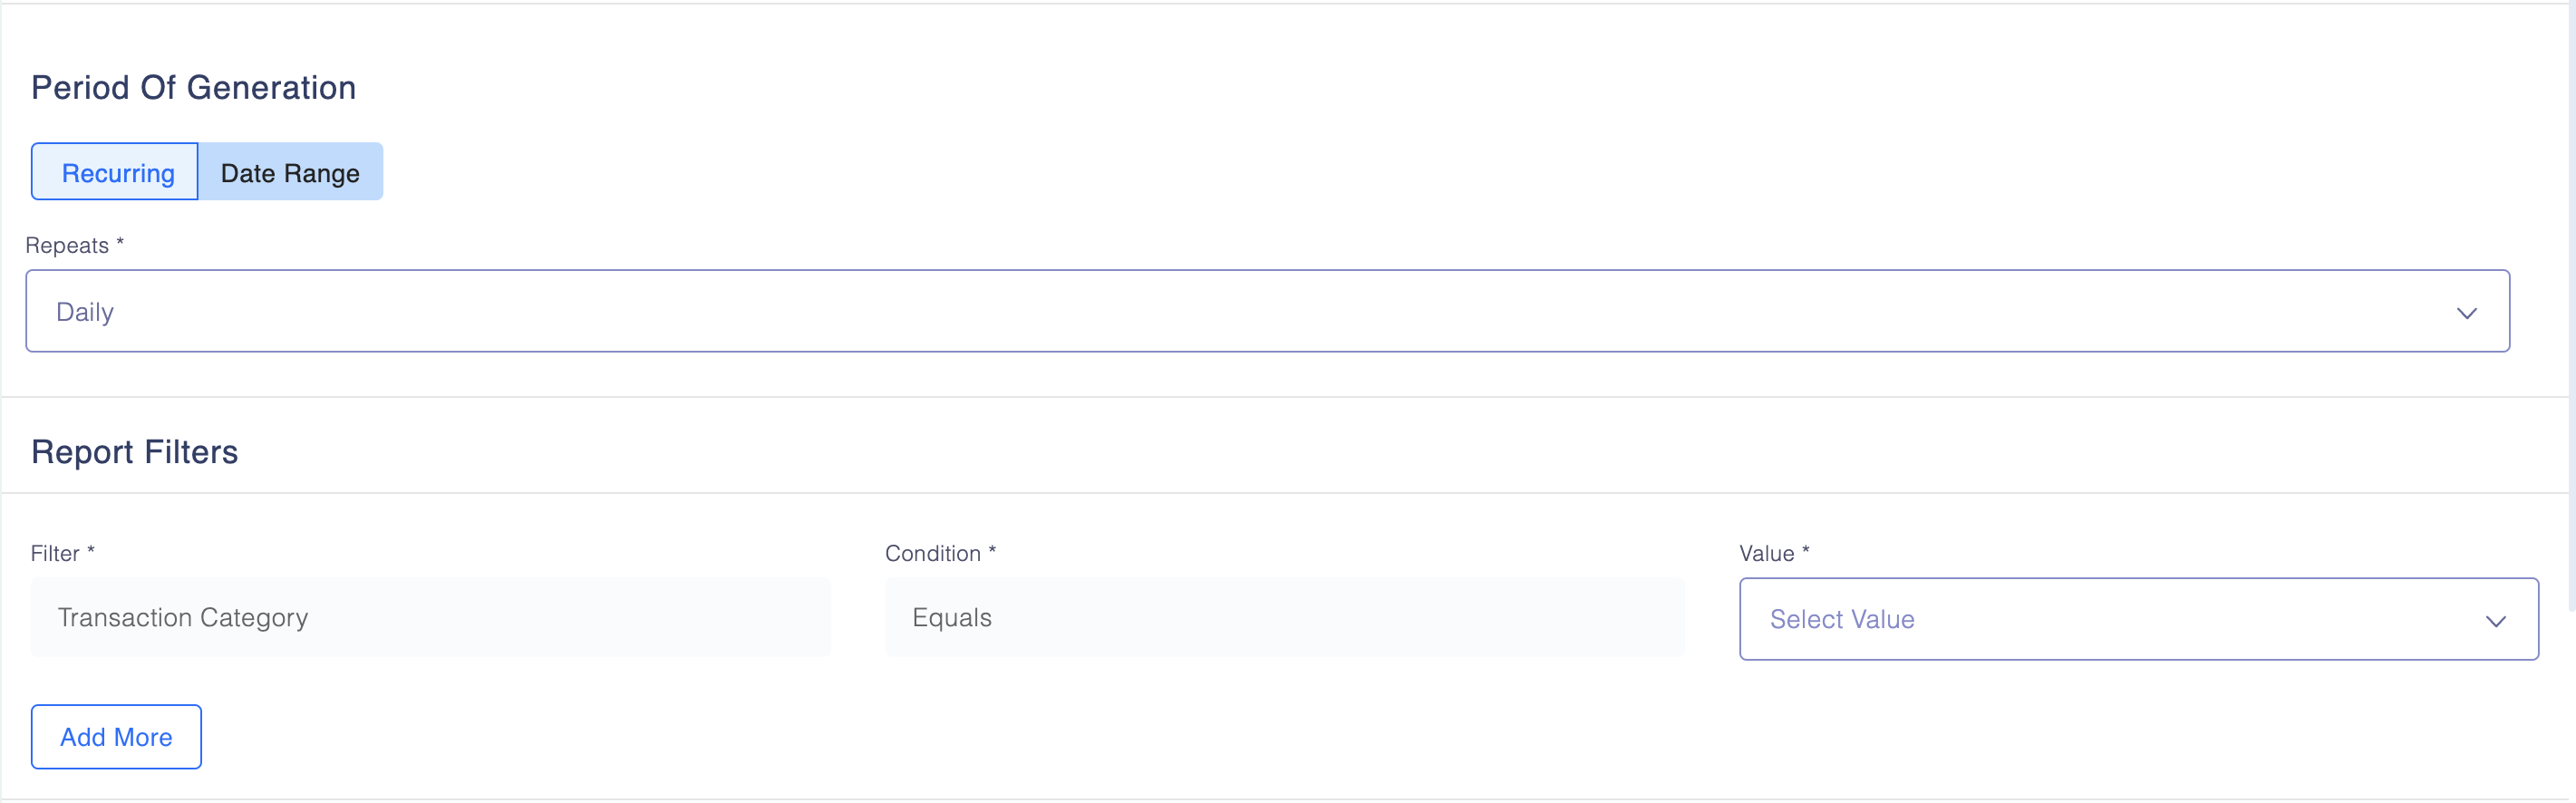
- Generation Period: Define the specific timeframe for the data (e.g., Last 7 Days, Monthly, or Recurring).
- Filters: Apply granular filters to include or exclude specific data subsets.
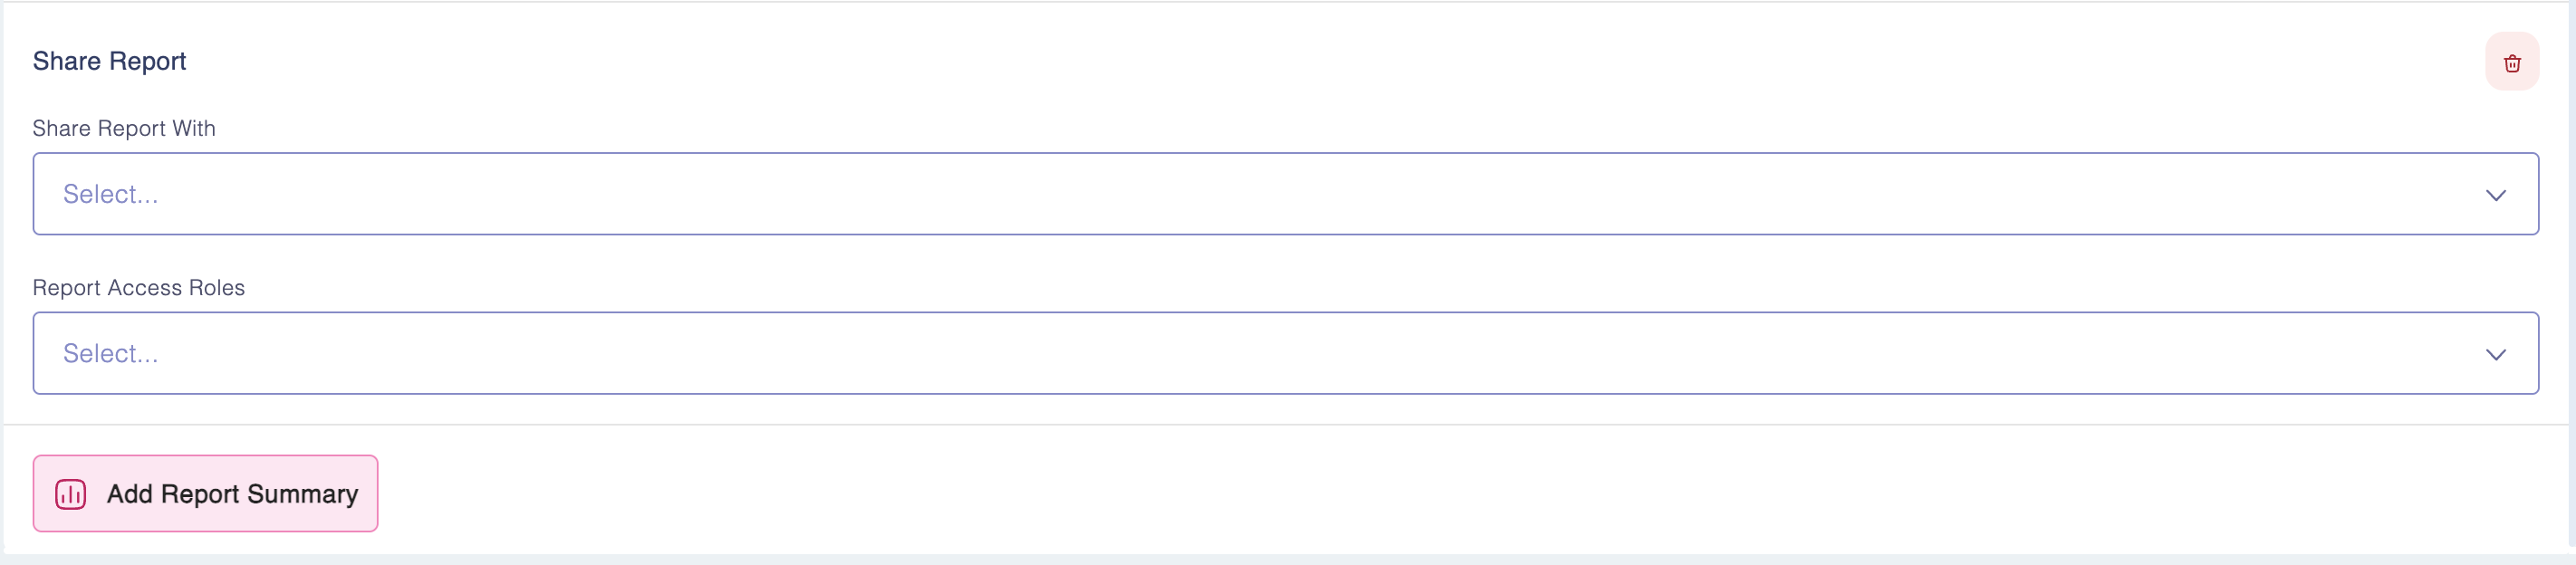
Step 3: Share the Report Once the report is configured, you can determine who has access to view and download the results.
- Sharing Methods Individual Users: Select specific team members one by one.
- Access Roles: To save time, you can share the report with entire groups. By selecting a Role, all users associated with that role will automatically gain access to the report.
- Note on Permissions > Sharing a report at the role level does not override individual user permissions. If a user within a selected role does not have the baseline permission to "View Reports," they will remain unable to see the shared export.