Bulk Upload of Manual Points
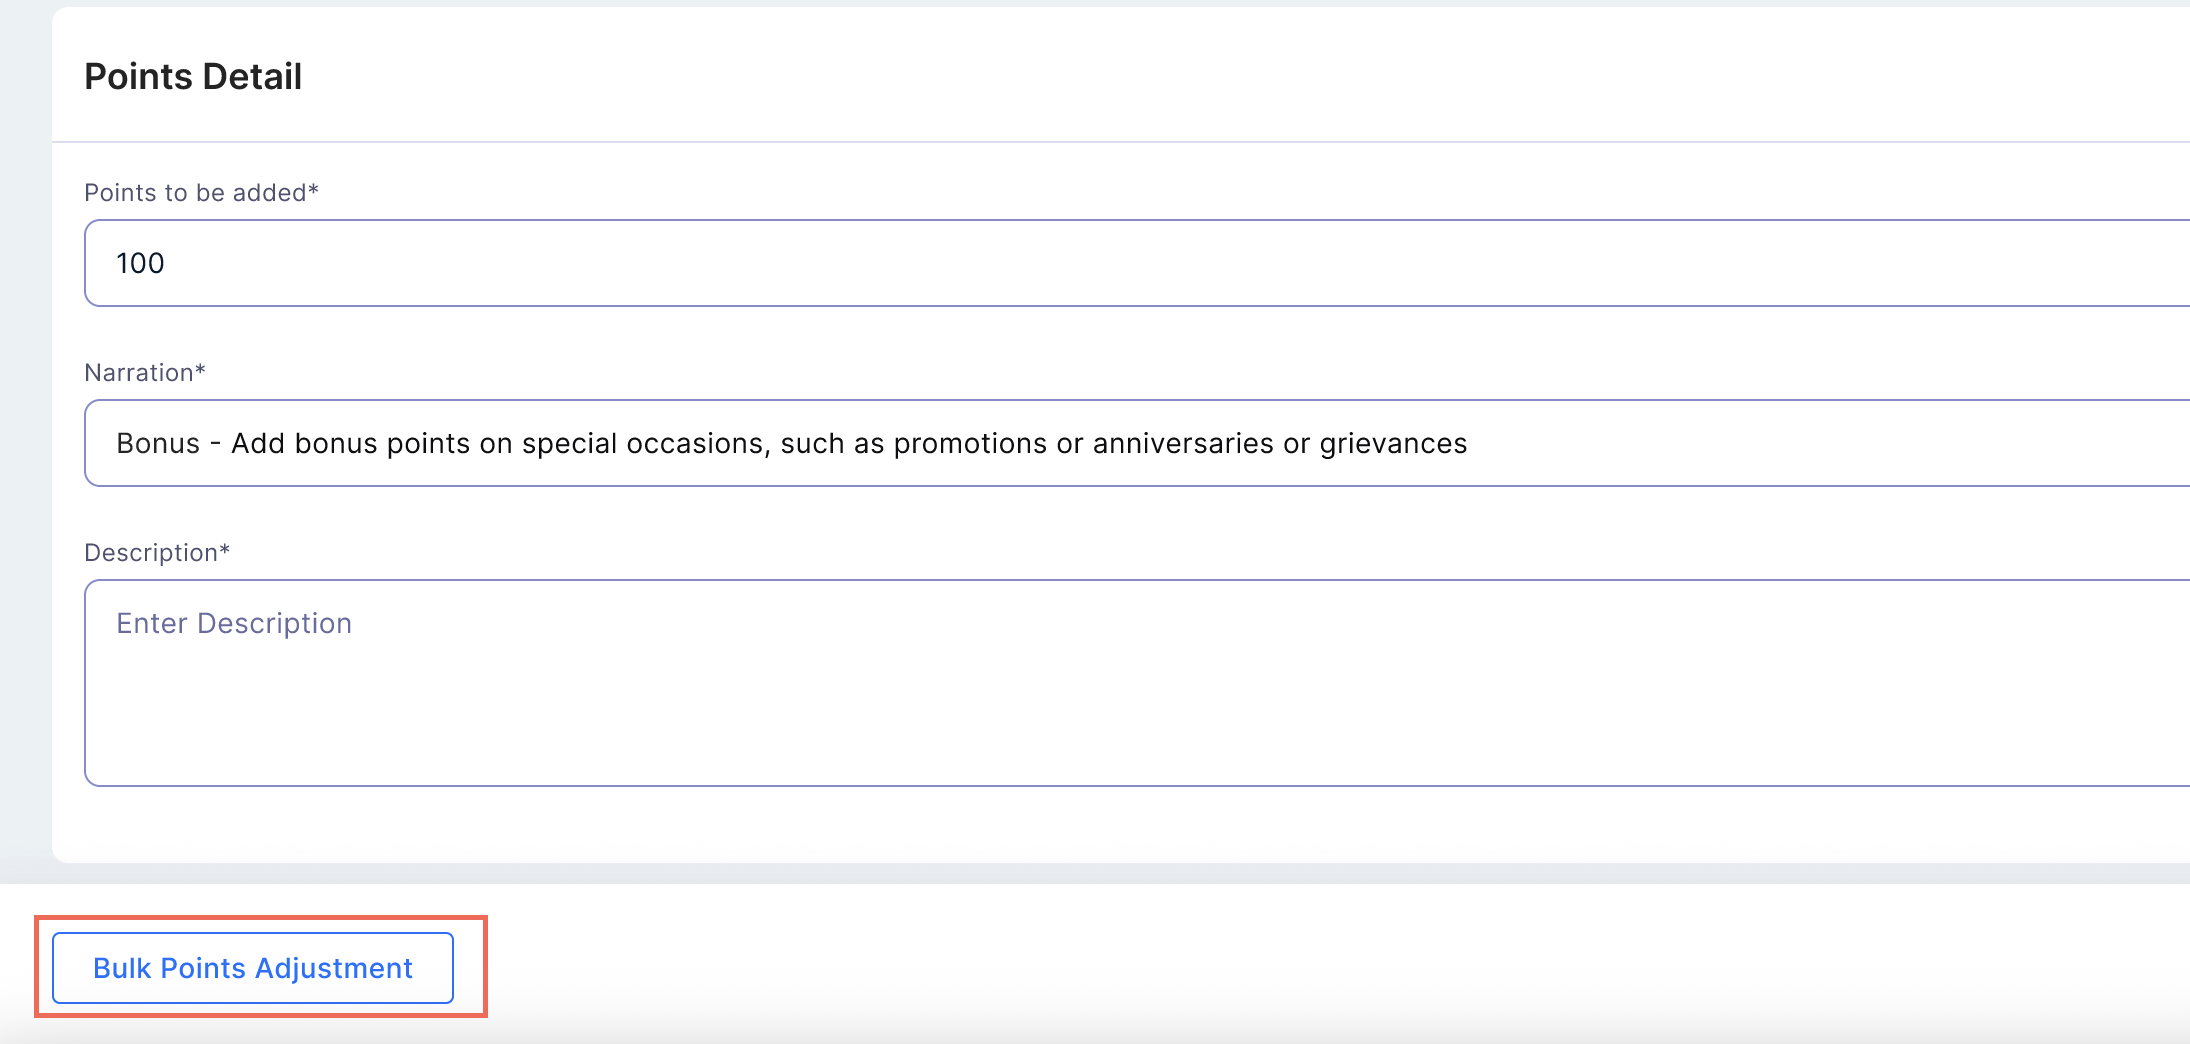
Step 1: To credit or debit points, navigate to Members. Click on Action and select Bulk Points Adjustment.
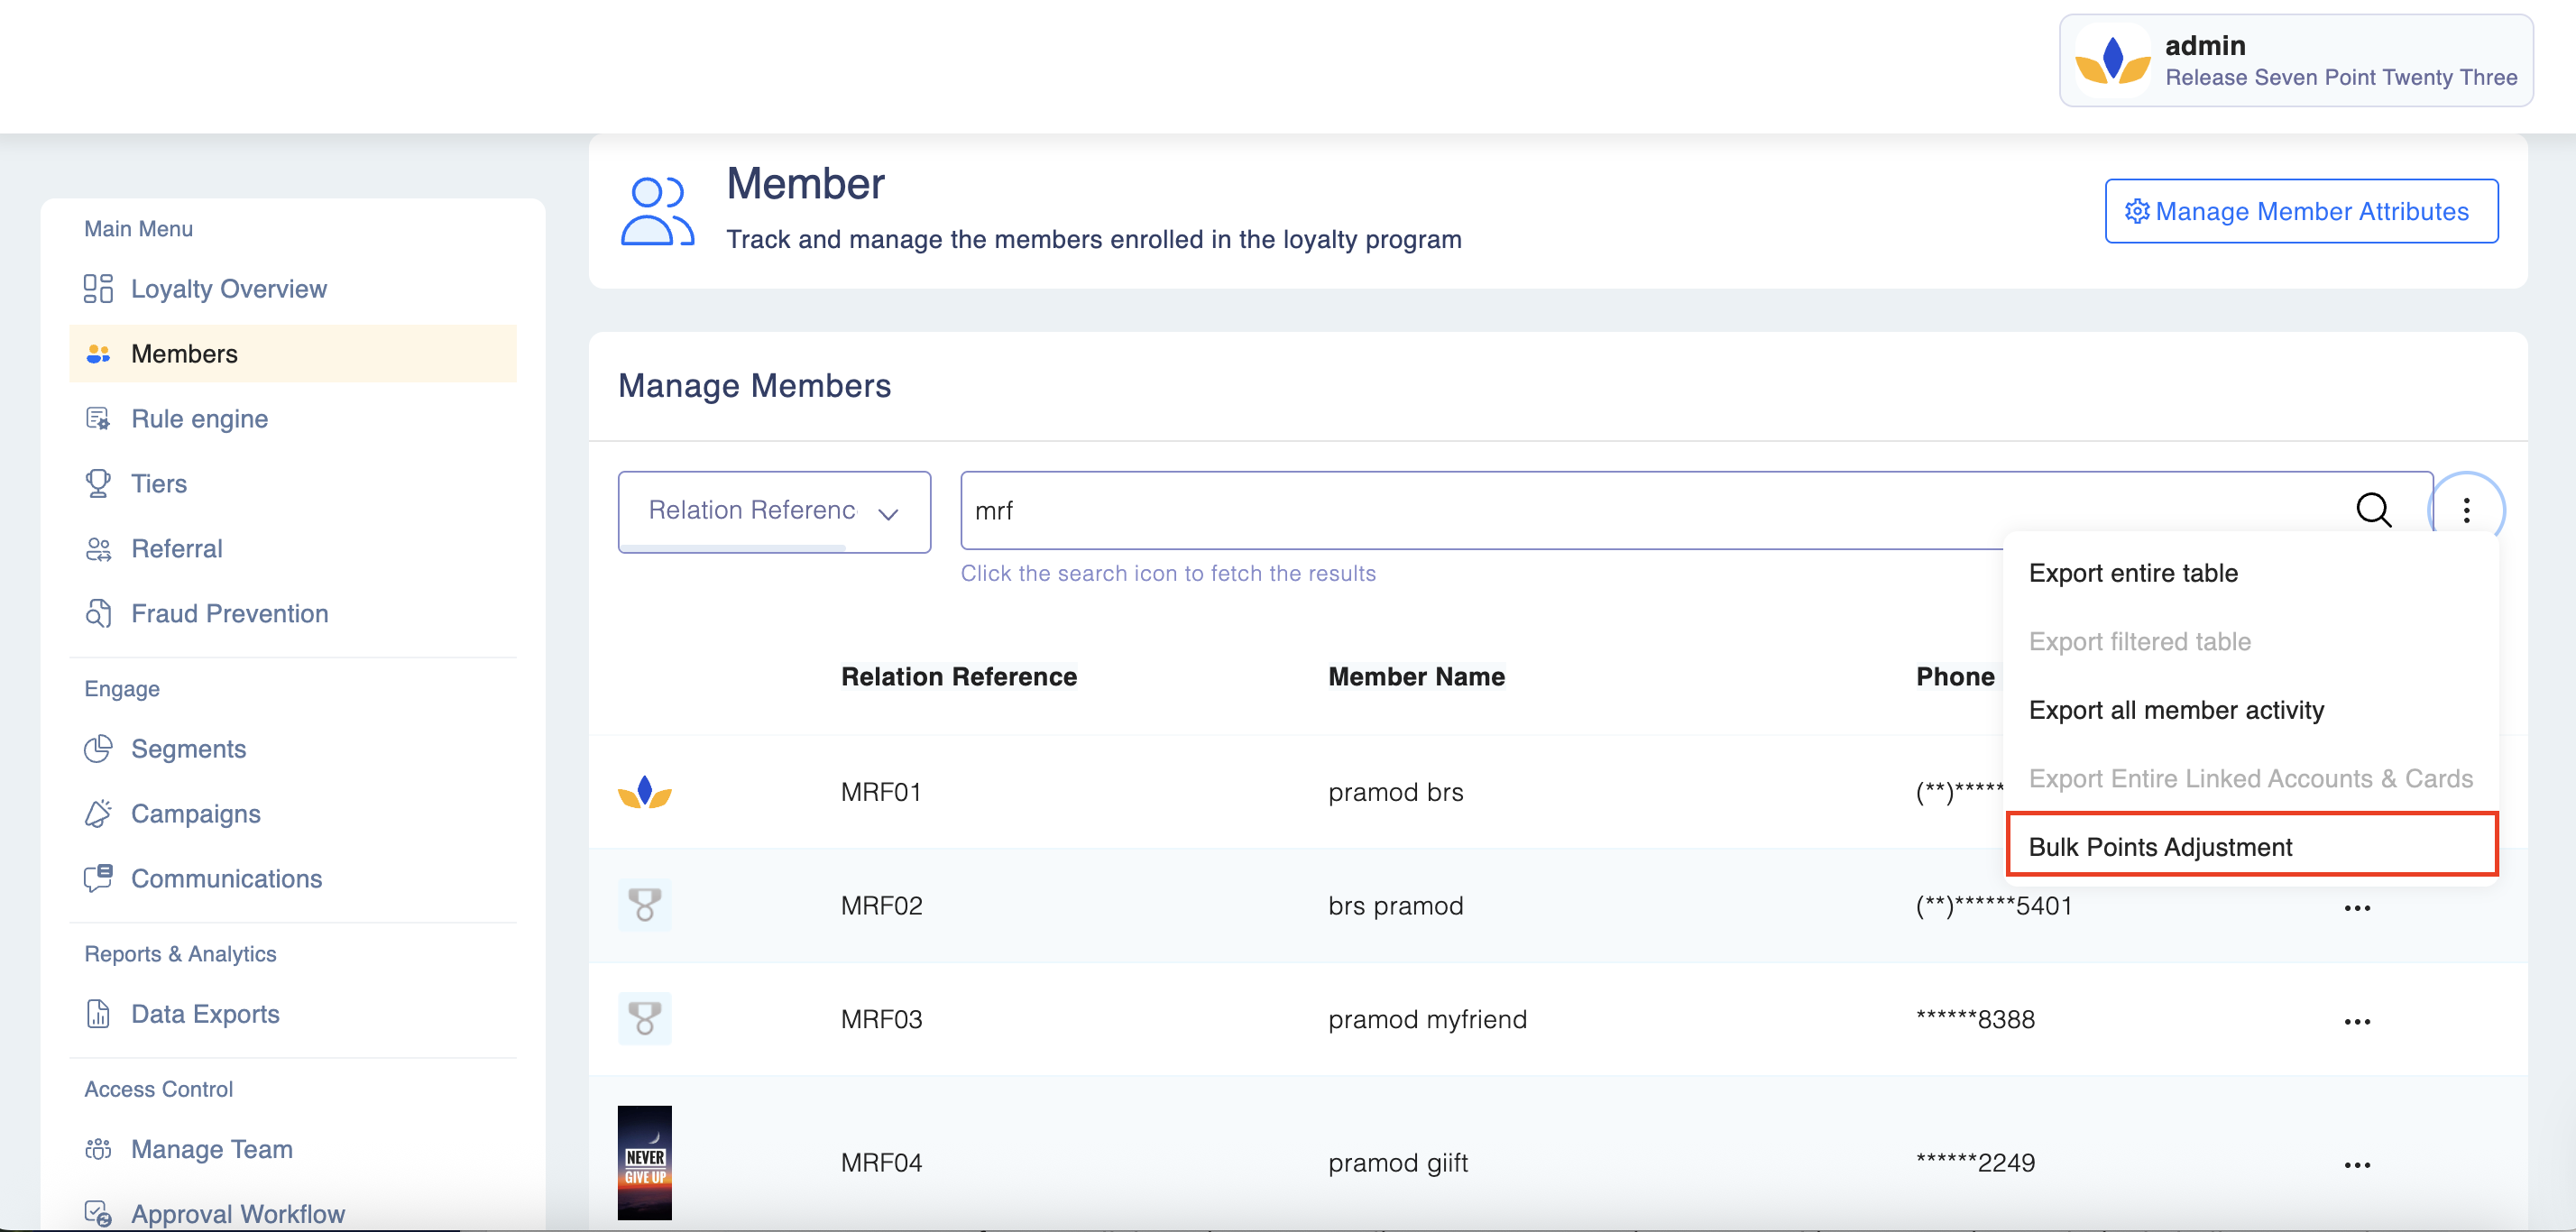
Step 2: Upload the file.
- This will trigger a pop-up window asking you to upload the adjustment file. Select the file from your system and upload it using the pop-up.
- You can upload 30,000 records in a csv format.
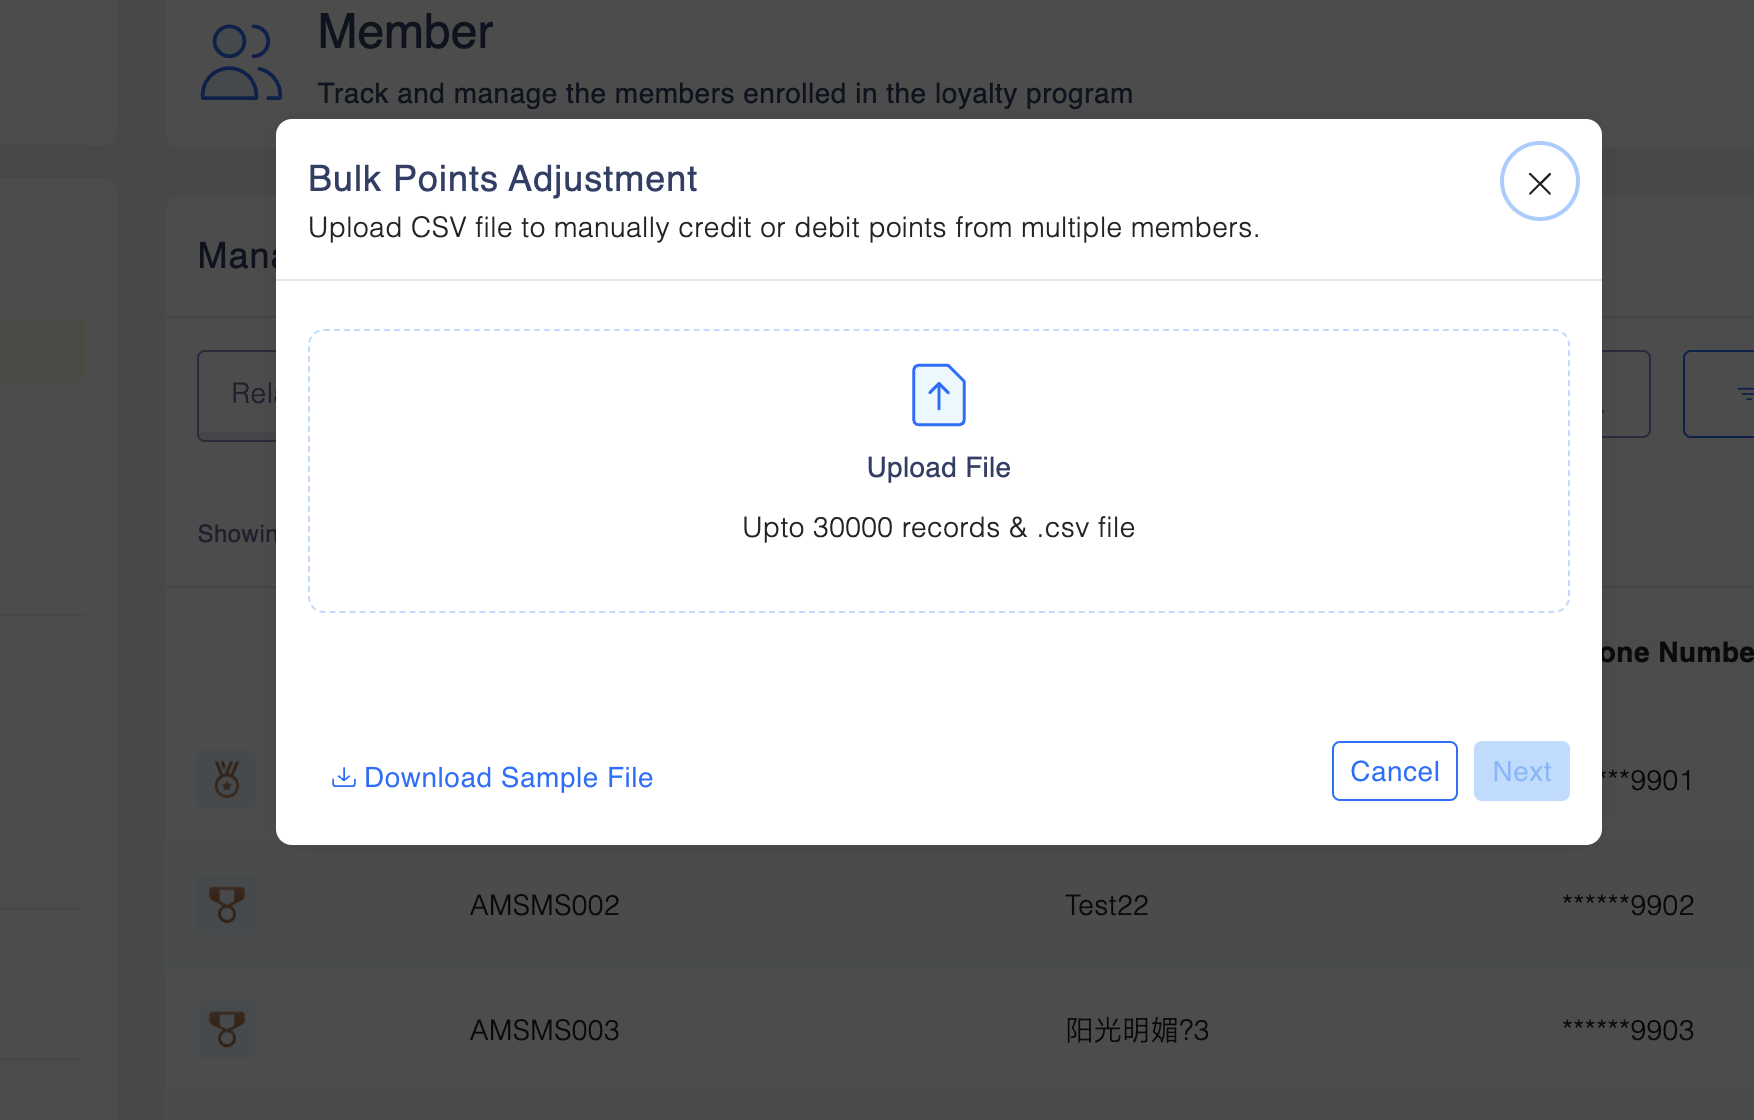
- Click “Send for Approval”
- If maker-checker is enabled for point adjustments, your submission will be routed through the approval workflow.
- The approver will receive a request to review and approve or reject the upload.
Please keep in mind:
✅ Only CSV files are accepted. Files in XLSX or TXT formats will be rejected.
✅ Make sure the file has all required columns as shown in the template. If any mandatory column is missing, the system will reject the file.
❌ Files with wrong data formats (like text in a number column) will also be rejected.
🚫 You can upload up to 30,000 records in one file. Files with more than 30,000 rows won’t be accepted.
🧾 If maker-checker is turned on: Every approval or rejection is tracked for auditing and compliance.
📝 Note: While approval actions are tracked, a full audit report for this feature isn’t available yet — but it's being worked on.
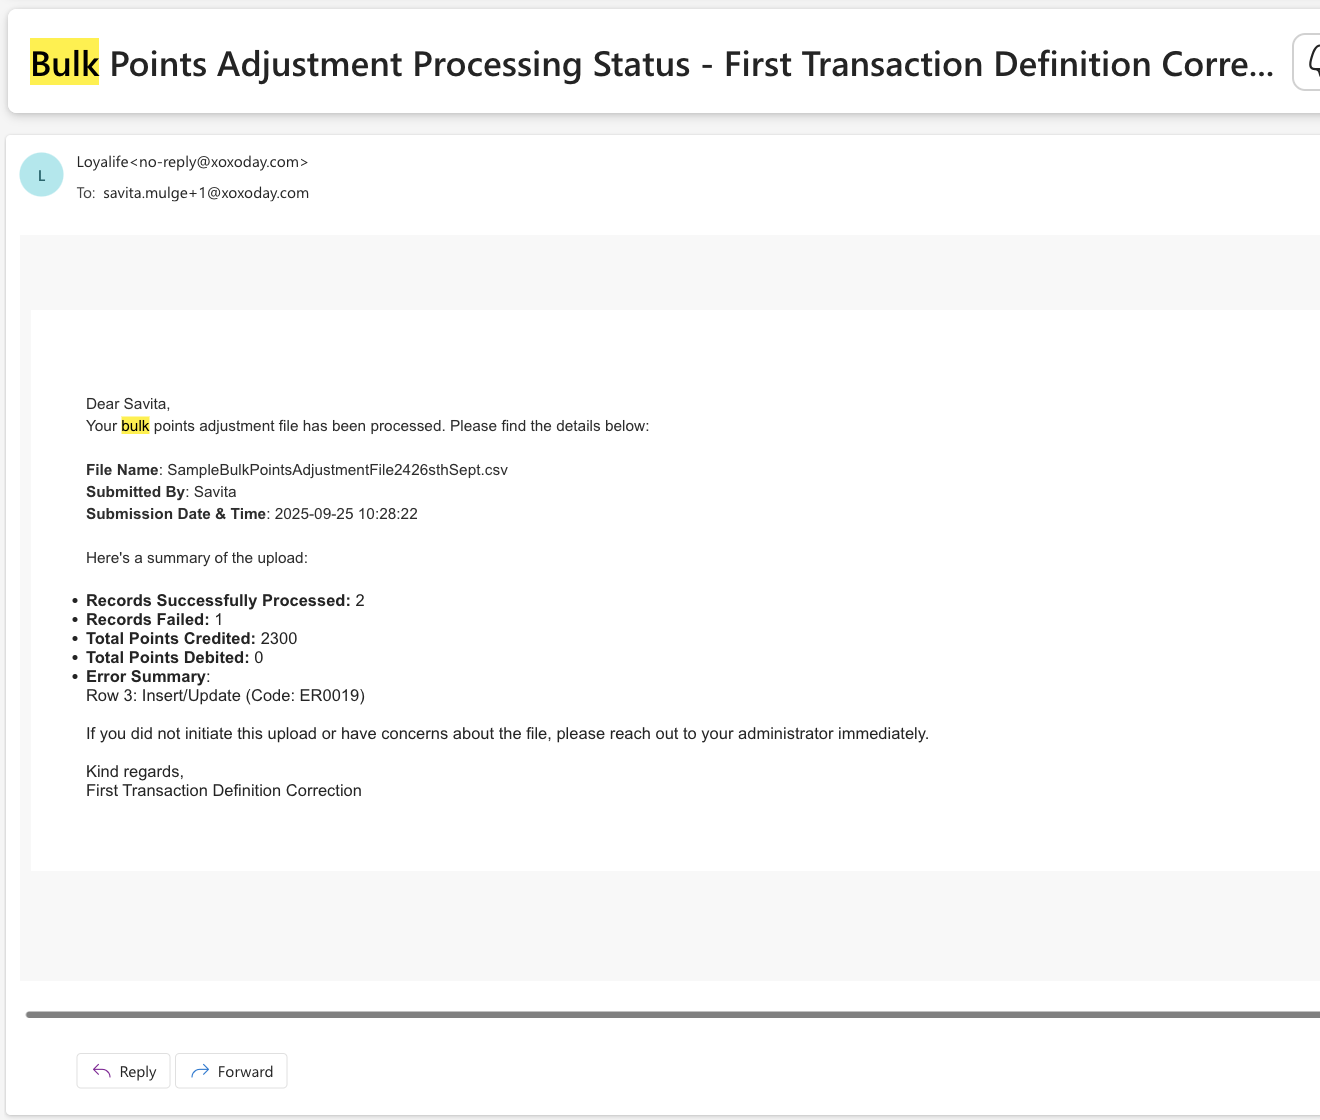
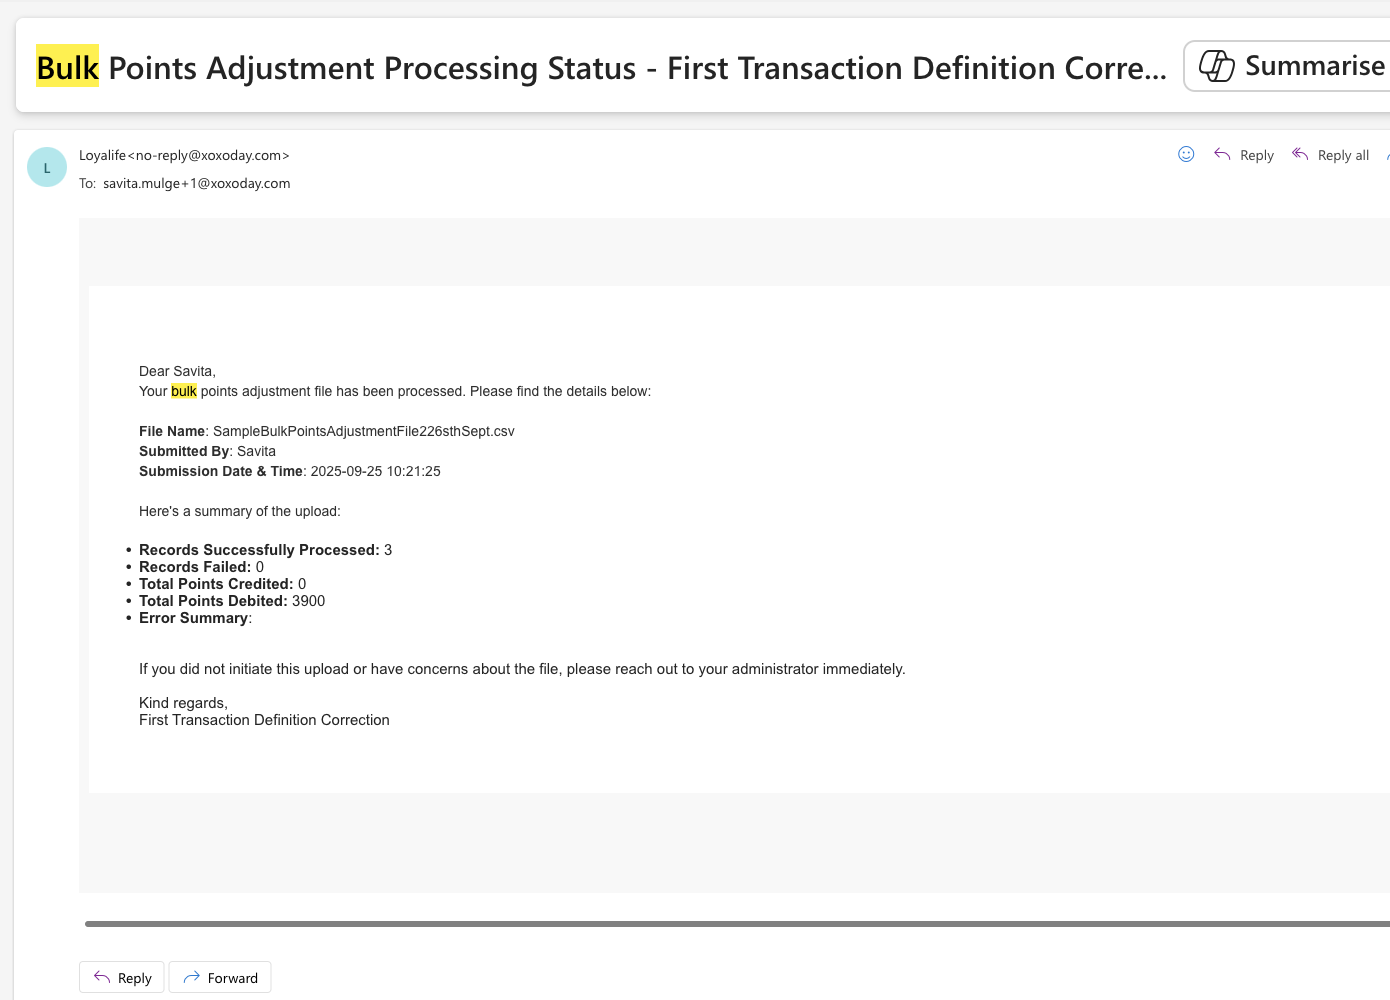
📧 You’ll (person who uploaded) receive an email for:
- Successful uploads
- Failed uploads
- Partial success cases
🔒 Only users who have the permission “Allow Add/Remove Points in Bulk” can access this feature.
Download Sample File button: Sample File for Bulk Points Adjustment
Logs for Bulk Point Adjustment
When generating transaction reports for auditing or reconciliation, you can now include the source file name for transactions processed via bulk uploads.
Steps to Include File Name in Exports:
- Navigate to Reports & Analytics > Data Exports
- Go to Logs tab
- Locate the file name you want to export data.
- Click on the three dots icon to download the report.
- The resulting file will contain a "File Name" column, showing the specific file (e.g., bulk_adjust_nov.csv) used for each transaction. Rows with blank values in this column indicate transactions that were not created via file upload (e.g., API or manual entry).
Audit Trail for Bulk Points Adjustment
The Audit Trail records all actions related to Bulk Points Adjustments. This helps ensure compliance, security, and transparency by keeping a record of who did what and when.
With this enhancement, you can now track:
- When a file was uploaded for bulk adjustment
- Who approved the adjustment
- Who rejected the adjustment
Where to Find Audit Logs
Step 1: Navigate to the Audit Trail section from the main menu.
Step 2: Use the search and filter options (e.g., date range, user, action type) to view entries related to Bulk Points Adjustment.

Step 3: Each entry shows detailed information such as username, date, file name, and action (upload, approval, or rejection).

Understanding the Audit Log Fields
Each log entry contains the following information:
| Field | What it means | Example |
|---|---|---|
| Date | The exact time the action happened. | 2025-07-11 09:45:21` |
| Username | The person who performed the action. | admin |
| Action | The type of action performed (Upload, Approved, or Rejected). | Bulk points adjustment (New) |
| Page URL | The system page where the action was performed. | https://lbmsqaaz.giiftdev.com/members |
| Activity | Details of the action, including the file name. | Bulk points adjustment via upload. File bulk_upload_100.csv. |
| IP Address | The IP address of the user’s system. | 10.233.11.182 |
| Browser | The browser used for the action. | Chrome 136 |
How It Works
- When You Upload a File
- The system automatically creates an audit entry.
- You’ll see details like your username, the uploaded file name, and your system/browser information.
✅ Example: “Bulk points adjustment via upload. File bulk_upload_100.csv.”
- When a File Is Approved
- Once a manager approves the bulk upload, a new entry is added.
- It records the approver’s username, date, and file name.
✅ Example: “Bulk points adjustment approved for file bulk_upload_100.csv.”
- When a File Is Rejected
- If the file is rejected, the system logs this action as well.
- The rejection entry includes the same details for full traceability.
✅ Example: “Bulk points adjustment rejected for file bulk_upload_100.csv.”
Sample Emails