
Report Upload Automation & Approval
Overview
The Report Upload Automation feature allows Loyalife users to configure reports for automated upload to defined destinations (SFTP, API, or internal) and optionally enforce a Maker-Checker approval workflow. This ensures compliance, traceability, and operational efficiency.
Key benefits include:
- Automating report delivery to final destinations.
- Optional verification and approval for audit-critical or time-sensitive reports.
- Role-based control for verification and approval.
- Full tracking of report metadata, status, and approval history.
Access and Permissions
- Required Permissions
- Manage_Report_Automation
- Configure upload destinations and approval workflows
- Manage report-level variables for SQL logic
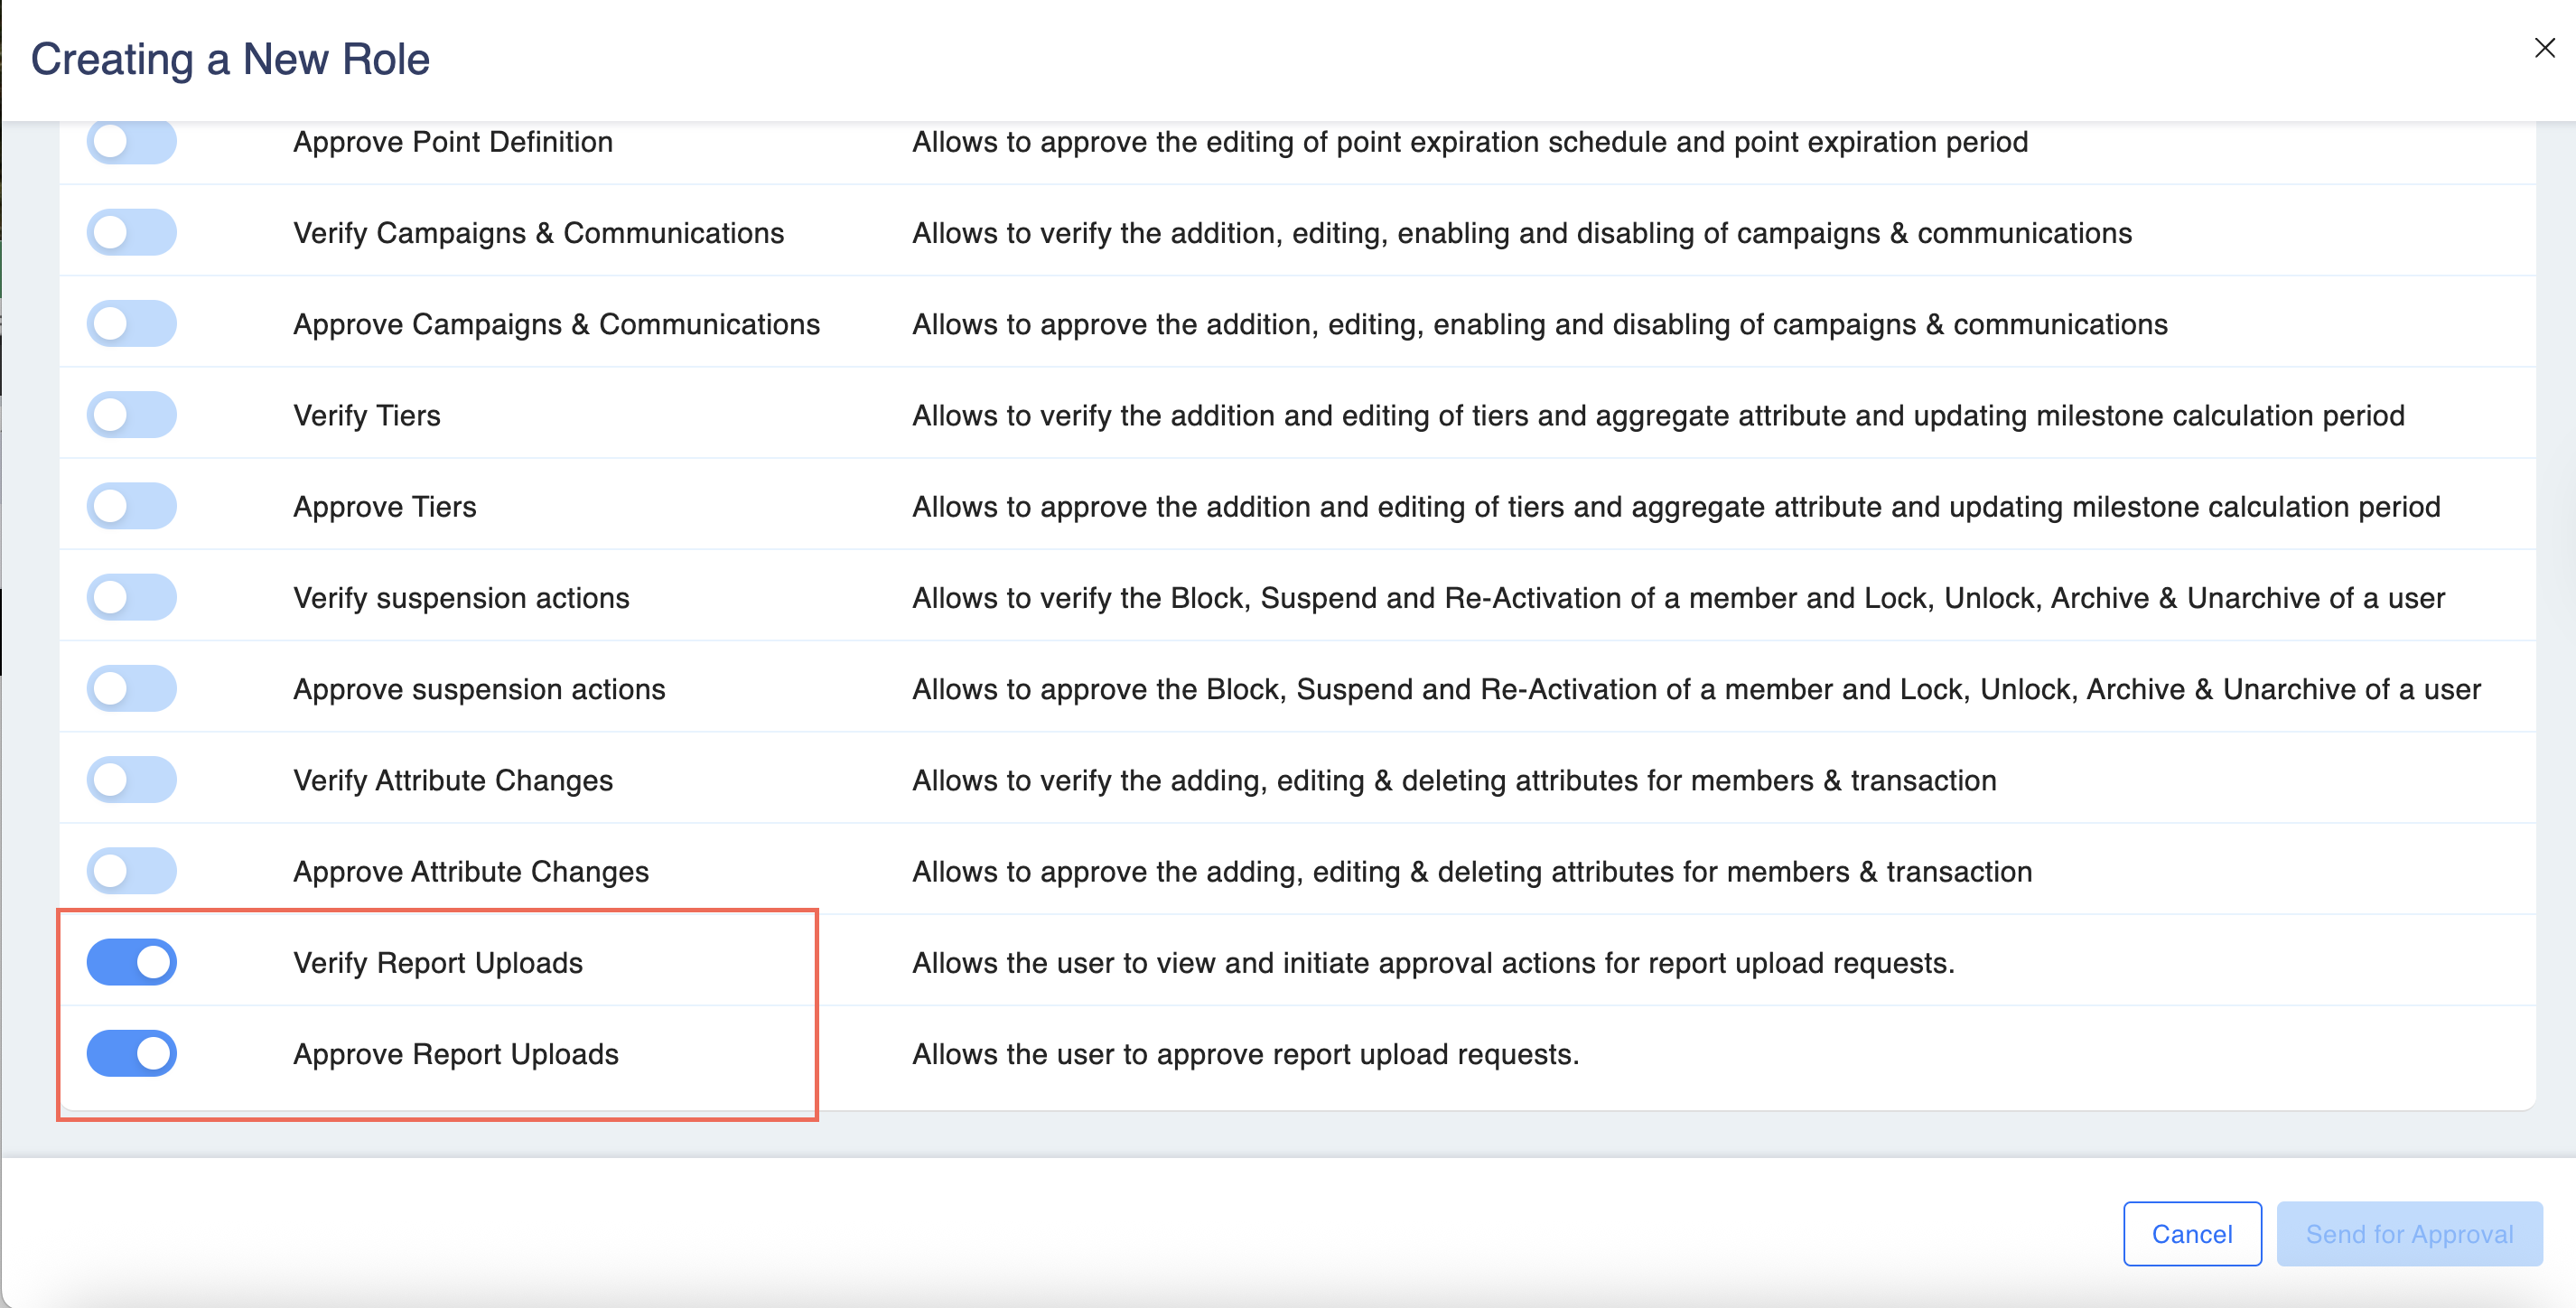
- Can_Verify_Report
- View and verify report upload requests
- Can_Approve_Report
- Approve verified report upload requests
- Only users with the relevant role can take action on Maker-Checker requests.
Module Setup
- Navigate to: Configurations > Modules > Approval Workflow.
- Enable the toggle: Report Upload Approval.
- Enabled: Activates Maker-Checker workflow for report uploads.
- Disabled: Hides the Report Upload Automation Configuration section and disables backend triggers.
Approval Workflow
Workflow Types
- Single-Step Approval
- User with both verification and approval roles can directly approve and upload.
- Dual-Step Approval (Maker-Checker)
- Verifier: Can verify the report and forward it to approver.
- Approver: Can approve only after verification is completed.
Roles at Runtime
| Role | Actions Allowed |
|---|---|
| Verify Report Uploads | Verify and forward to approver |
| Approve Report Uploads | Approve only after verification |
| Both Roles | Directly approve the report without verification step |
Report Generation Handling
Auto-Generated Reports
- Maker-Checker request is created immediately after report generation.
Manually Generated Reports
- Daily cron job checks for reports marked for upload.
- Triggers approval request and upload for matching configured reports.
Maker-Checker Request UI
Navigate to: Approval Workflow > View Request
Request Details Displayed
- Description: Current status and last approved step
- Approve/Reject Buttons: Visible only to configured approvers
- Approve Changes: File name, timestamp, download link
- Actuals: Module, schedule, destination, creator
- Request History: Actions with timestamps (verification & approval)
- Users without relevant roles cannot view or act on requests.
Audit Trail Tracking
All actions related to report upload automation are logged:
- Creation, modification, and deletion of report upload configurations
- Maker-Checker actions (verify, approve, reject)
- Metadata captured: user email, timestamps, file name, destination, and status
Important Notes
- Upload destinations (SFTP, API, internal) must be pre-configured in the backend.
- Frontend does not handle credential entry for SFTP in this phase.
- Reports deleted after upload will not affect past uploads but will stop future ones.
- Only configured reports with automation enabled will trigger Maker-Checker requests.
Configuring Report Upload Automation
Step 1: Configure Report for Upload Automation
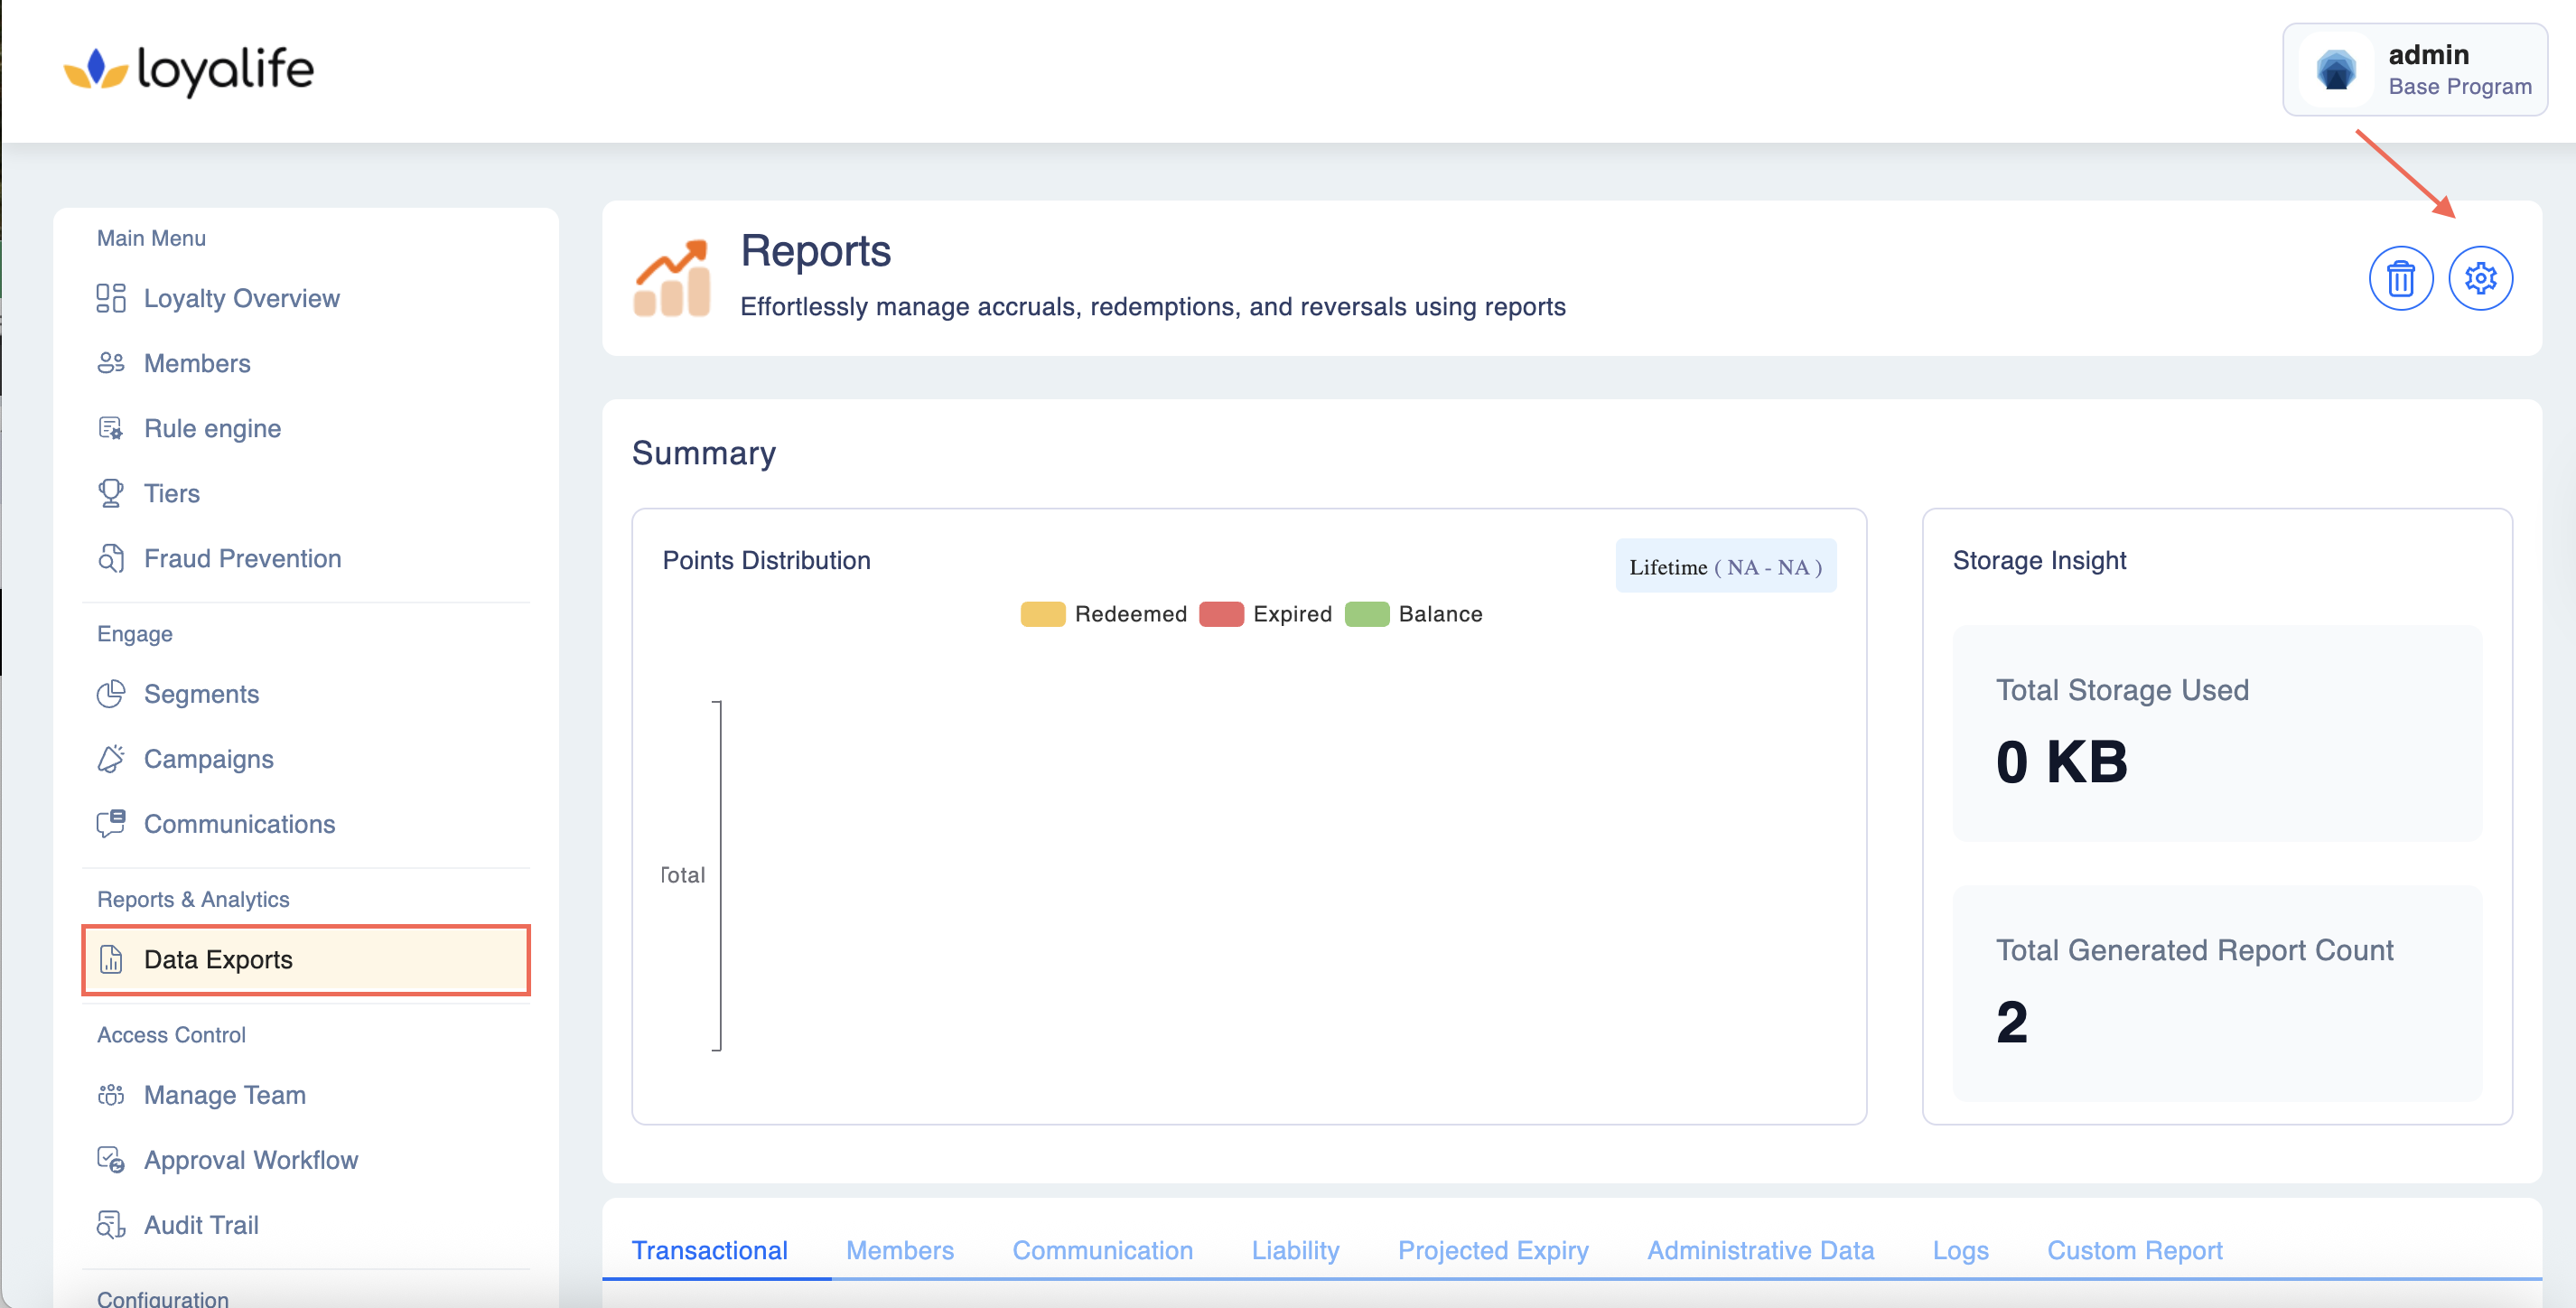
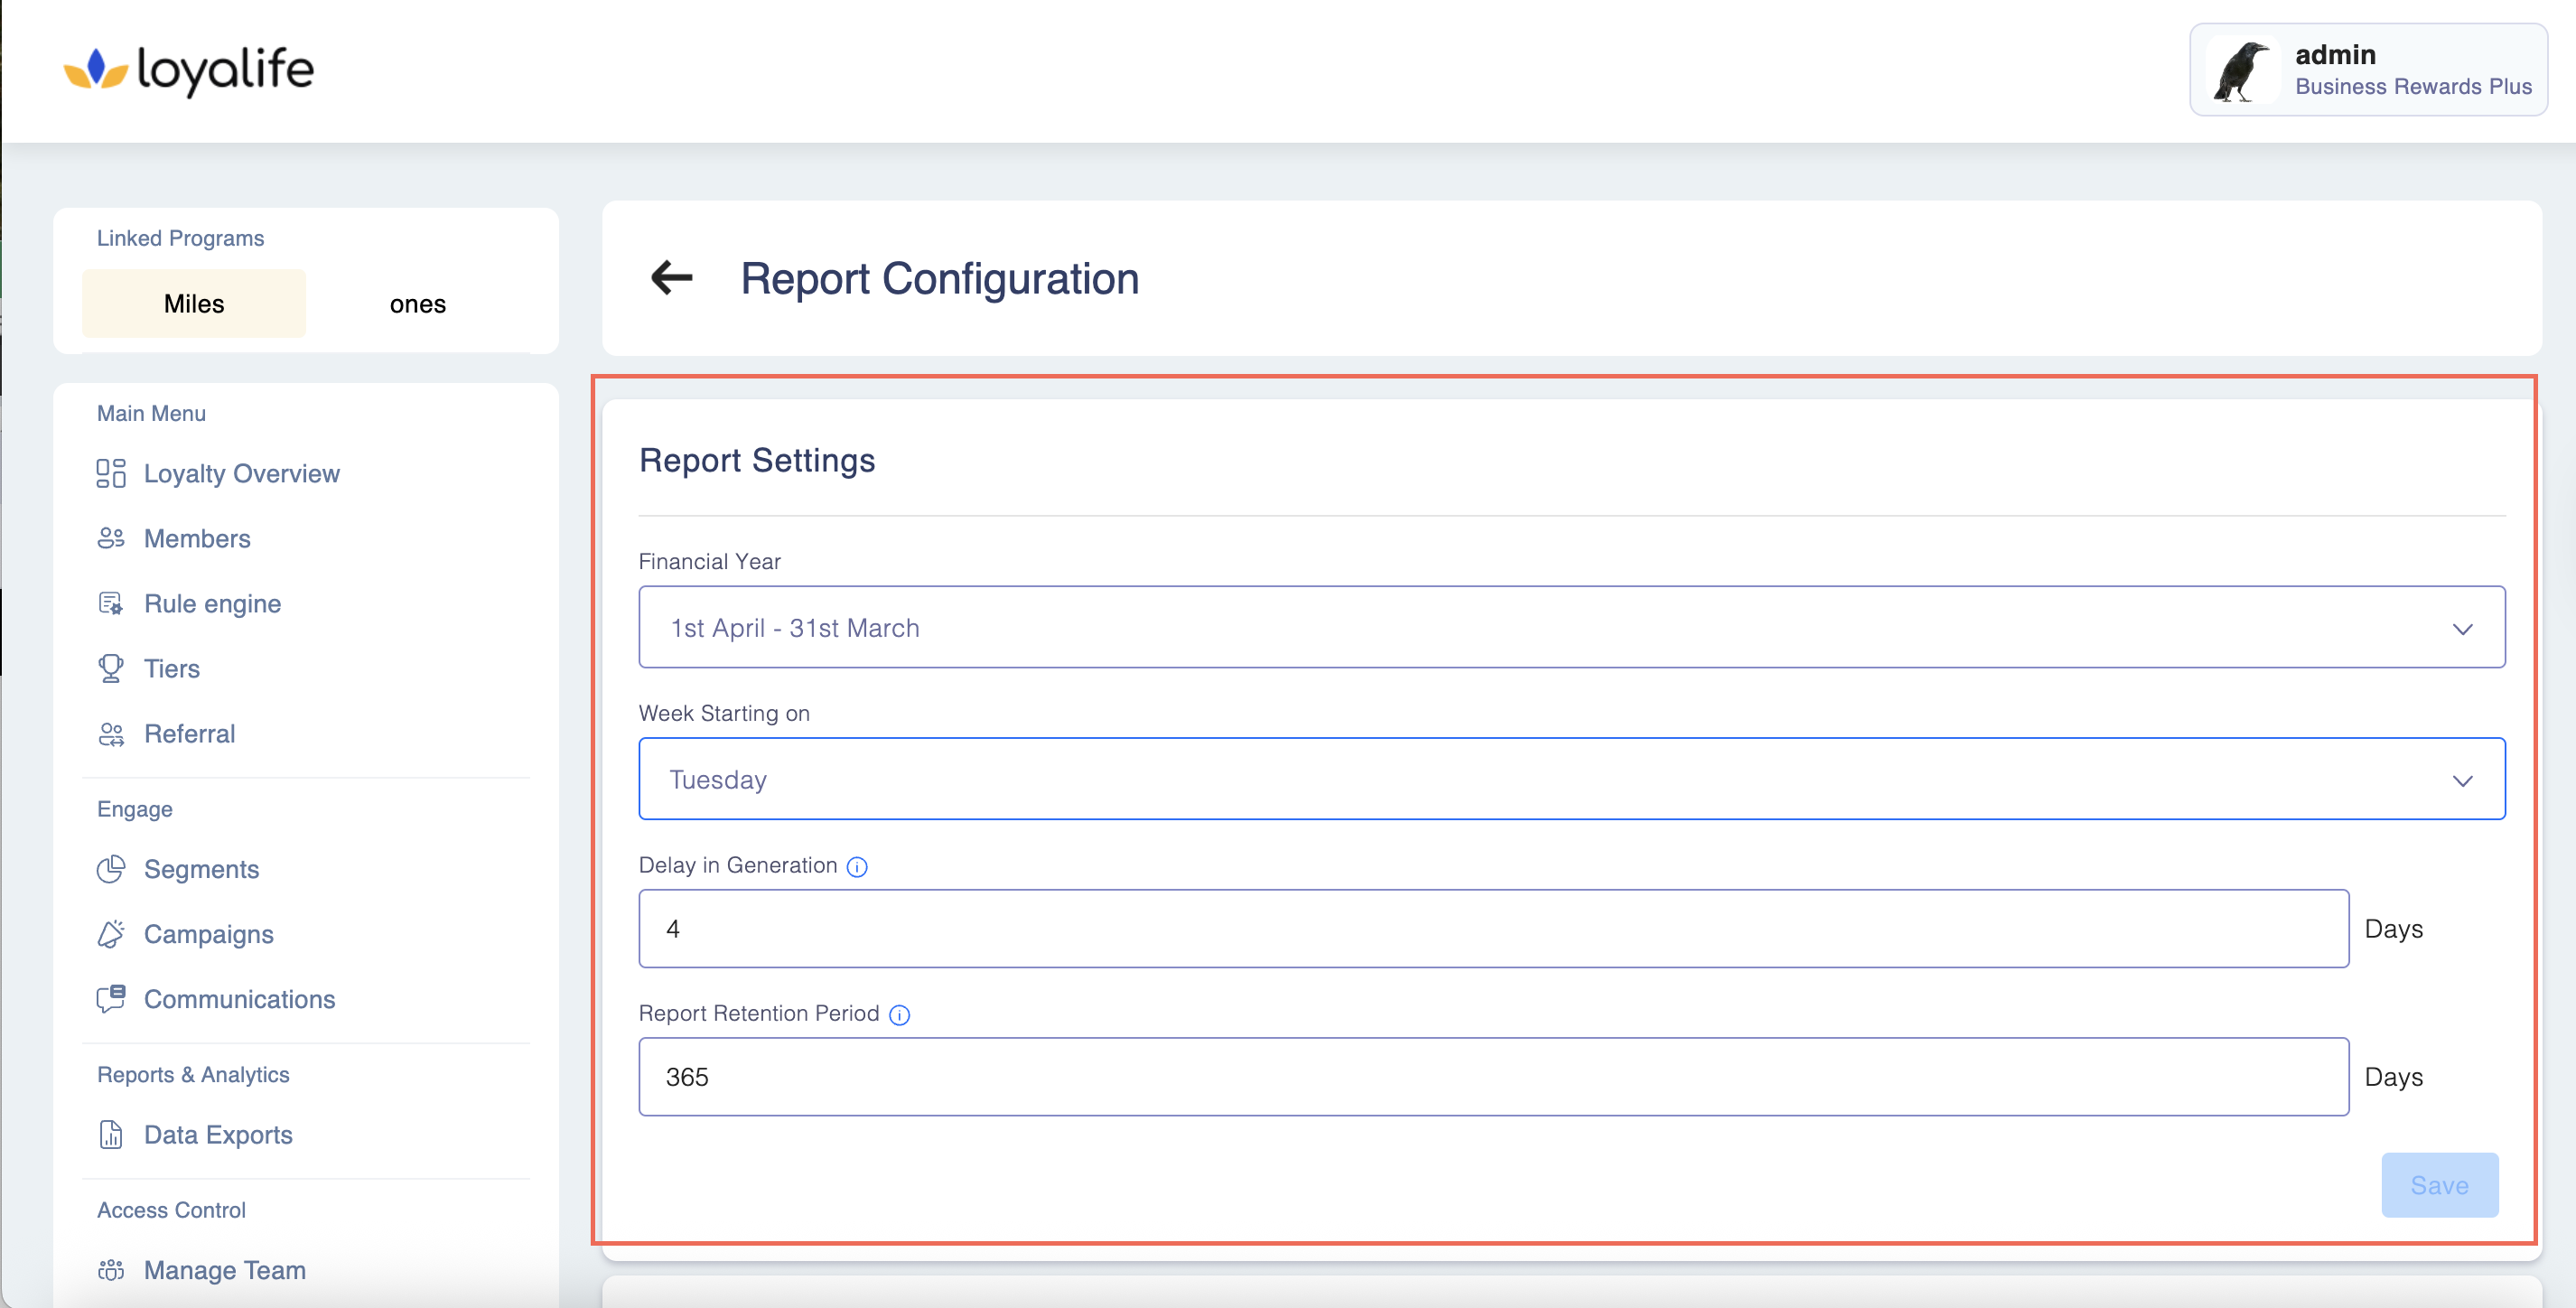
Access Configuration: Admin users with the Manage_Report_Automation permission navigate to Report Setting > Report Upload Automation Configuration.
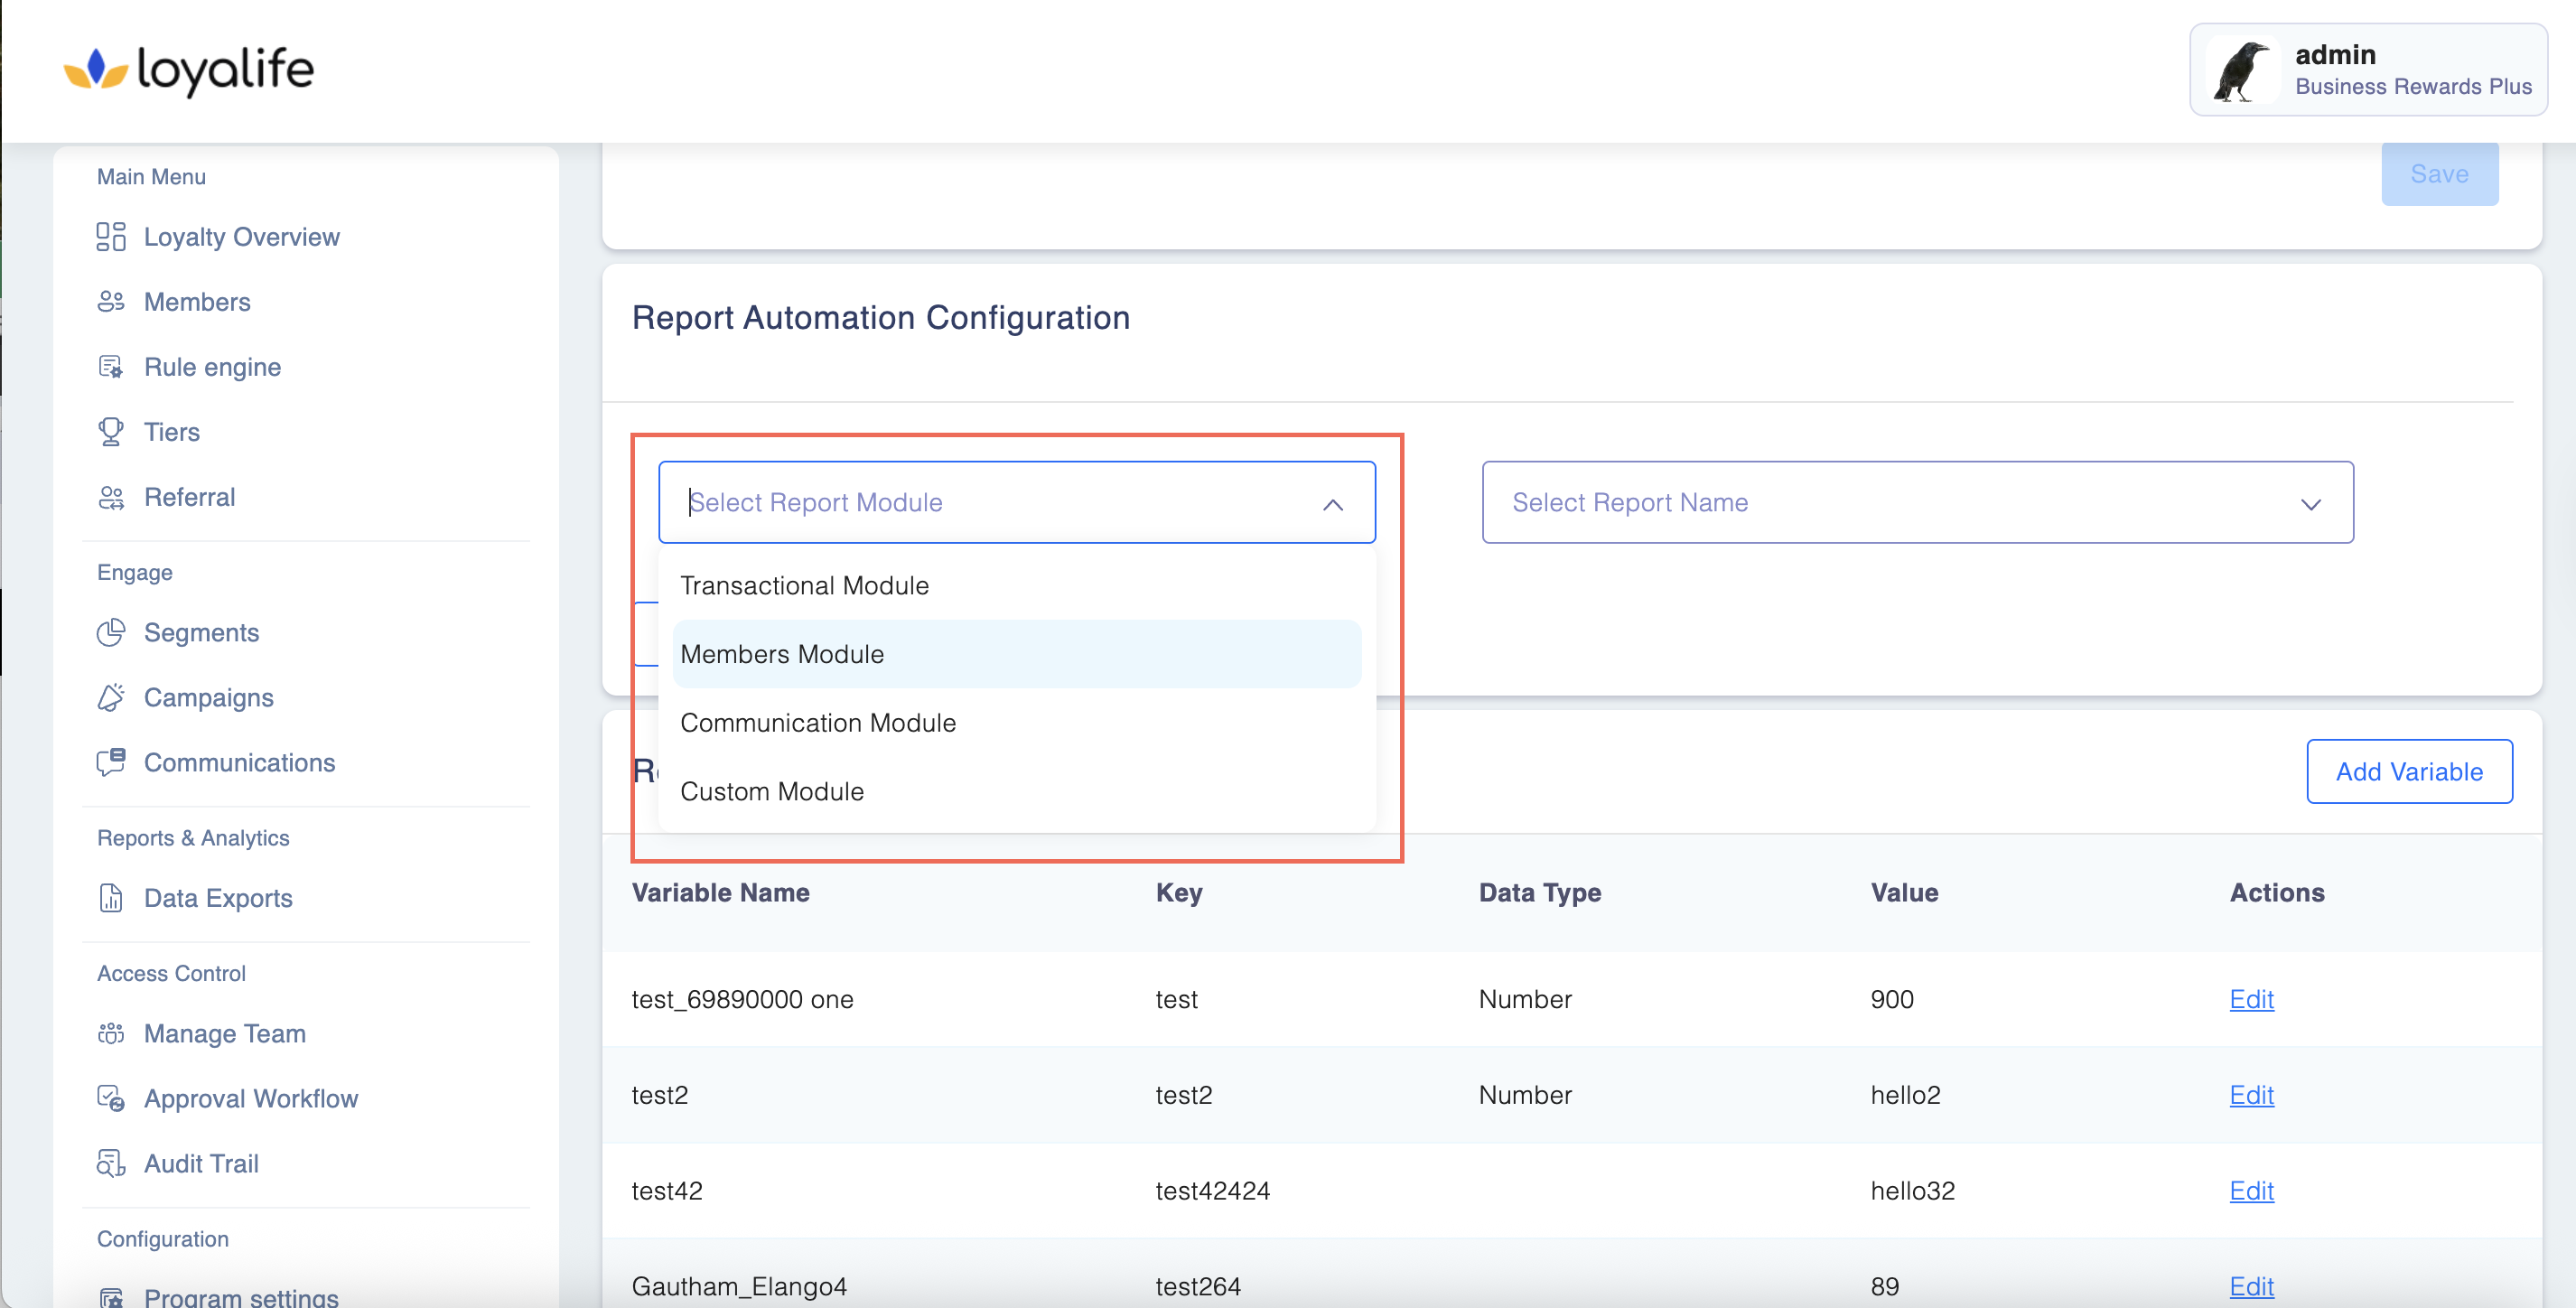
Step 2: Select Report Module: Choose the type of report — Transaction, Member, Communication, or Custom.
Pick the Report: From the dropdown of active reports, select the specific report to configure. Only active (non-deleted) reports are displayed.

Step 3: Enable Upload Automation: Toggle ON to allow the report to be automatically uploaded after generation.
Optional Approval Workflow:
- If the report requires verification and approval before upload, toggle Enable Approval Workflow ON.
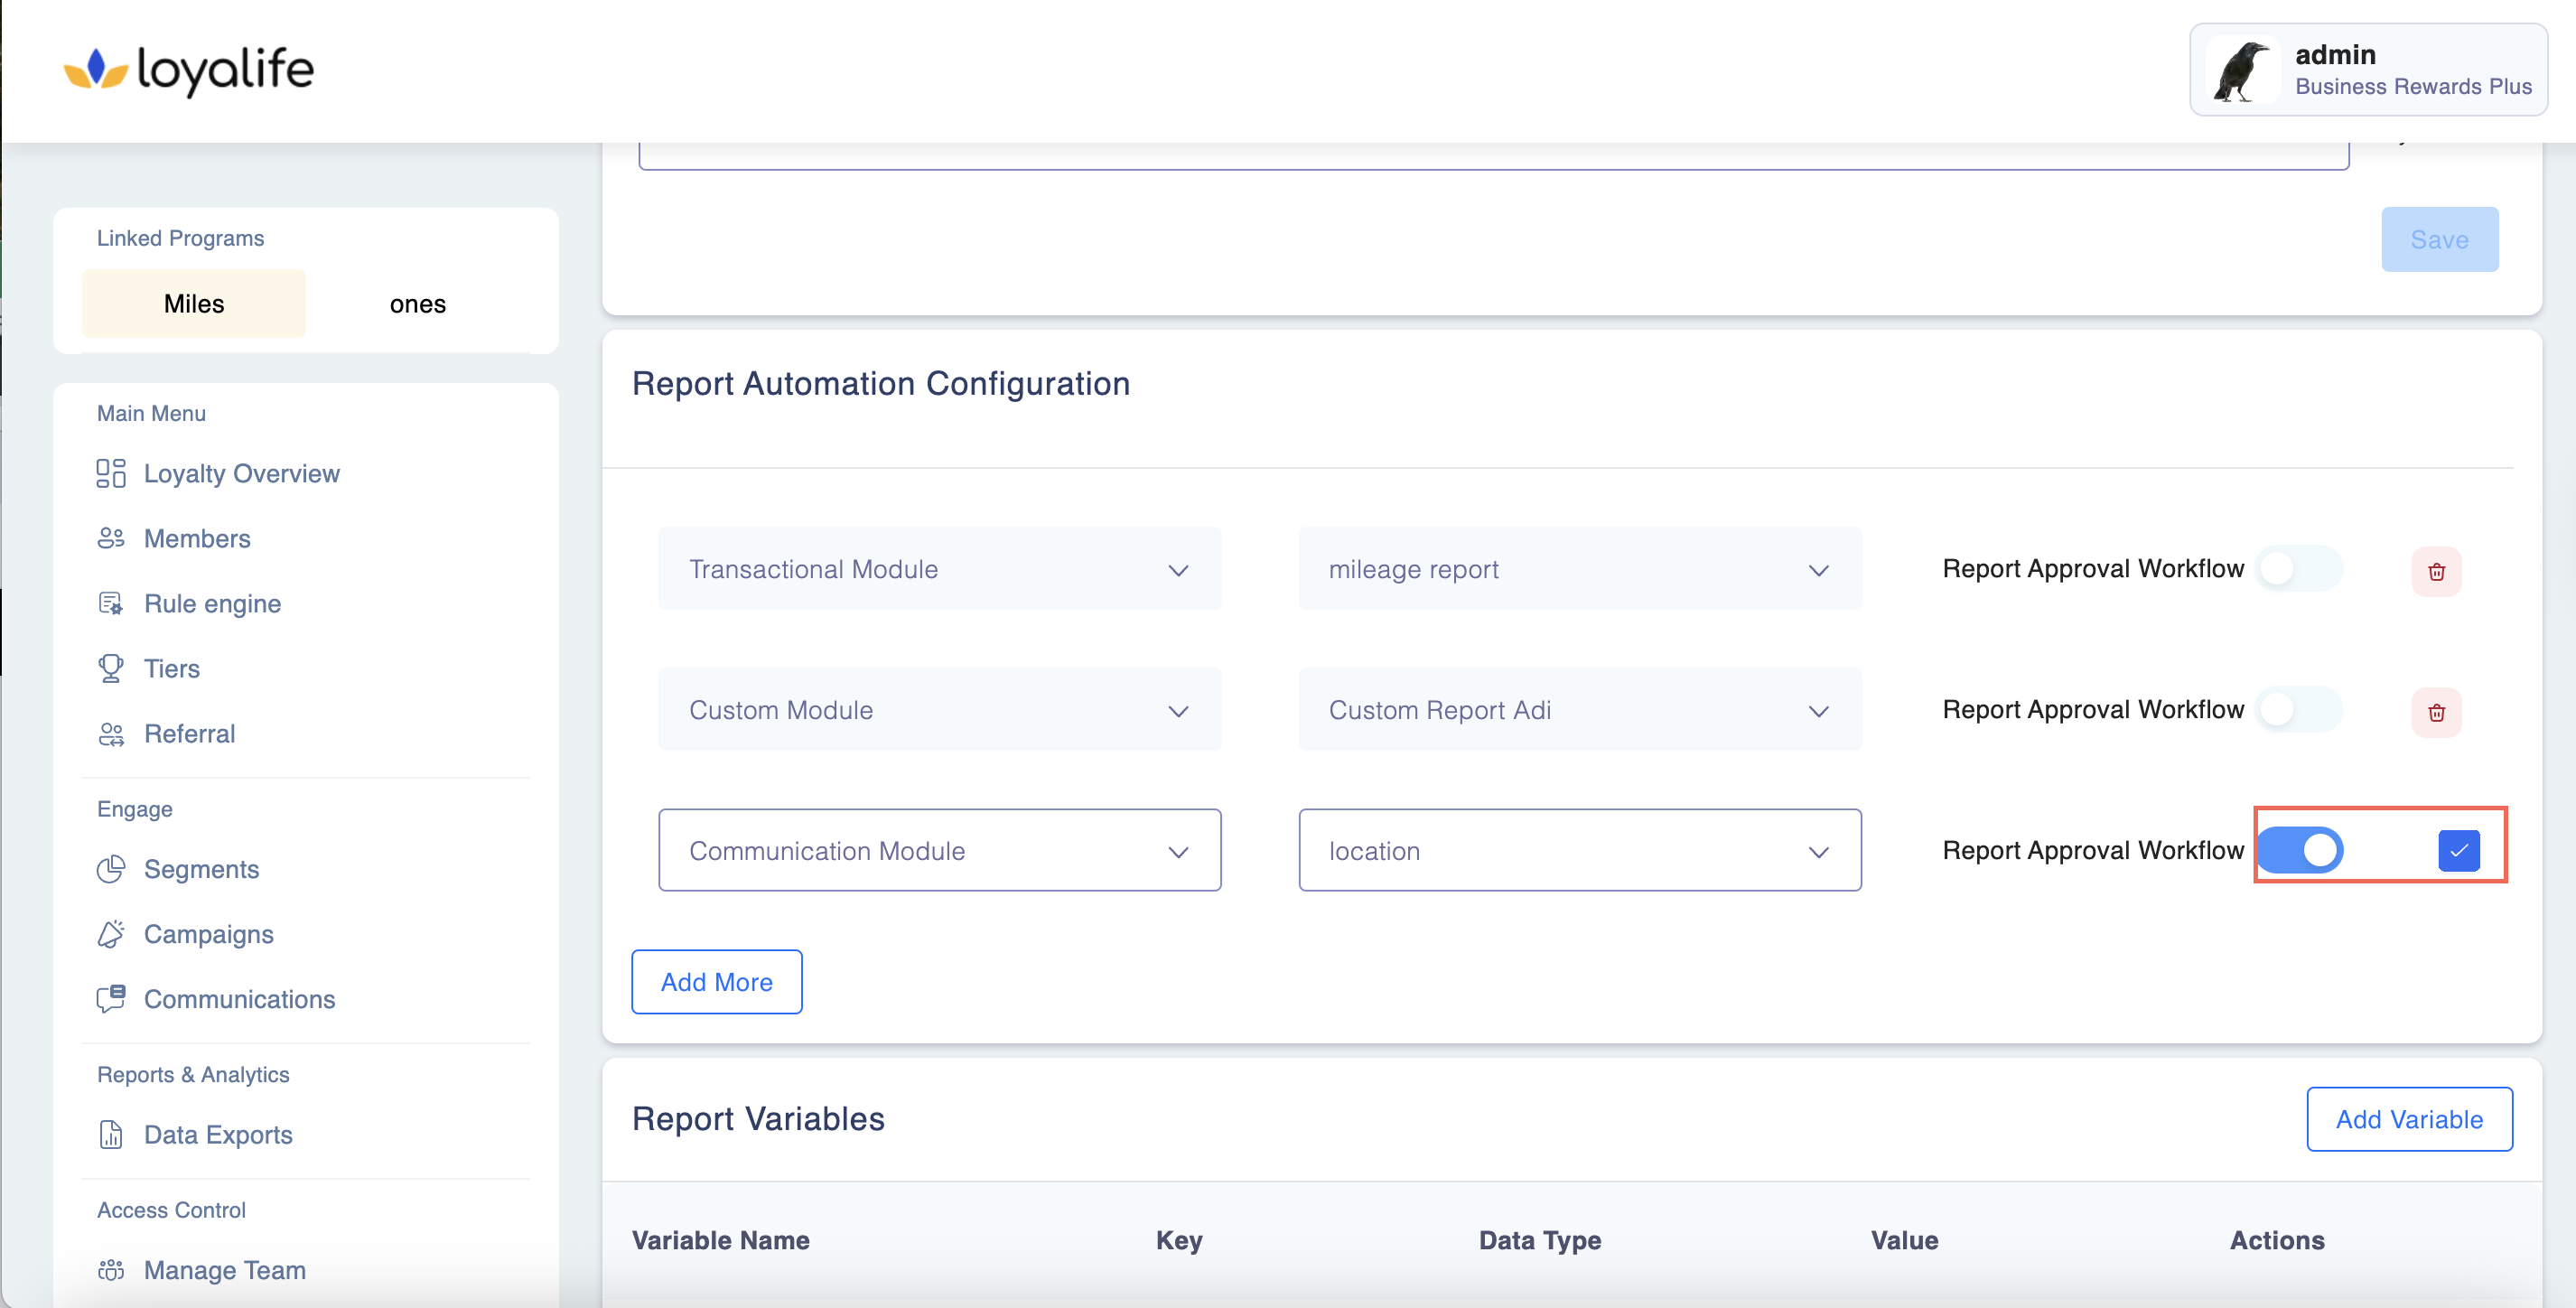
**Step 4: **Assign approvers using roles: Can_Verify_Report and Can_Approve_Report.
Destination Selection: Specify where the report should be uploaded — SFTP, API, or internal destination (backend configuration).
Save Configuration: Once saved, the system will track this report for automated upload and, if enabled, enforce the Maker-Checker approval process before any upload occurs.
Outcome: The report is now ready for automated upload. Depending on the workflow, it may trigger an approval request immediately after generation (auto-generated reports) or via a daily cron check (manual reports).