Custom Report
Learn how to set up custom reports in Loyalife
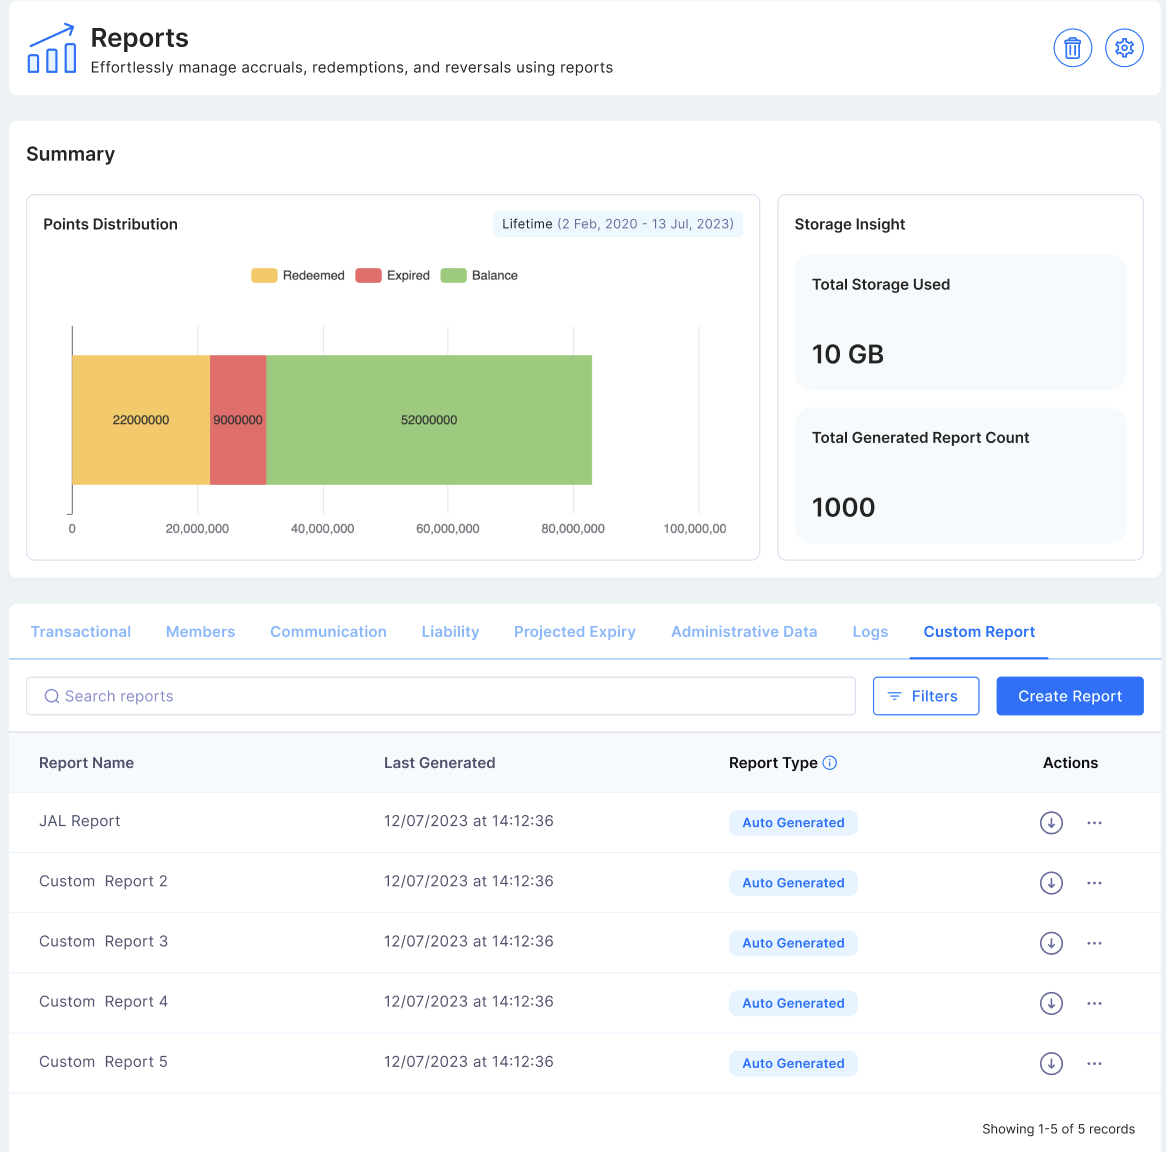
Purpose of Custom Report
The Custom Report module in the Loyalife Reports section empowers Admins (not Program Admins) to build dynamic reports tailored to business needs. It supports SQL query writing, cron job scheduling, and report sharing/visibility management, and is available only for private cloud and on-premise clients.
This feature enables organizations to go beyond standard templates by creating complex, multi-table SQL reports, scheduling automated delivery, and ensuring controlled access across teams. It gives Admins a self-service tool to streamline reporting, improve governance, and maintain security and compliance.
Creating a Custom Report
To create a custom report that meets your specific business needs:
-
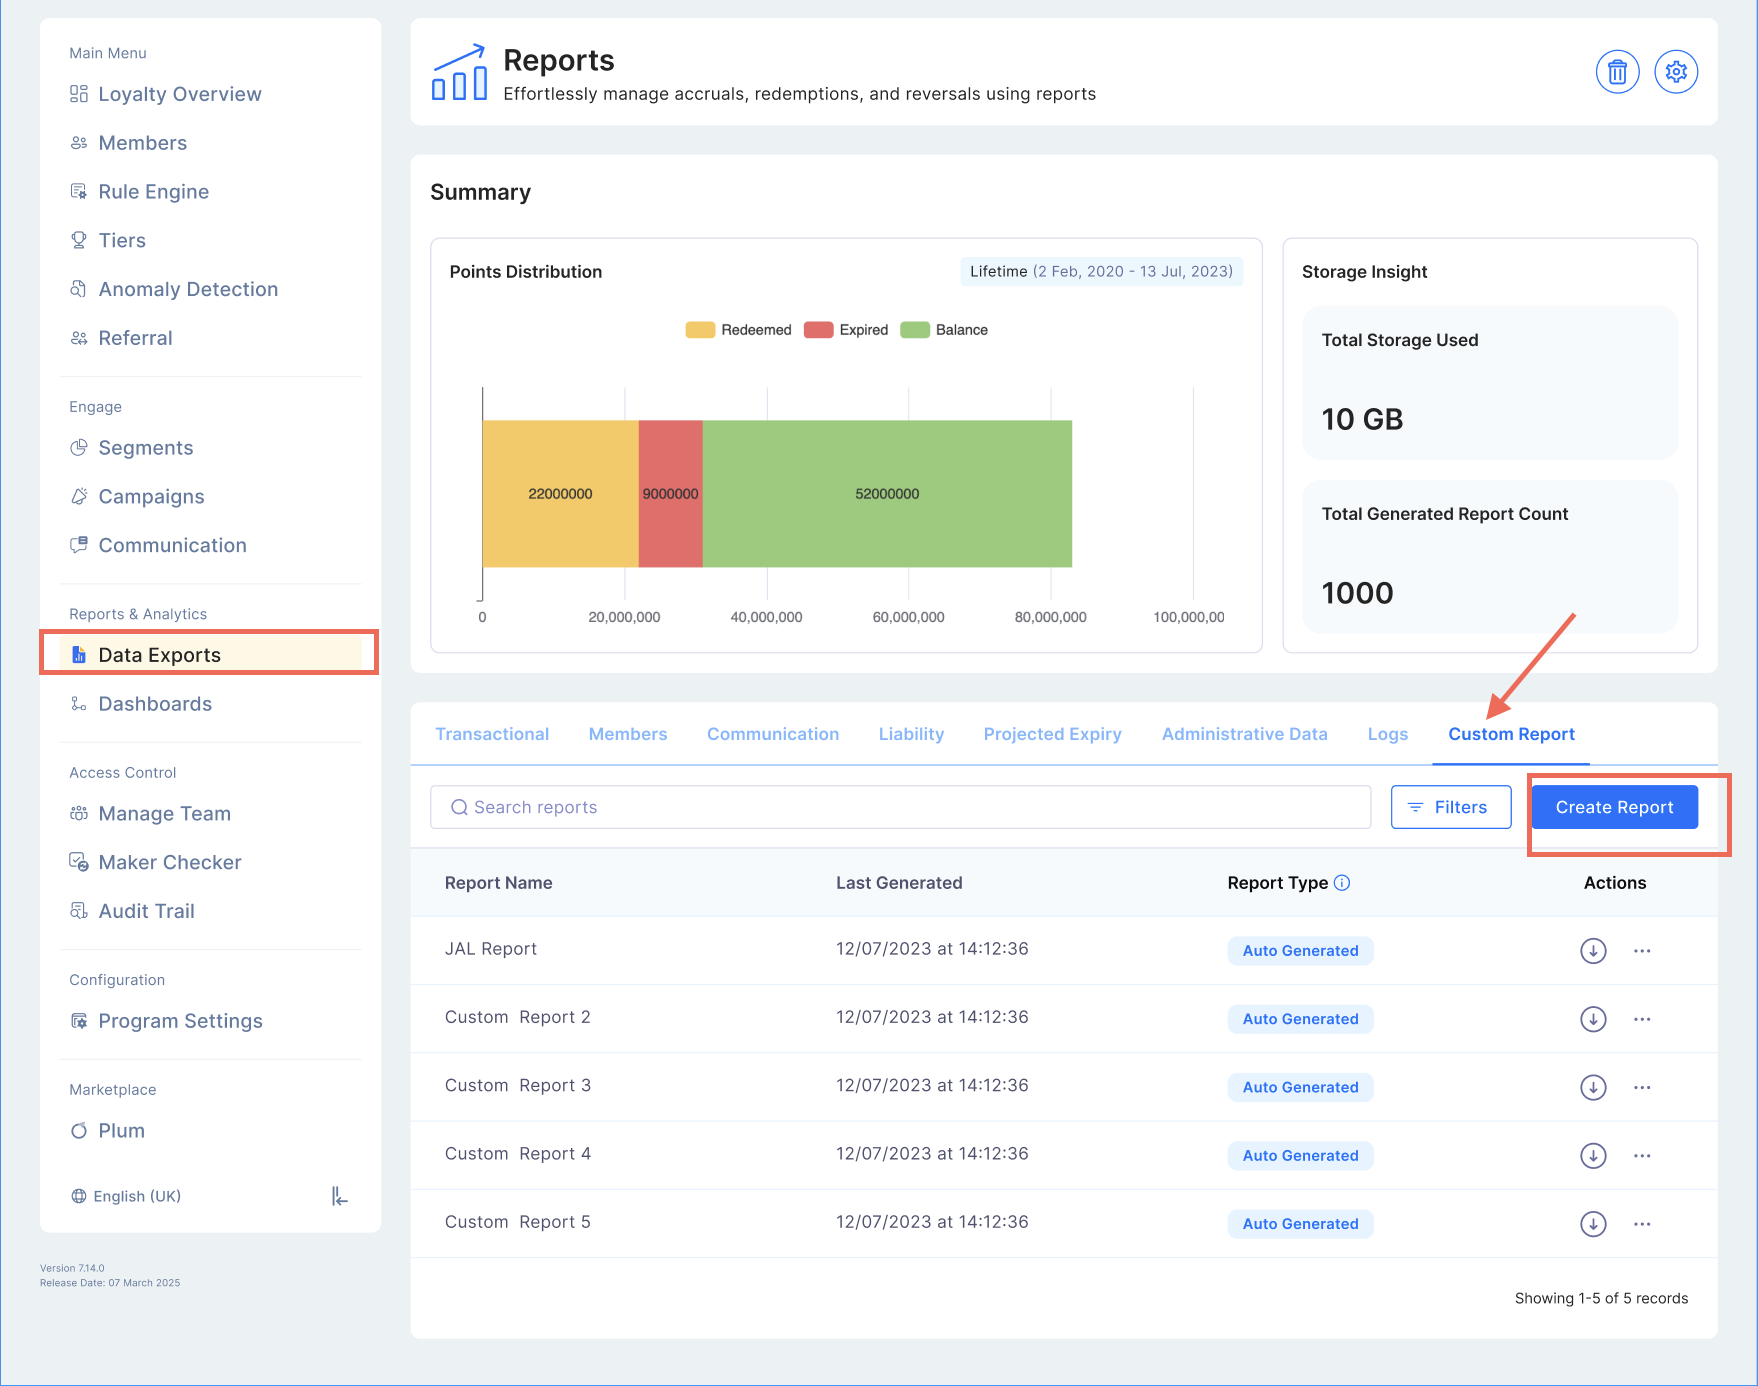
Access the Feature:
- Navigate to Reports and Analytics > Data Exports > Create Report tab.
- Report Set Up:
-
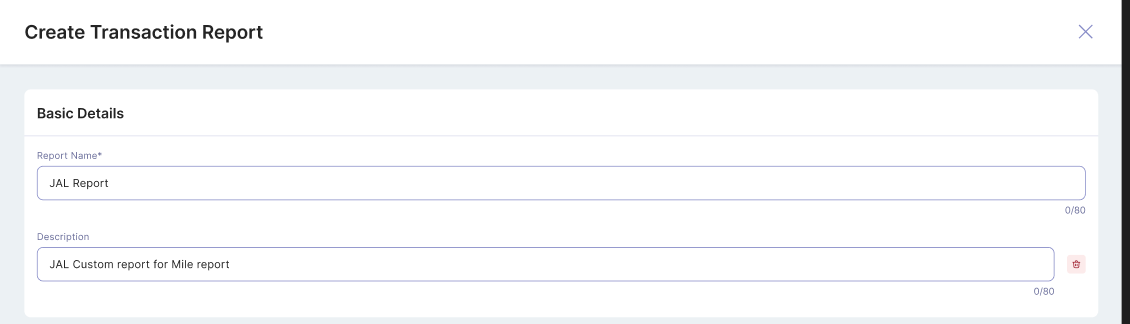
Click Report Set Up and provide the following details:
- Report Name and Description
- Assign a clear and identifiable name to the report, such as "JAL" Report.
- This helps users quickly locate and retrieve reports from the system.
-
Report Query
The logic for filtering data (like current_date - 1) can be written directly in the SQL query by pasting it in the space.
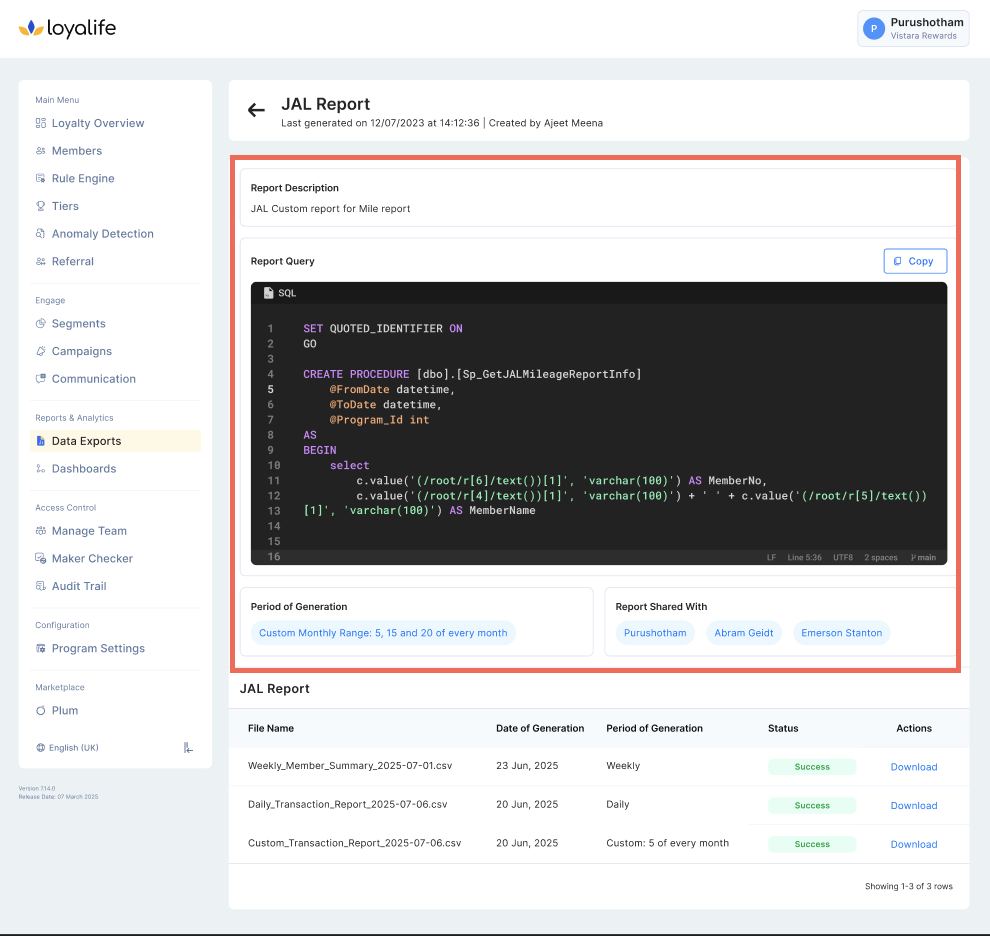
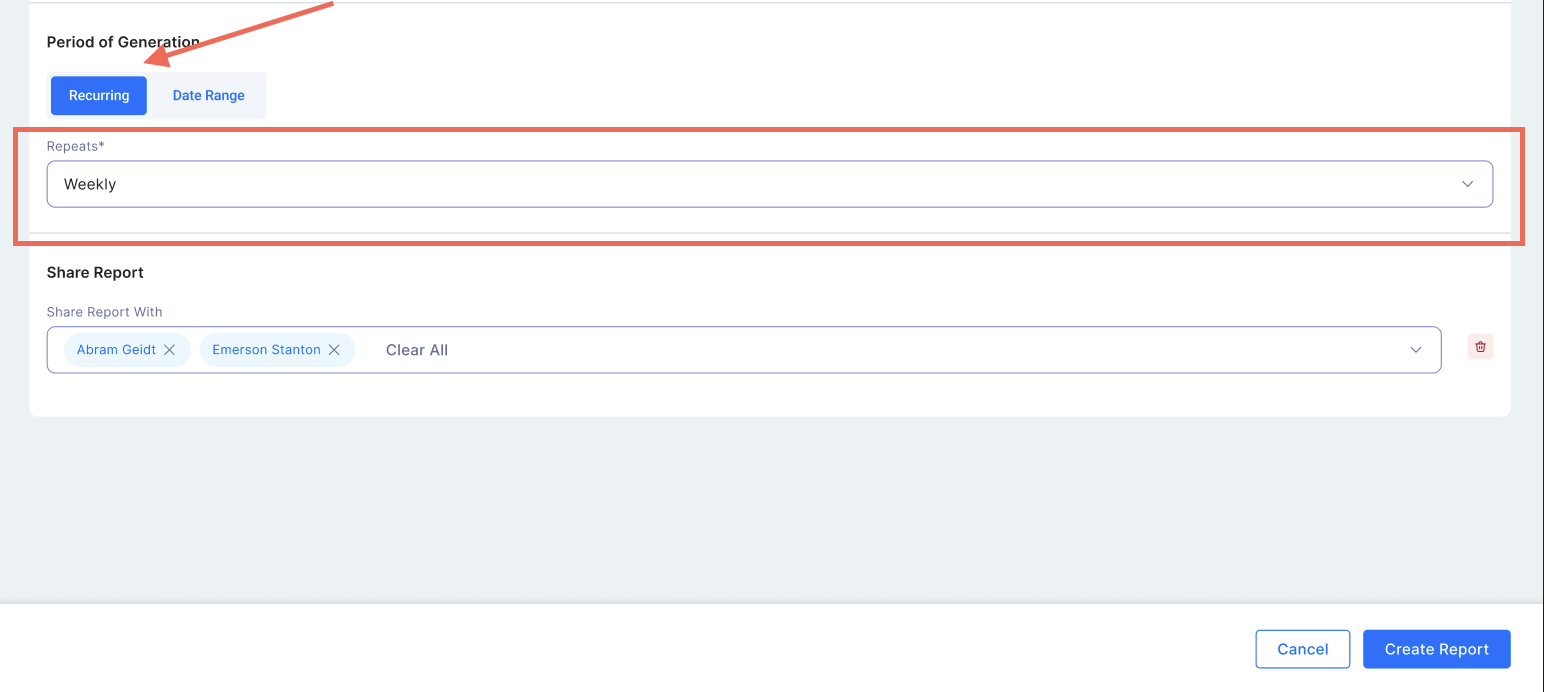
- Period of Generation
- Select the period of generation. You can either select
- Recurring: Defines how frequently the report should be generated. Options include: Daily – For real-time monitoring of new transactions. Weekly – Provides a summary of transactions over a week. Monthly, Quarterly and Annually – Useful for trend analysis and financial reconciliation.
- Select the period of generation. You can either select
- Report Name and Description
One-Time Manual Generation (Generate Button)
In addition to recurring setups, each Custom Report now includes a Generate option that lets you produce a report immediately for any date range:
How to Use Manual Generation
- Open the report detail view.
- Click Generate.

- Enter Start Date and End Date (both required).
- Click Generate Now.
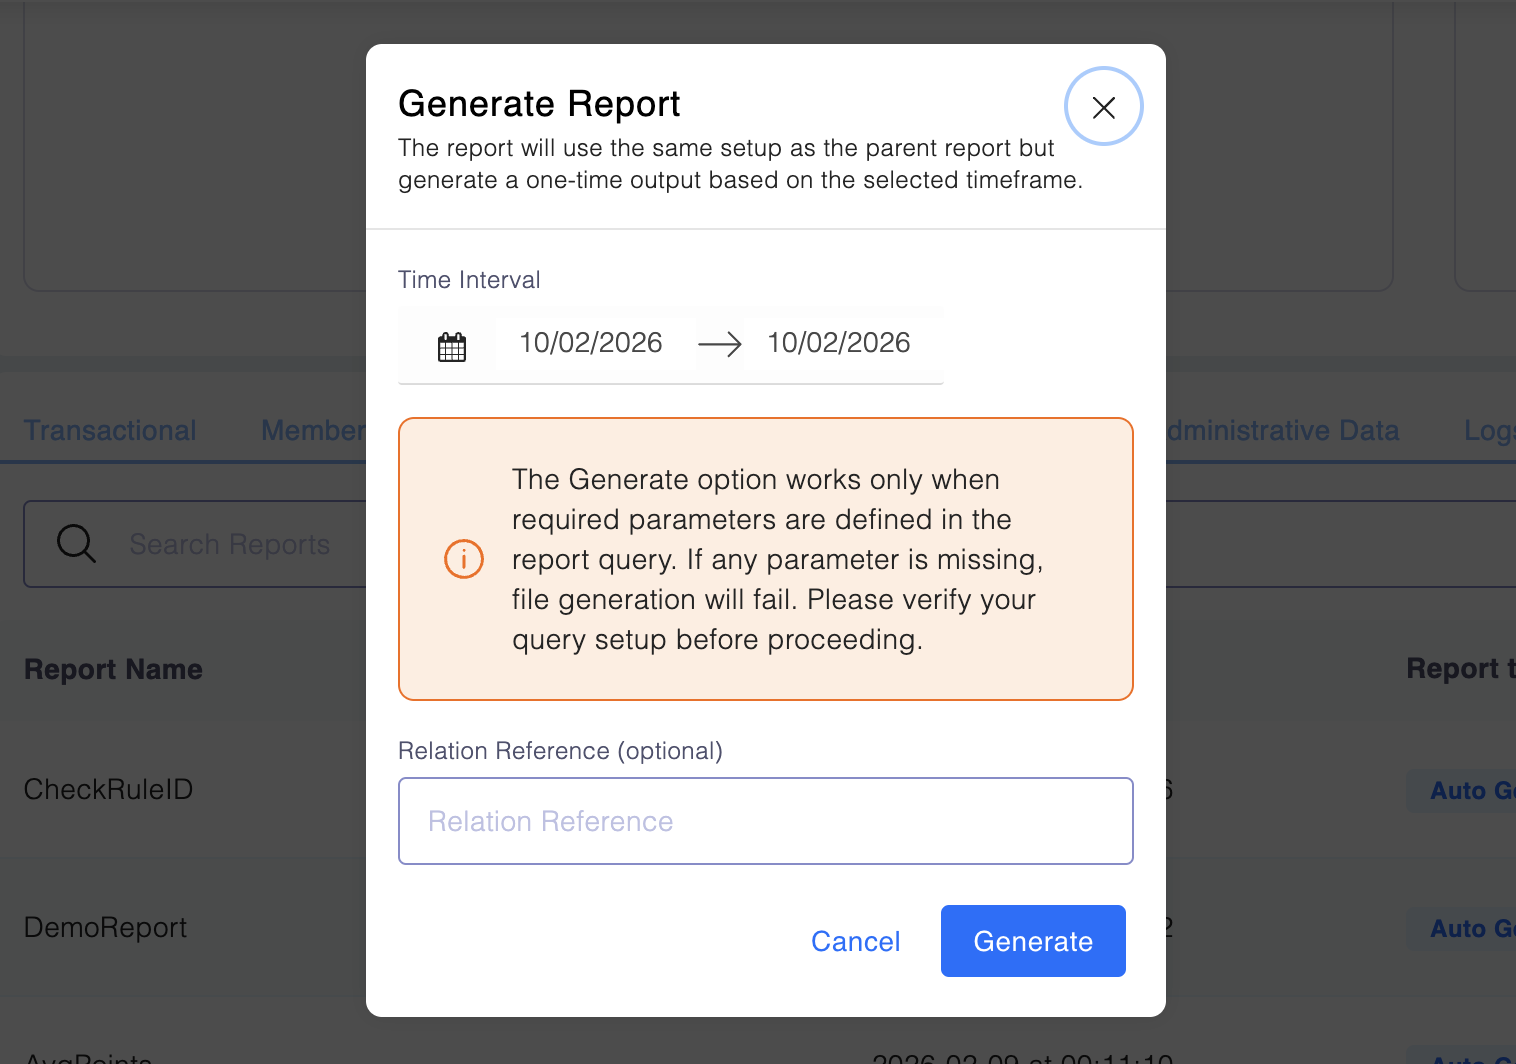
The system runs the saved SQL using these dates and stores the output in the same module with a Manual tag.
- This does not modify the recurring schedule.
- Date Range: Lets you select a defined time period with a clear start and end date.
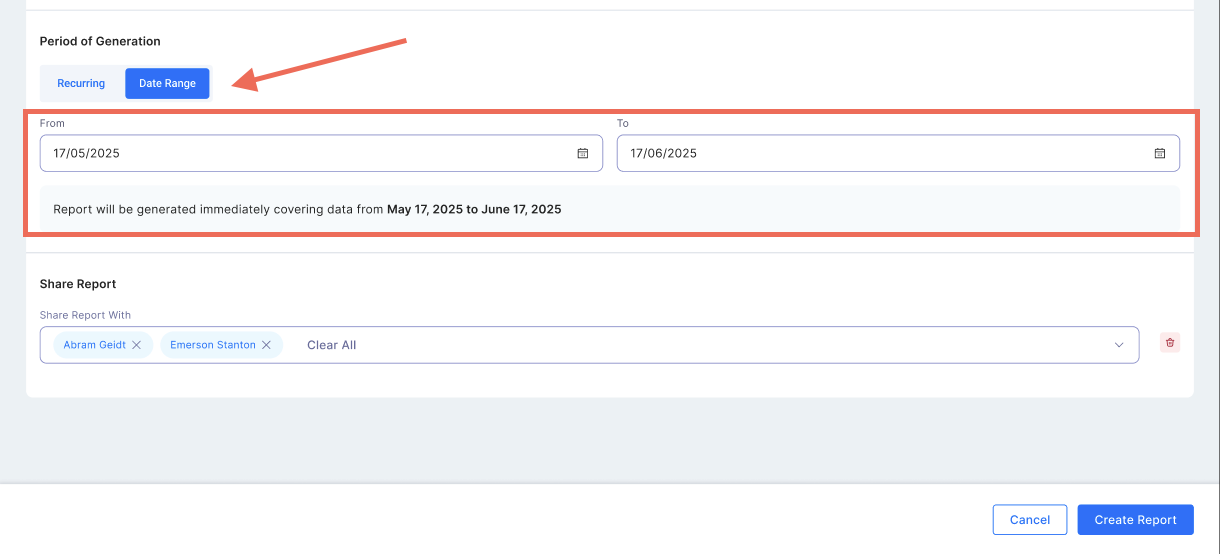
- Share Report with
Add or select the email id of the user you wish to share the report with. Once done, click on Save.
Report Generation Periods
You can customize the frequency of your report generation to meet your analysis needs. Available options include:
- Daily
- Weekly
- Monthly
- Quarterly
- Yearly
These options allow you to generate reports at regular intervals during off-hours to minimize server load.
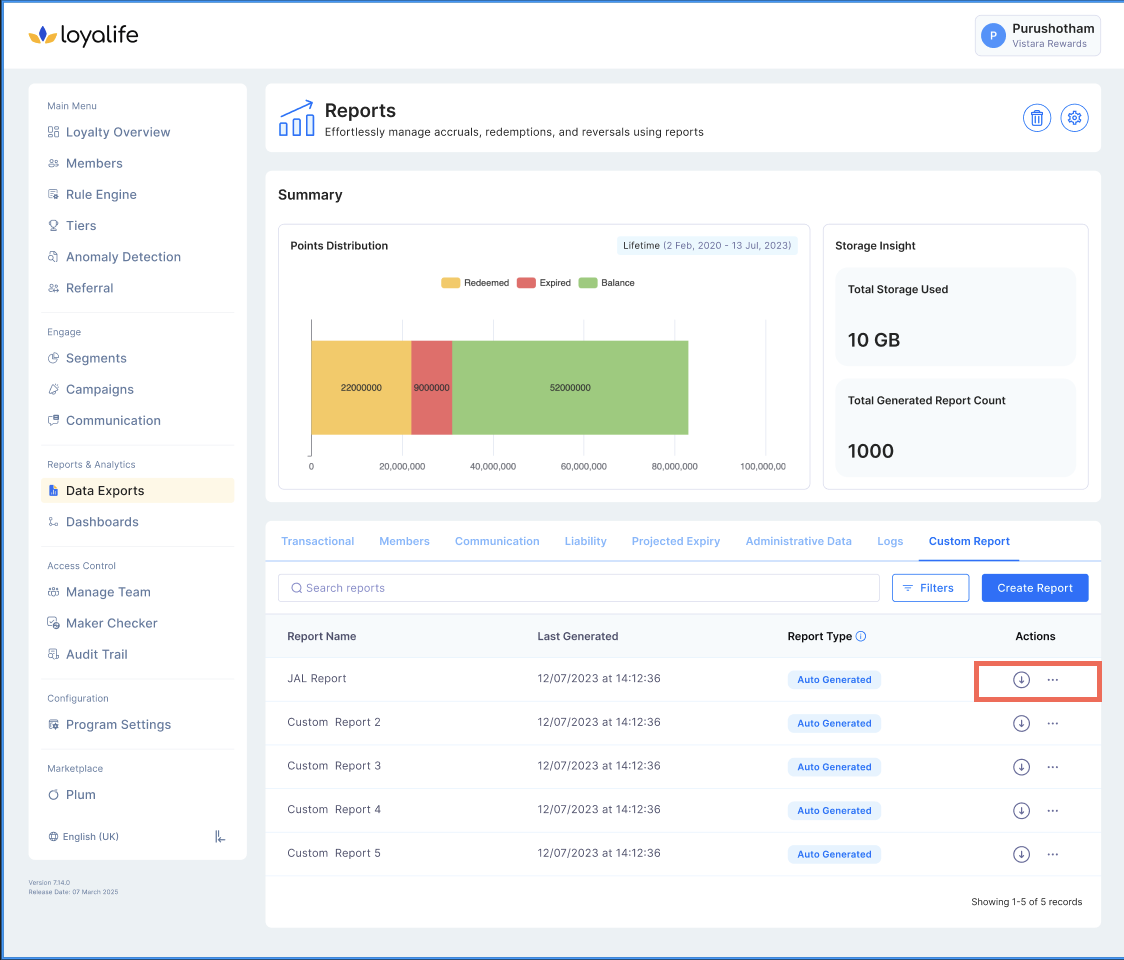
Accessing and Managing Custom Reports
Navigate to the Custom Reports Section:
- Go to Reports and Analytics > Data Exports from the main menu.
- Select the Custom tab where all saved views are listed.
View a custom report based upon custom time period:
- In the Custom Report tab, you will see a list of your custom views.
- Locate the view you want to access and click on the three dots at the right and then "View"
Generating On-Demand Files
Every report detail page now includes a Generate button.
- Allows users to run Manual reports for any date range.
- Files appear alongside recurring outputs in the list.
Only Super Admins can create or edit reports, but any user with access to the report can generate a Manual file.
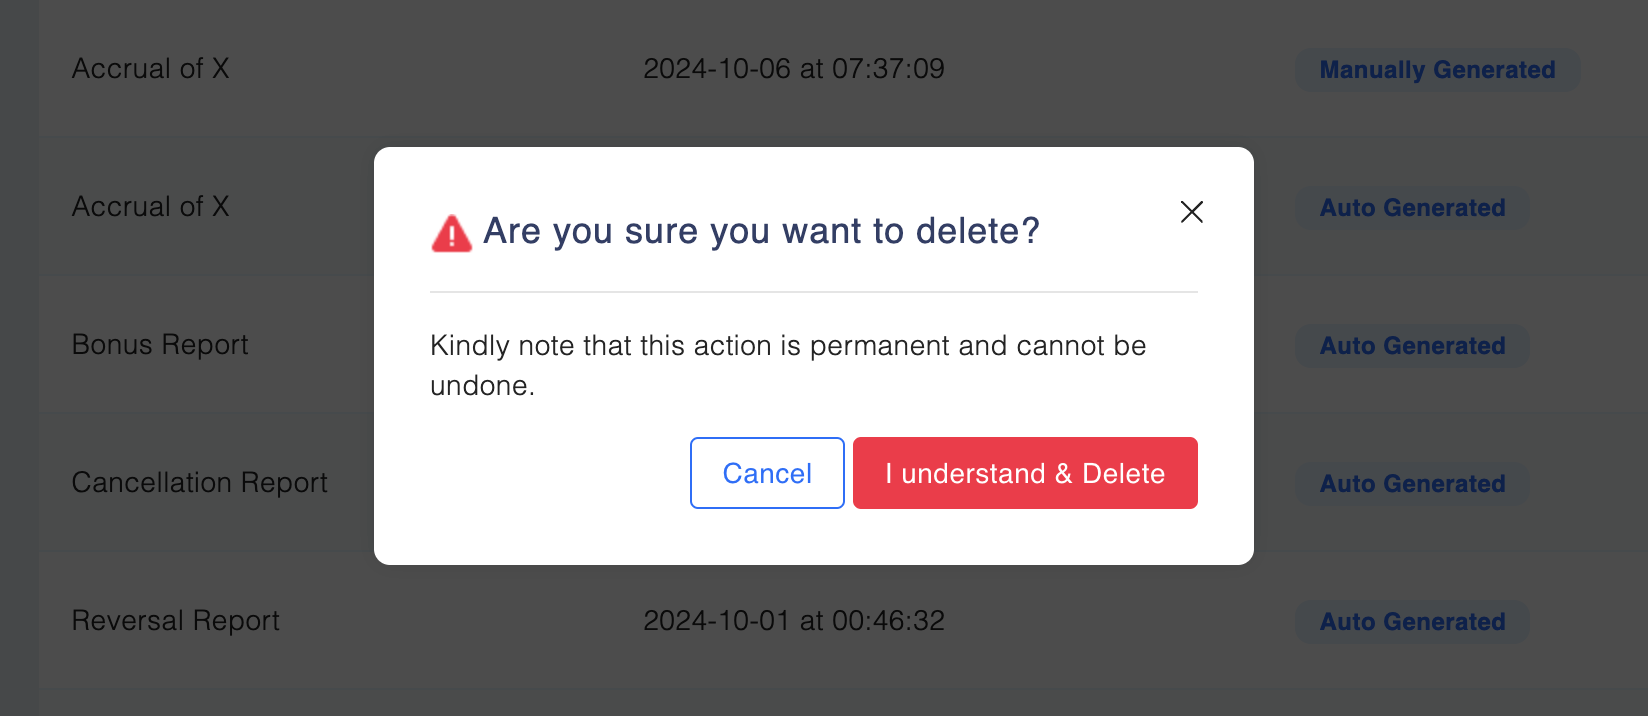
Deleting a Custom Report
Select the View to Delete:
- Locate the custom view you wish to remove.
- Click the three dots at the right and click Delete next to the view.
Confirm Deletion:
- A confirmation prompt will appear. Confirm that you want to delete the view.
- The view & associated reports will be permanently deleted from storage and will no longer appear in the list.
Sharing Reports Data
If you need to share a particular transaction report, follow these steps to share it:
Select the View to Share:
- Find the custom view you want to share.
- Click the three-dot menu on the right side of the view and select Share.

- In the dropdown menu, select the user you want to share the view with.
- Click Share to grant access.
Note: Sharing with a specific user is only available if their access settings allow it.
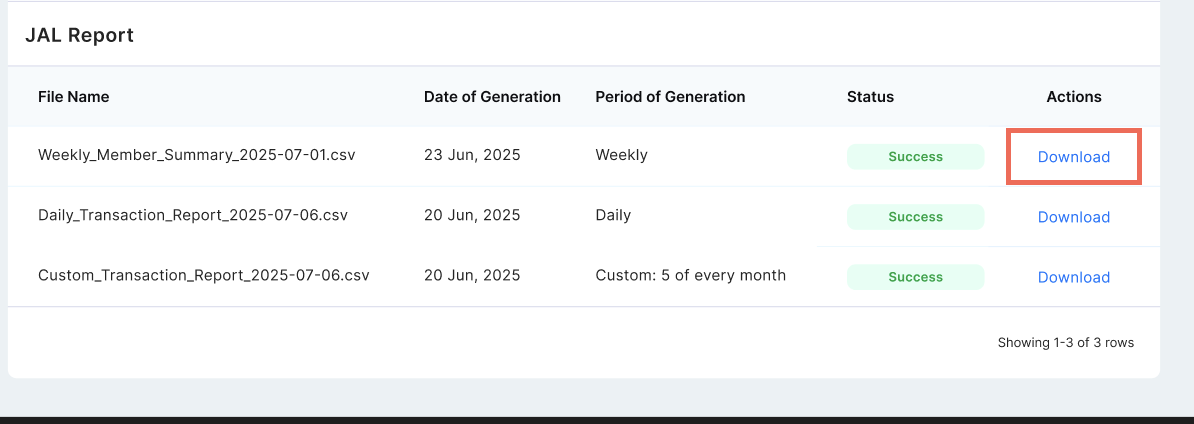
Downloading a Custom Report
Option 1: Click the Download button next to the custom report you want.
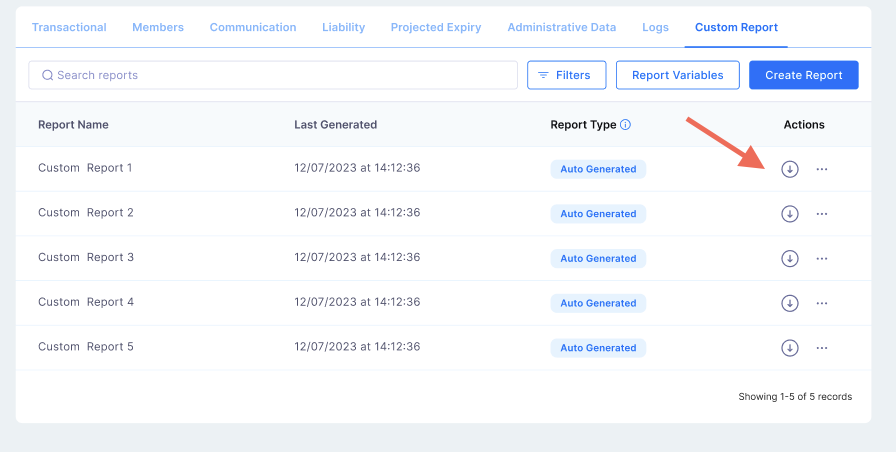
Option 2: Click the three dots (⋮), select View Report, and then choose Download for the version you wish to save.