
Create & Edit Segments
Learn how to create and edit a segment.
Creating a New Segment
Pre-requisiteOnly users with create permissions can create the segments. Learn more about
permission in User Access Management here: User Access Mangement
Steps to create a new segment:
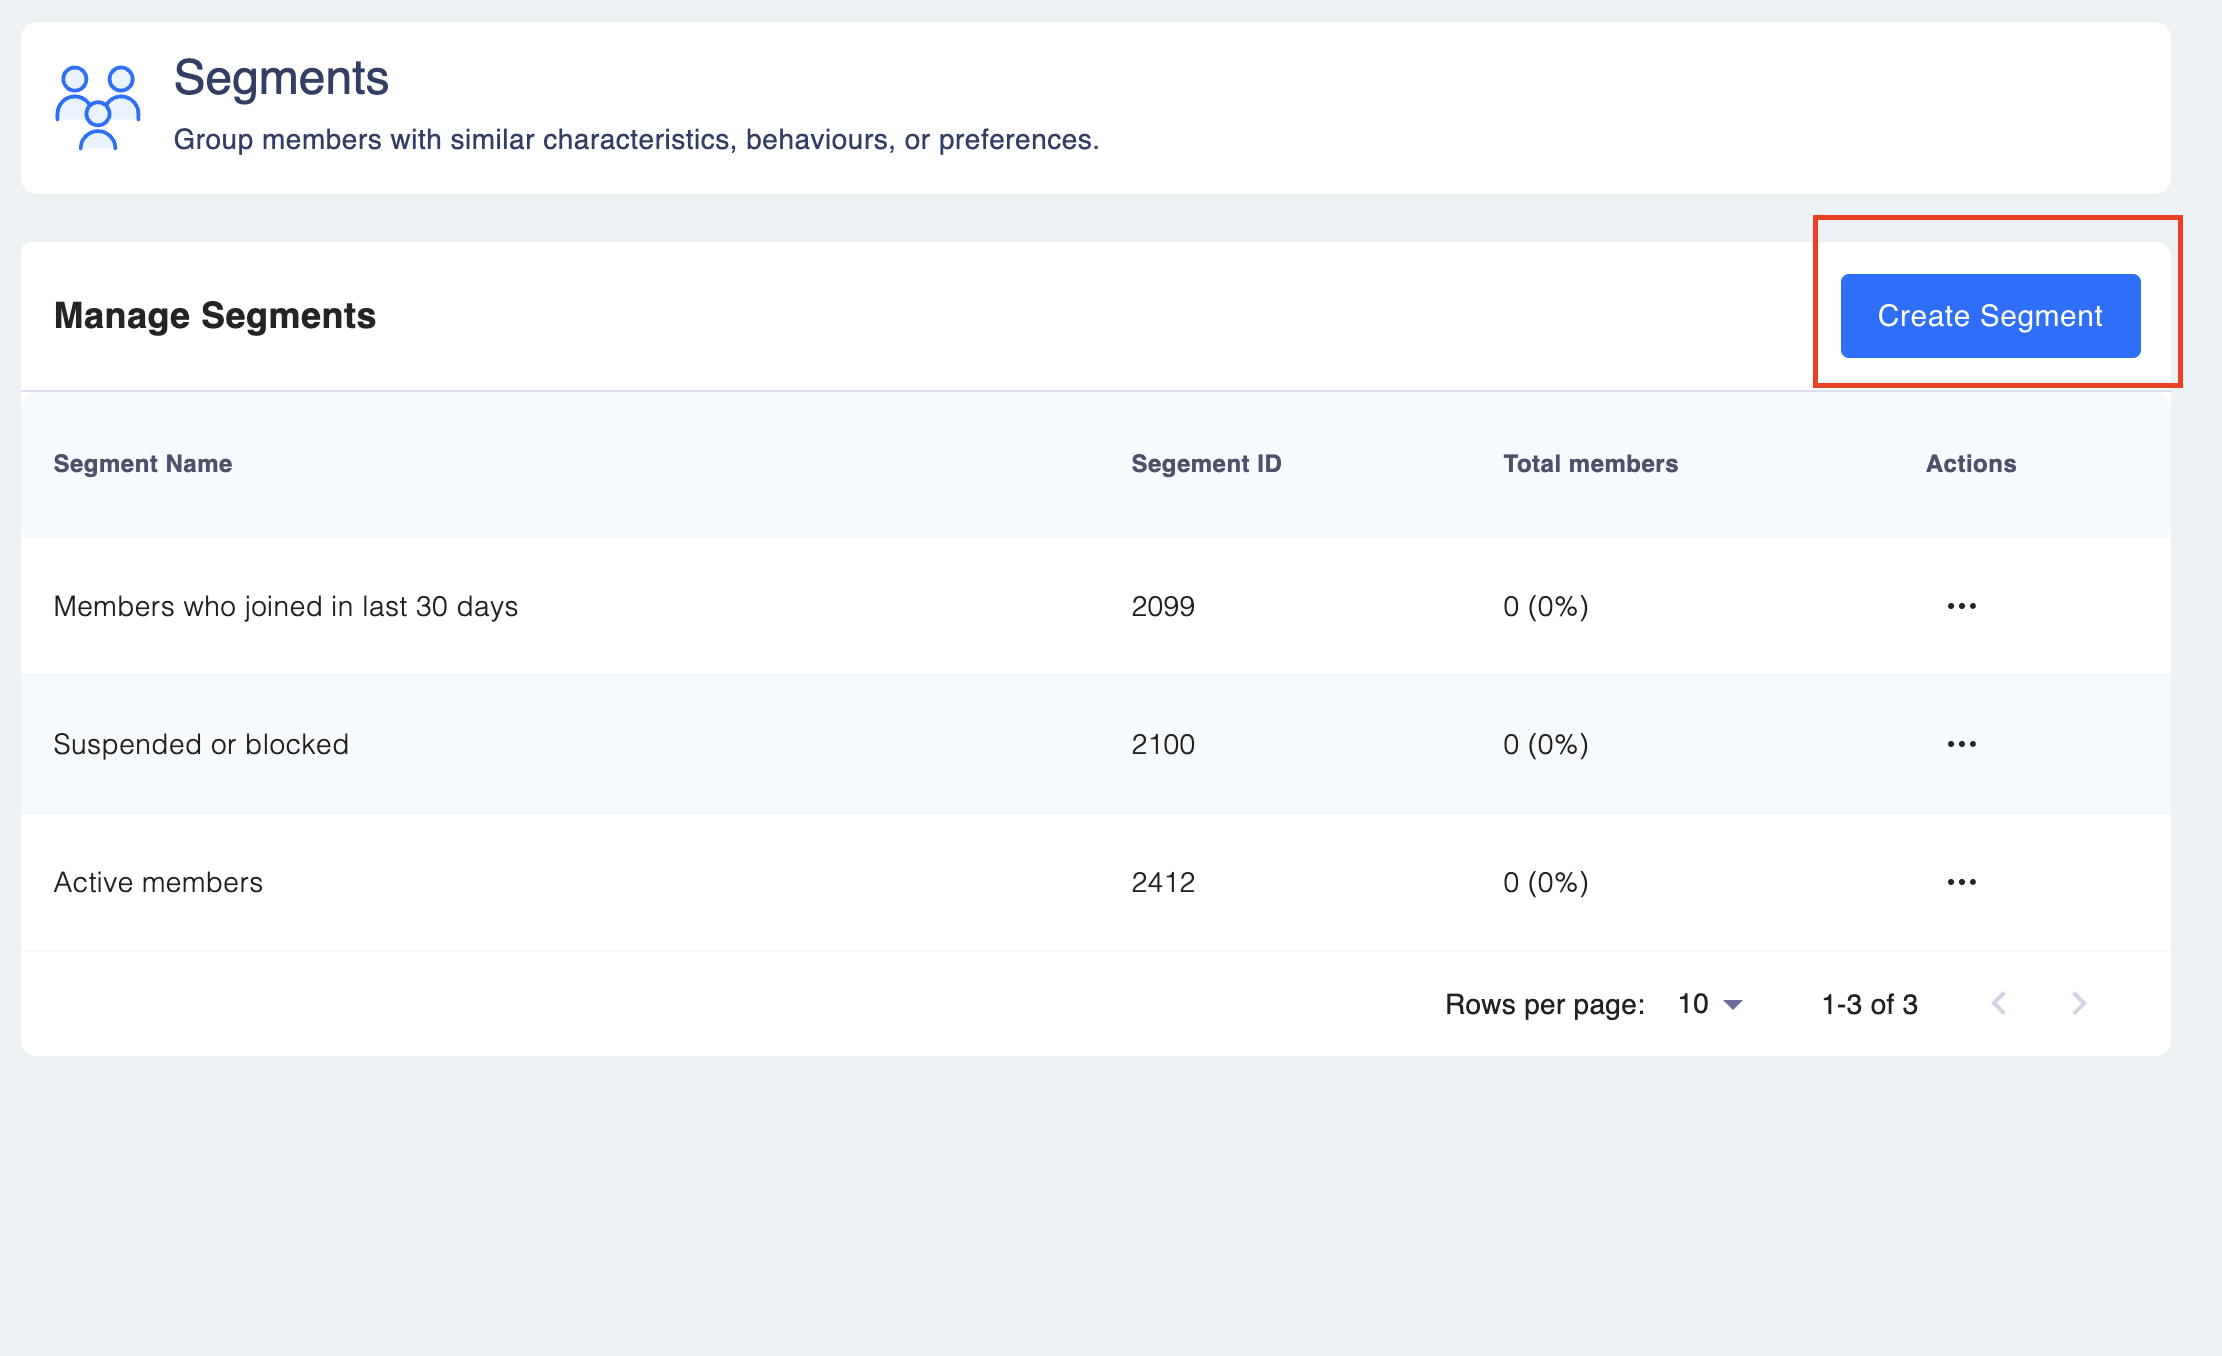
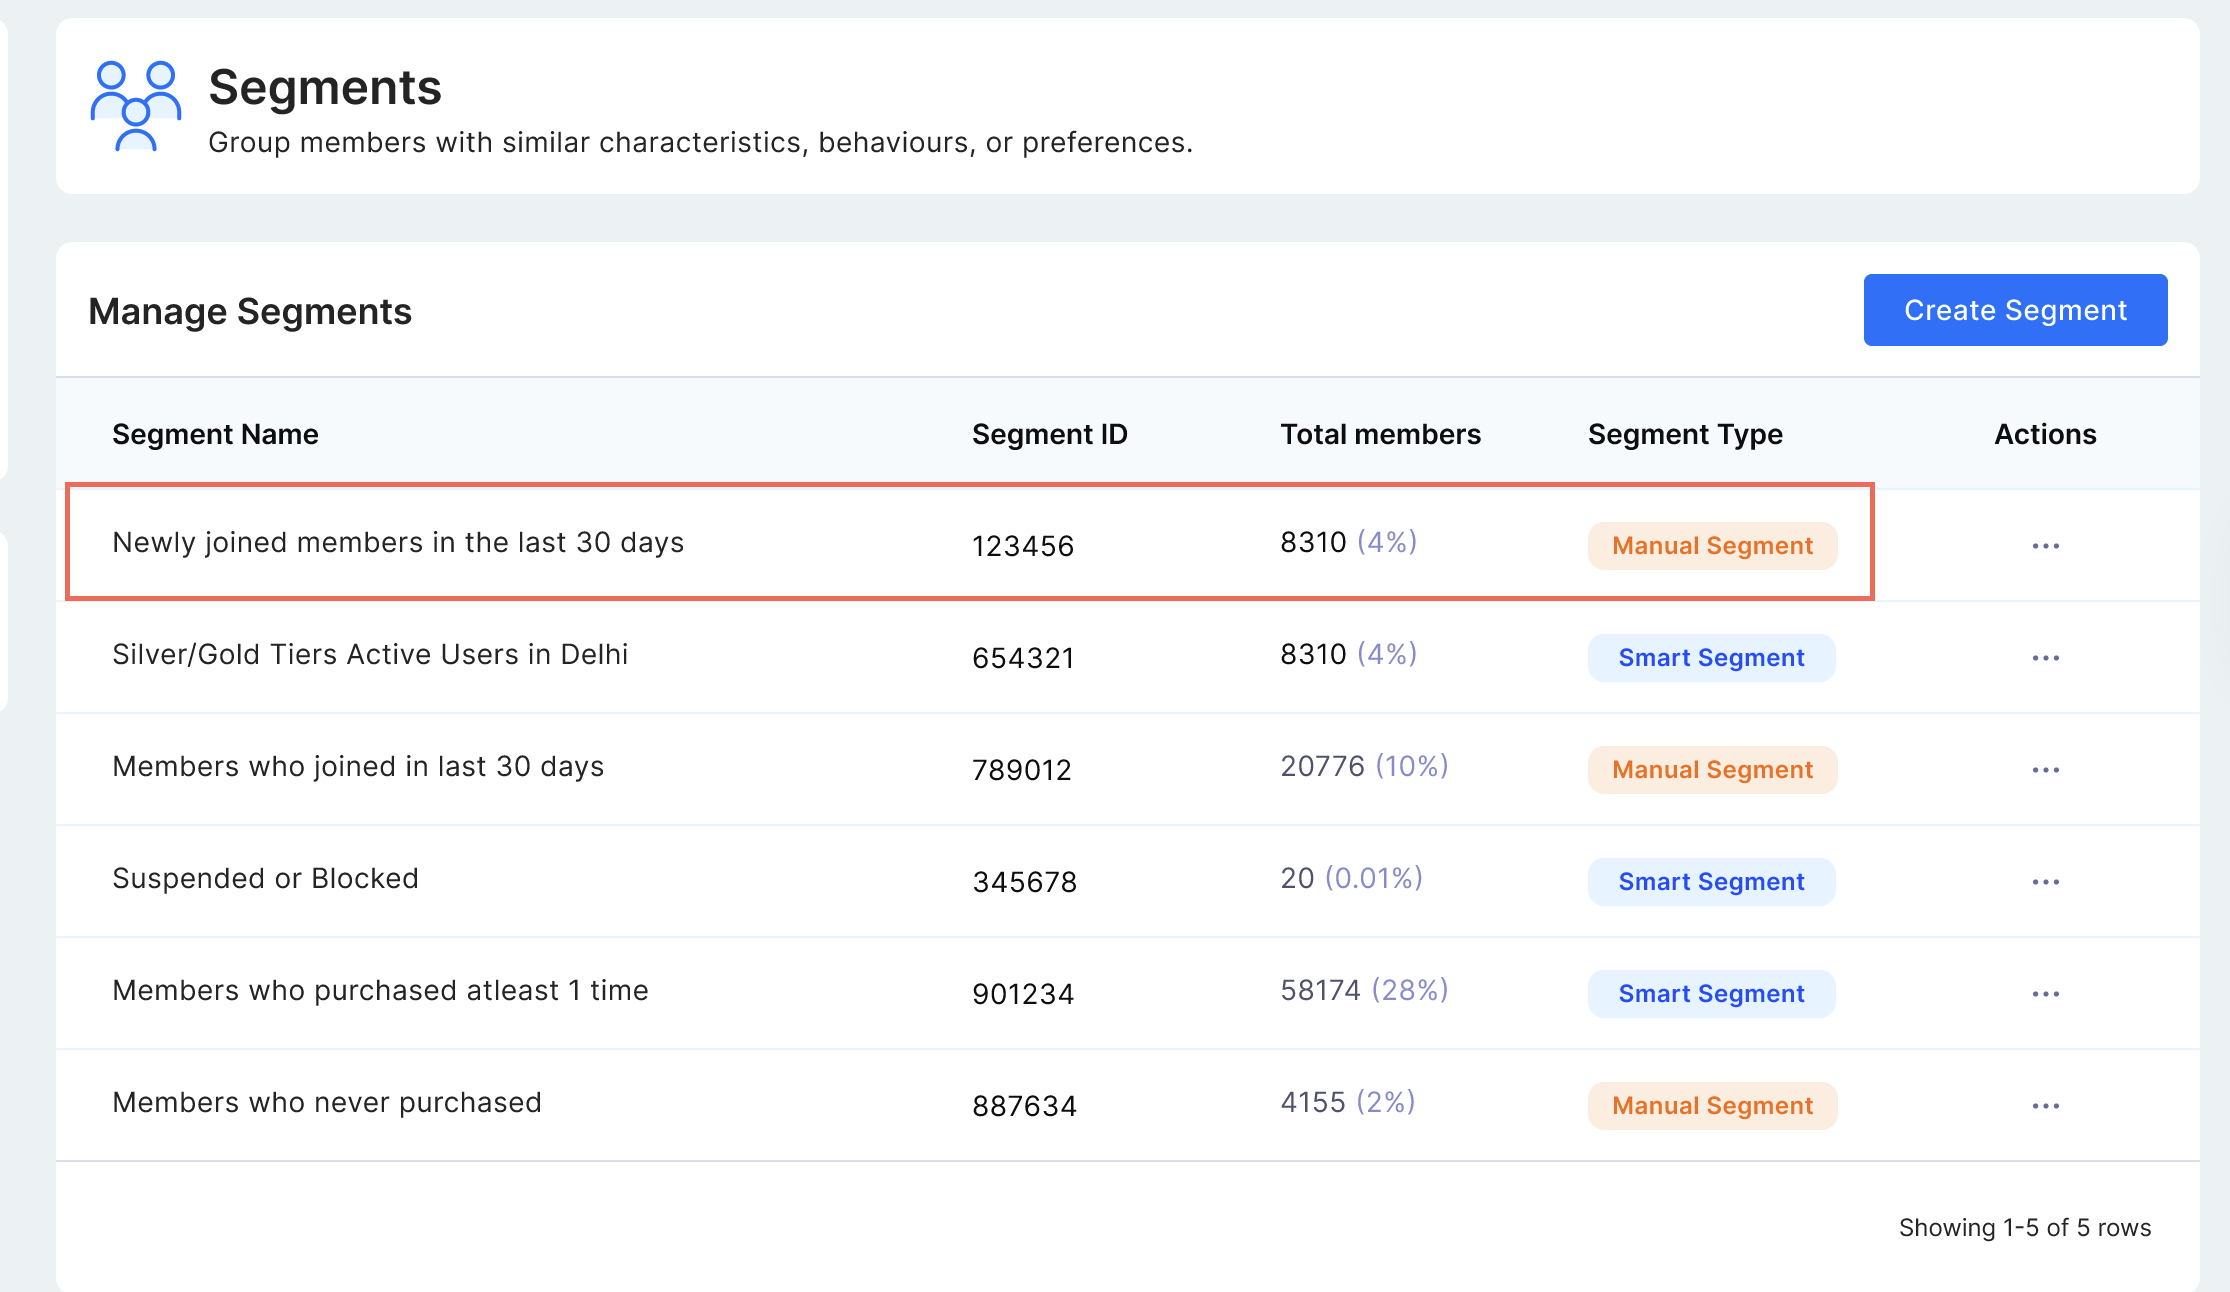
Step 1: Go to Engage ➝ Segments.
Step 2: Click on "Create Segment.
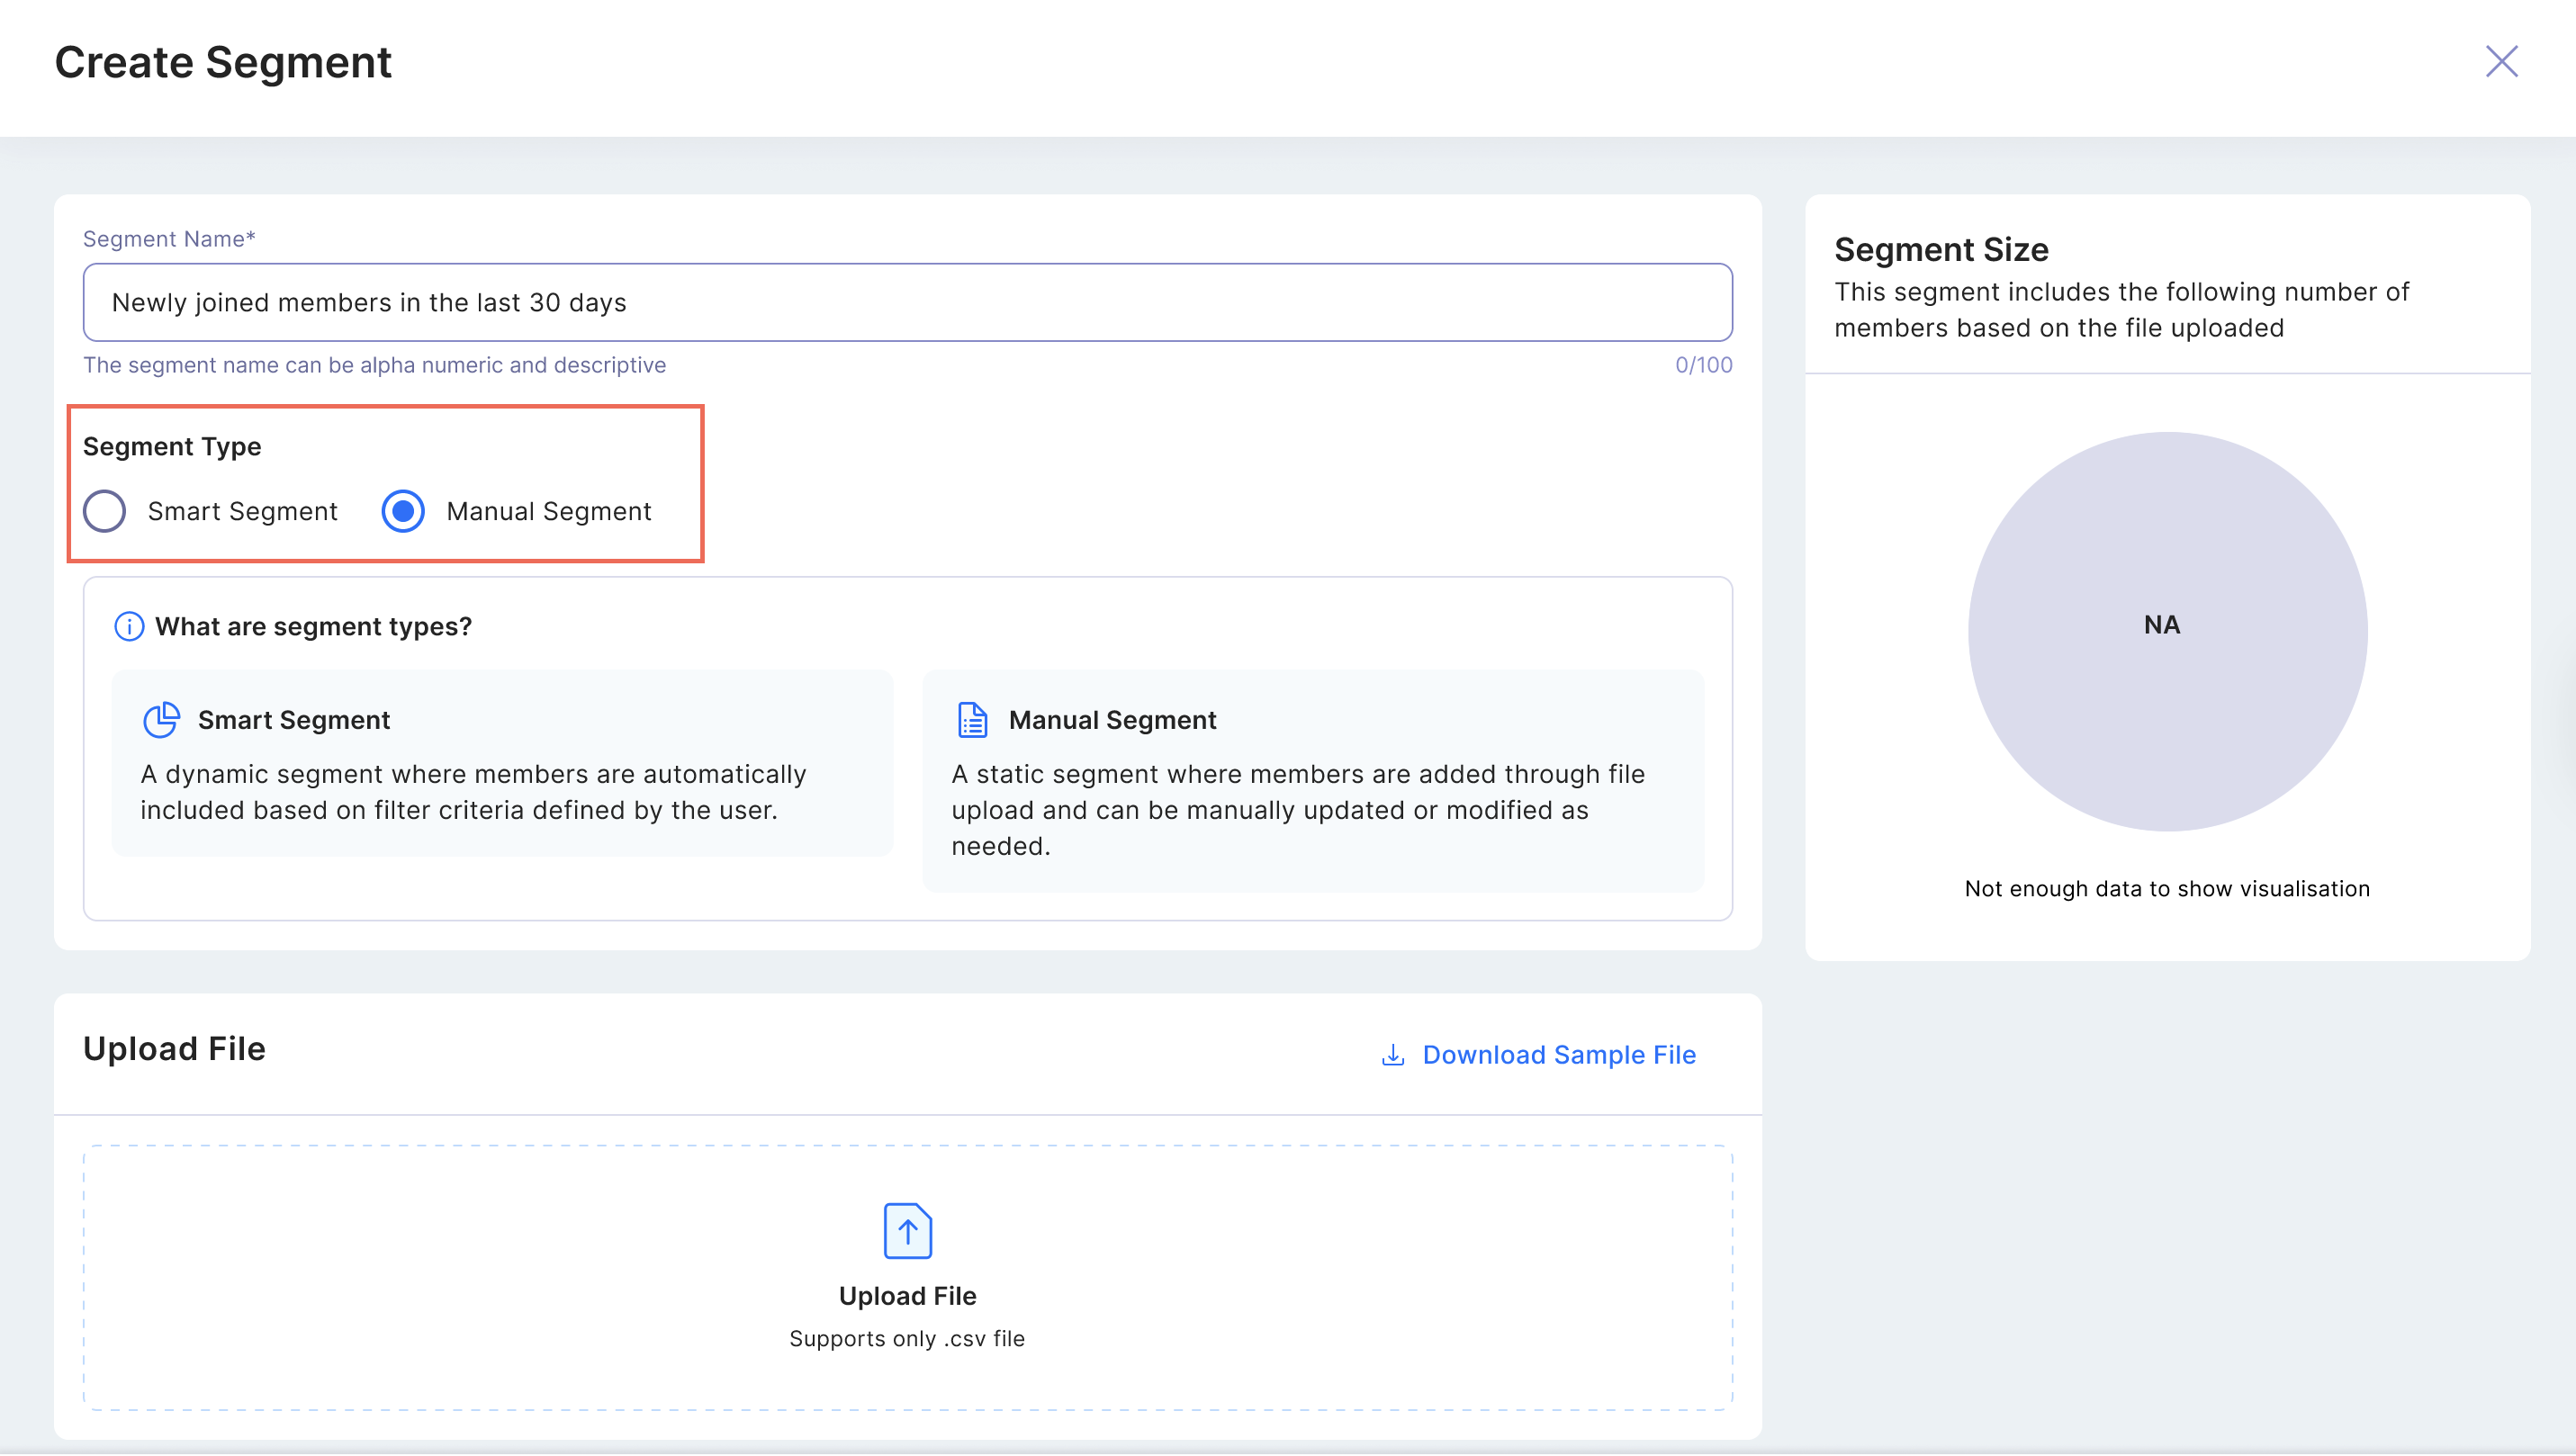
Step 3: Select the Segment Type.
You can choose between two segment types:
- Smart Segment: A smart segment automatically includes members based on the filter criteria defined by the user.
- Manual Segment: A static segment where members are added through file upload and can be manually updated or modified as needed.
**3.1 Follow the steps if you chose Smart Segment **
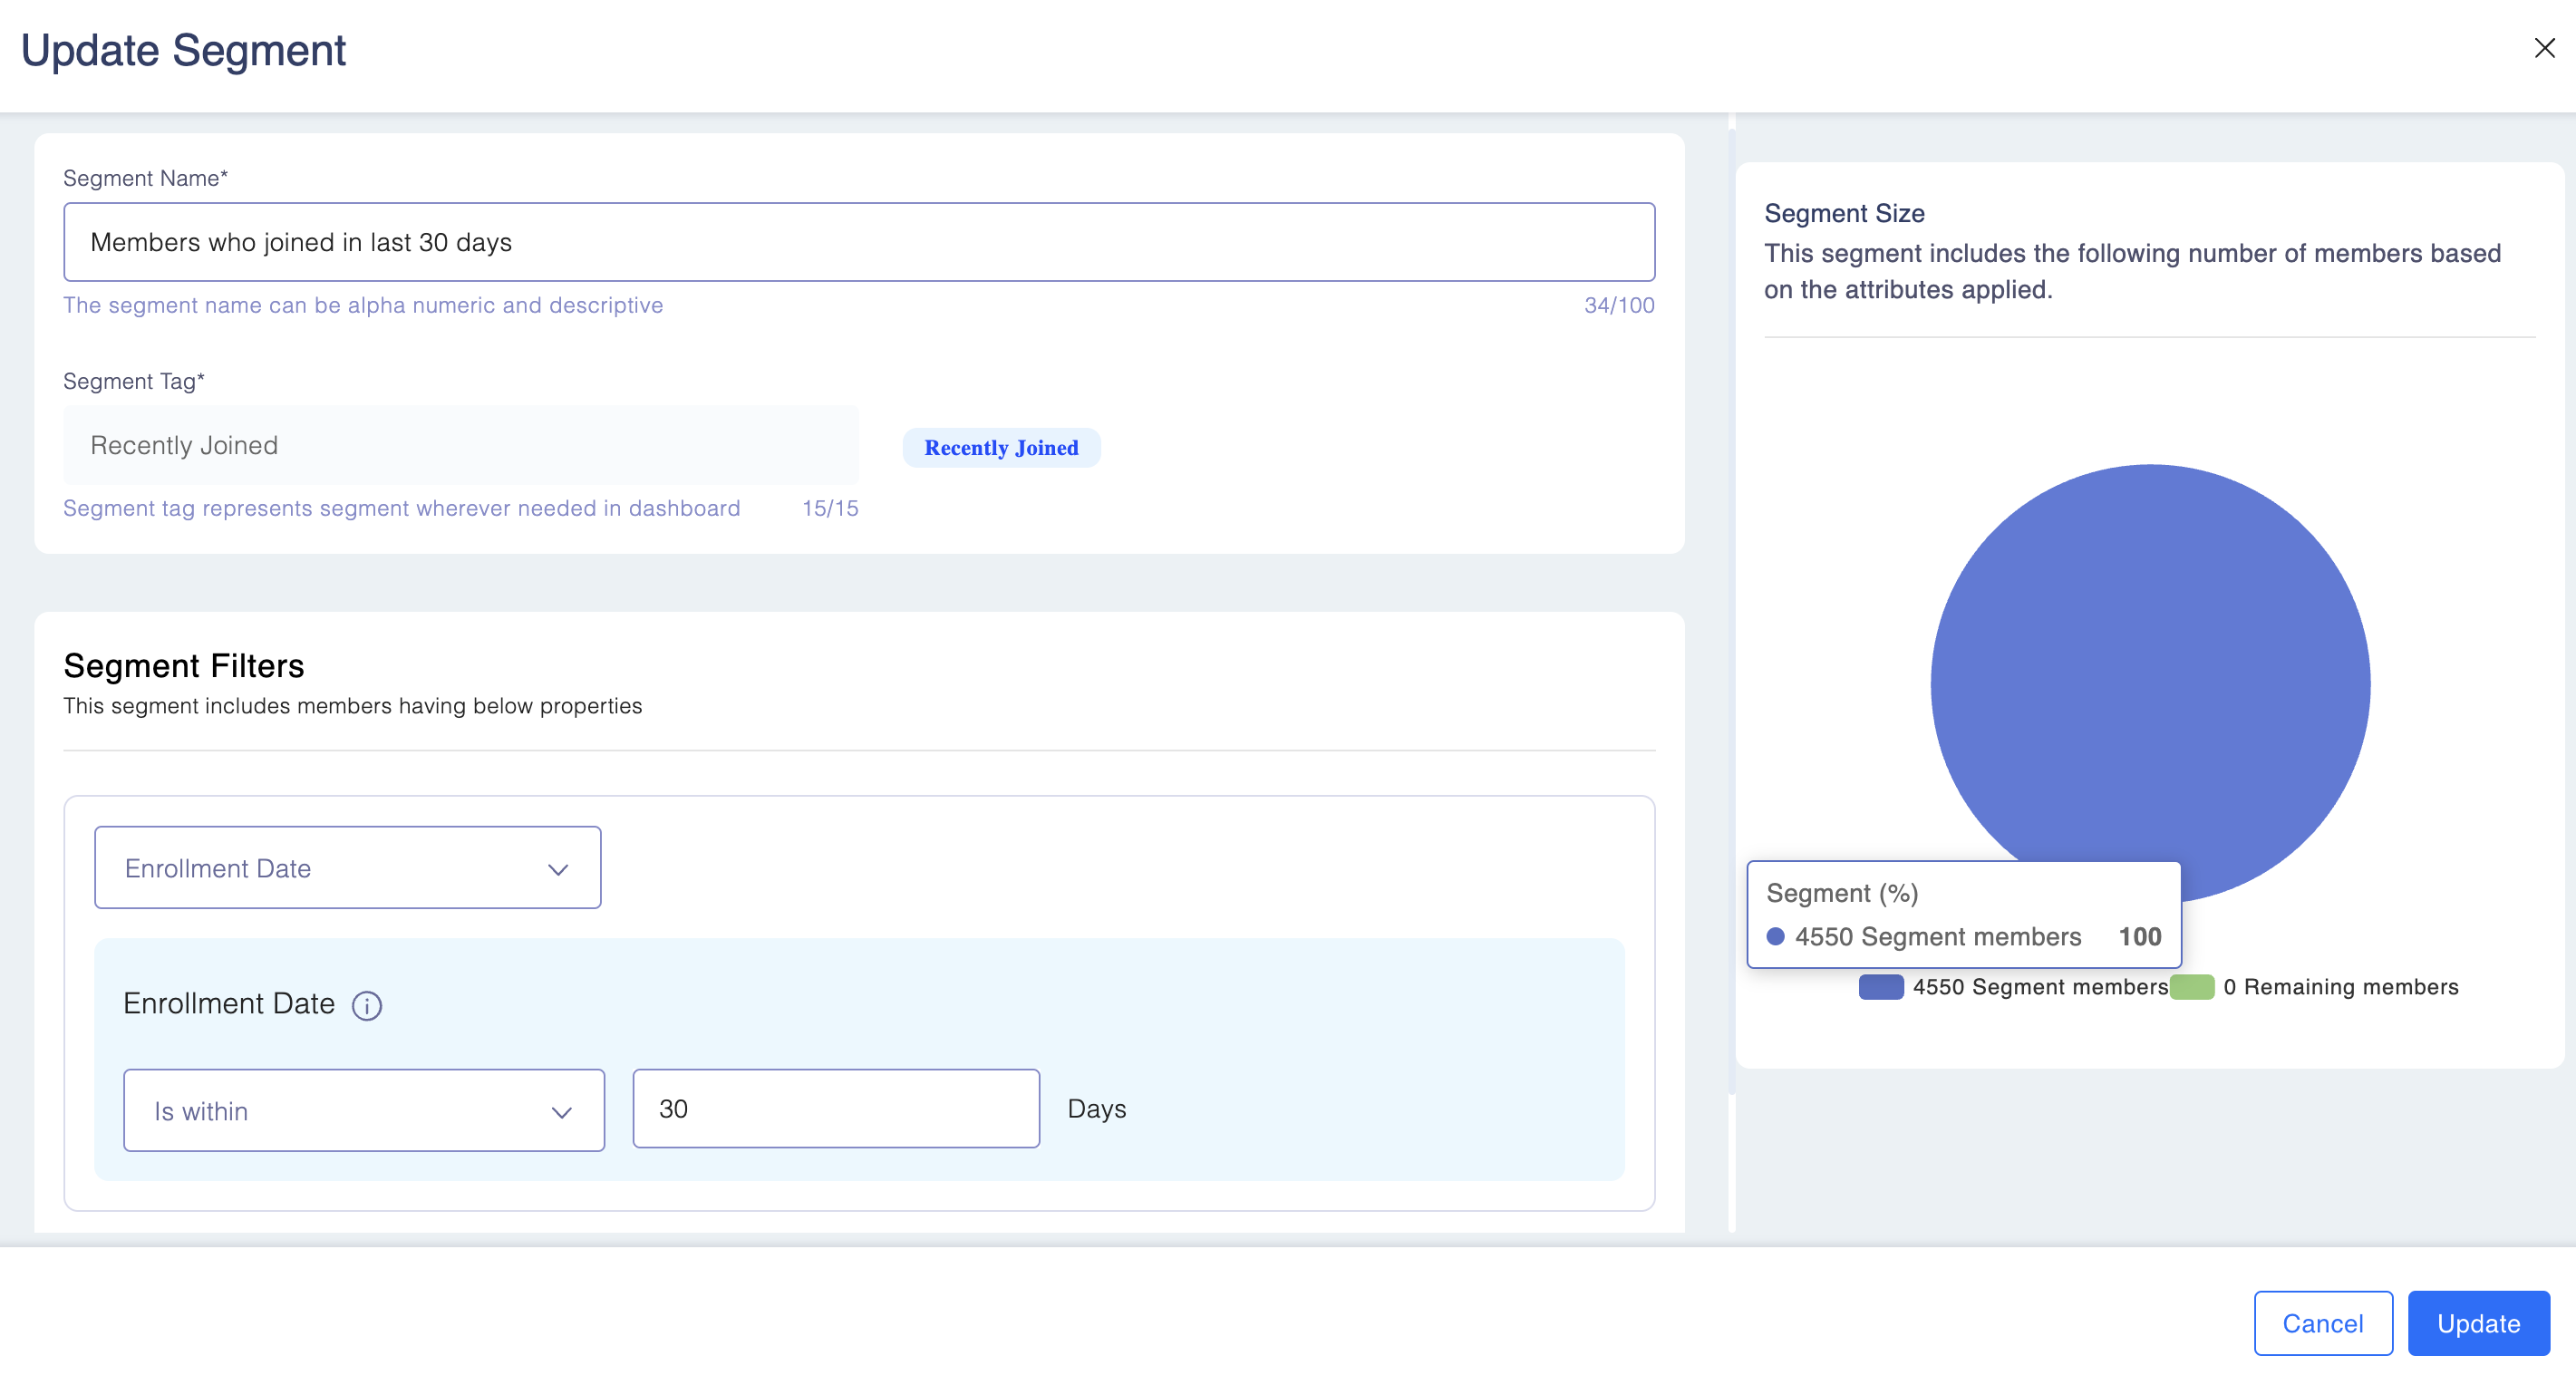
Step 1: Define the criteria for your new segment.
You can set criteria based on various factors like purchase history, demographics, and behaviour.
- Segment Name: This is the name of the segment, clearly identifying its purpose or logic. Best practices suggest using clear, descriptive names that explain the audience.
Example: "High Spenders - Last 90 Days" "Gold Tier Members in UAE" "Inactive Members - Last 6 Months"
For example: Let me demonstrate how segmentation works by creating a custom segment for "High Spenders in New York," where we'll target members with specific spending patterns in a particular location.
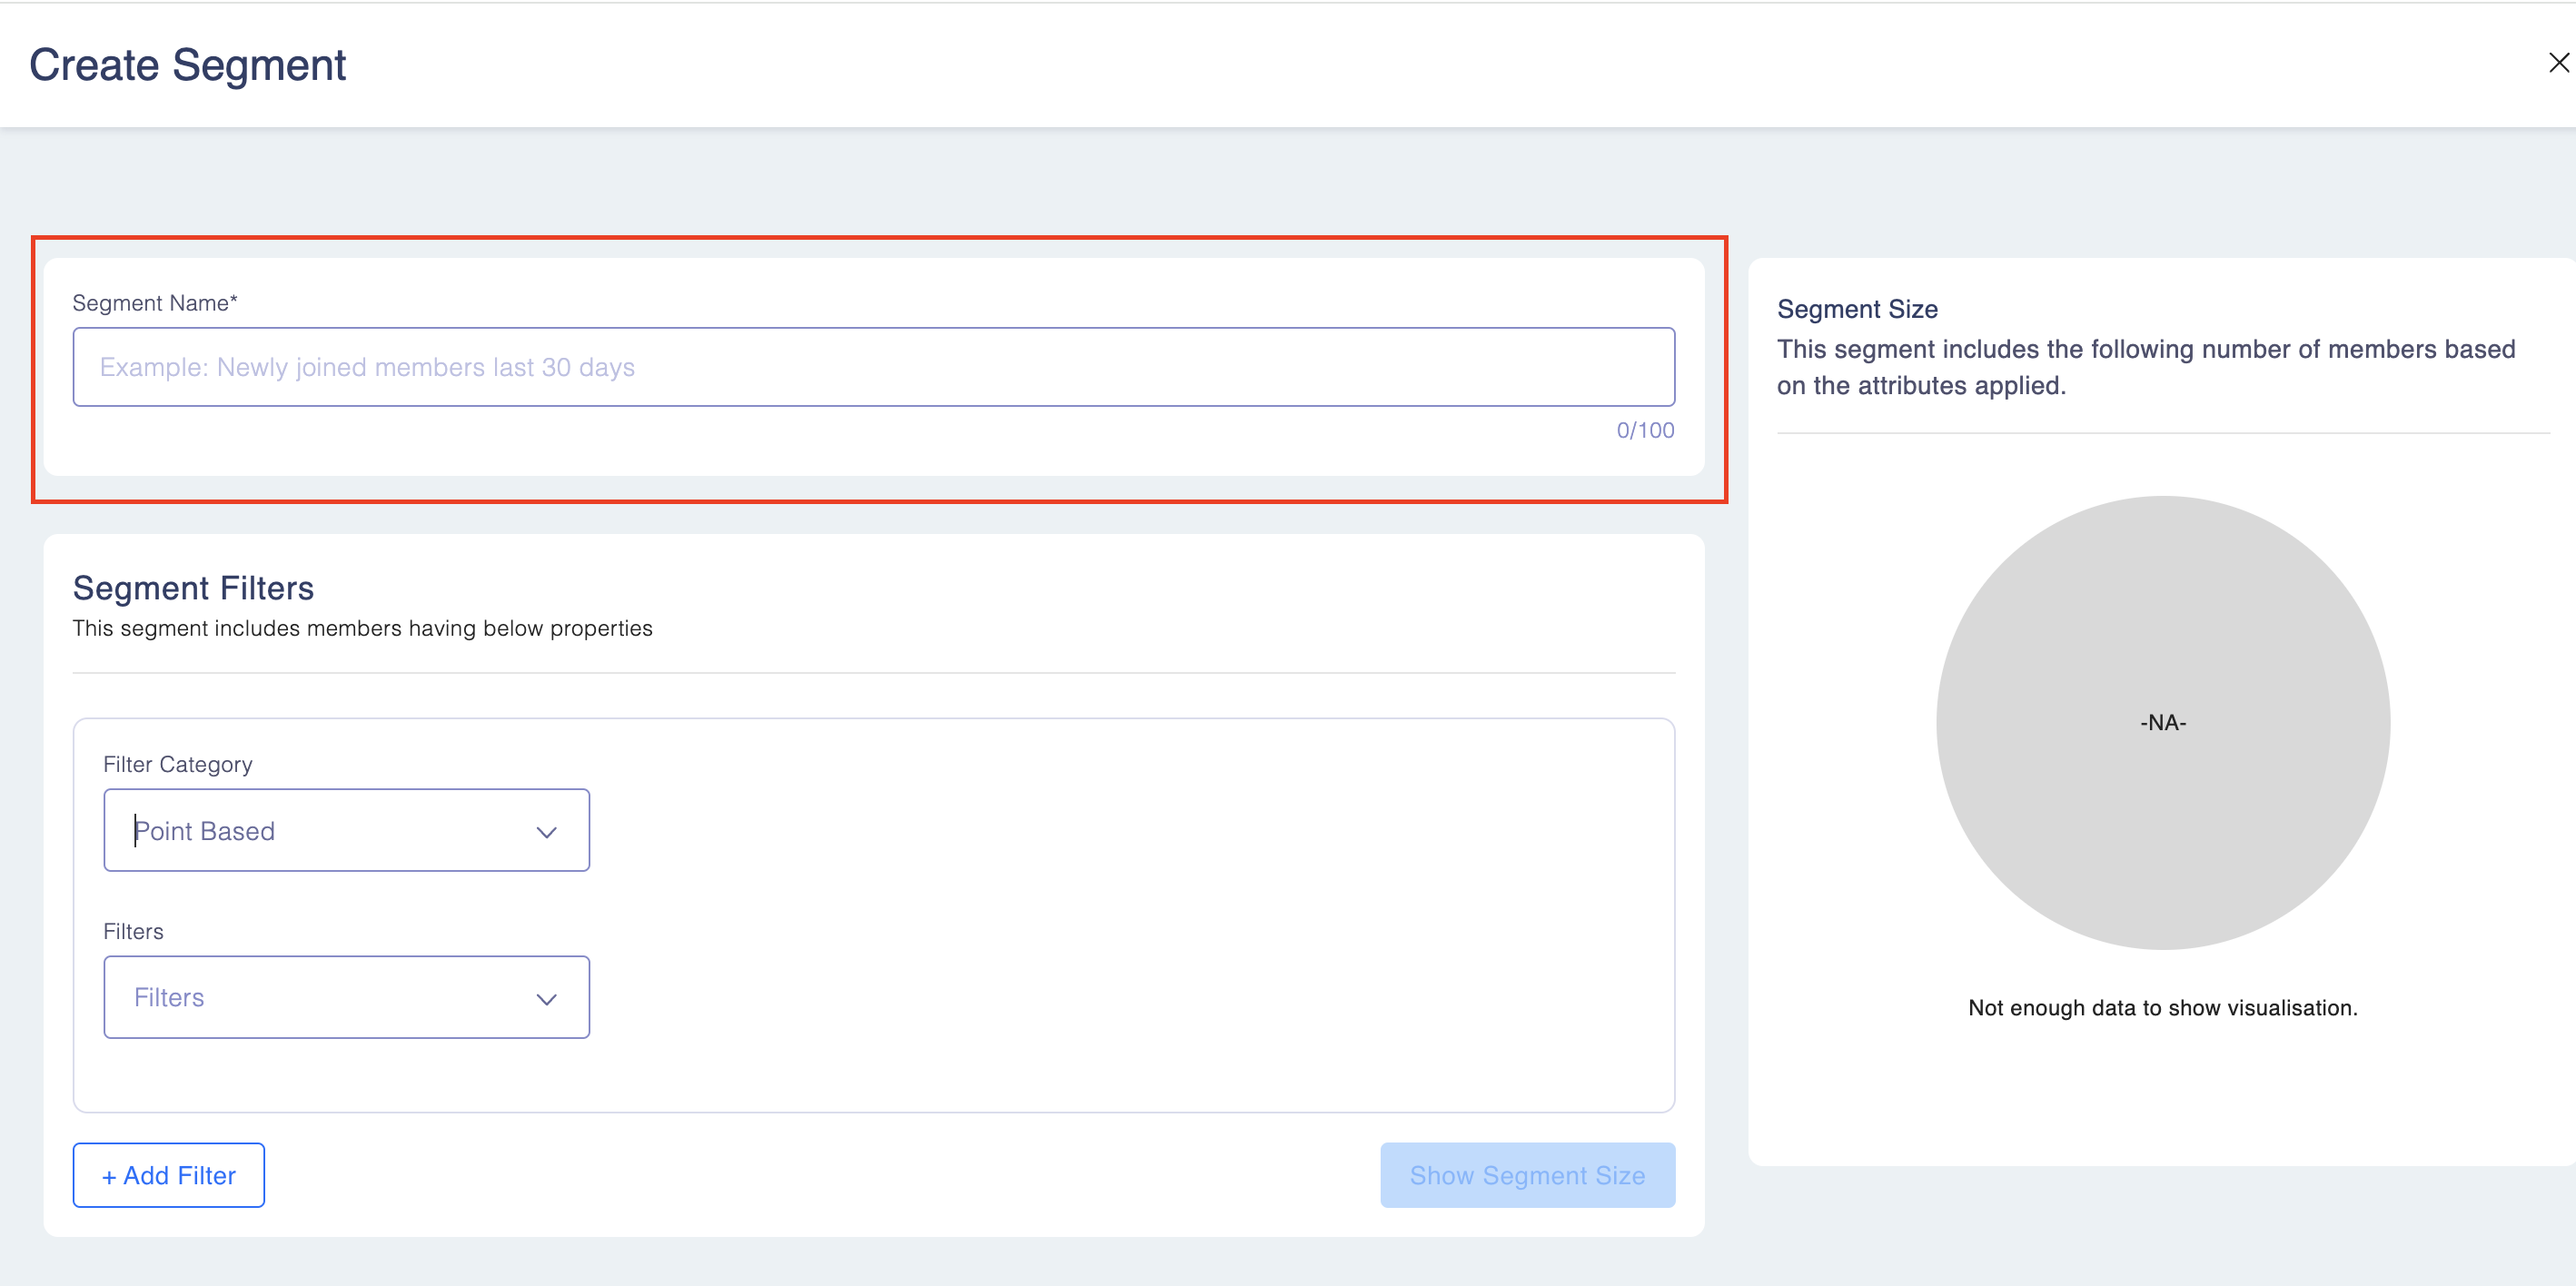
Step 2: Add Segment Filters
- Segment Filters: include members having the filtered and selected properties. Filter categories can be selected using the drop-down. There are five types here:
- Date Based
- Point Based
- Tier and Status Based
- Demographics
- Custom Attributes
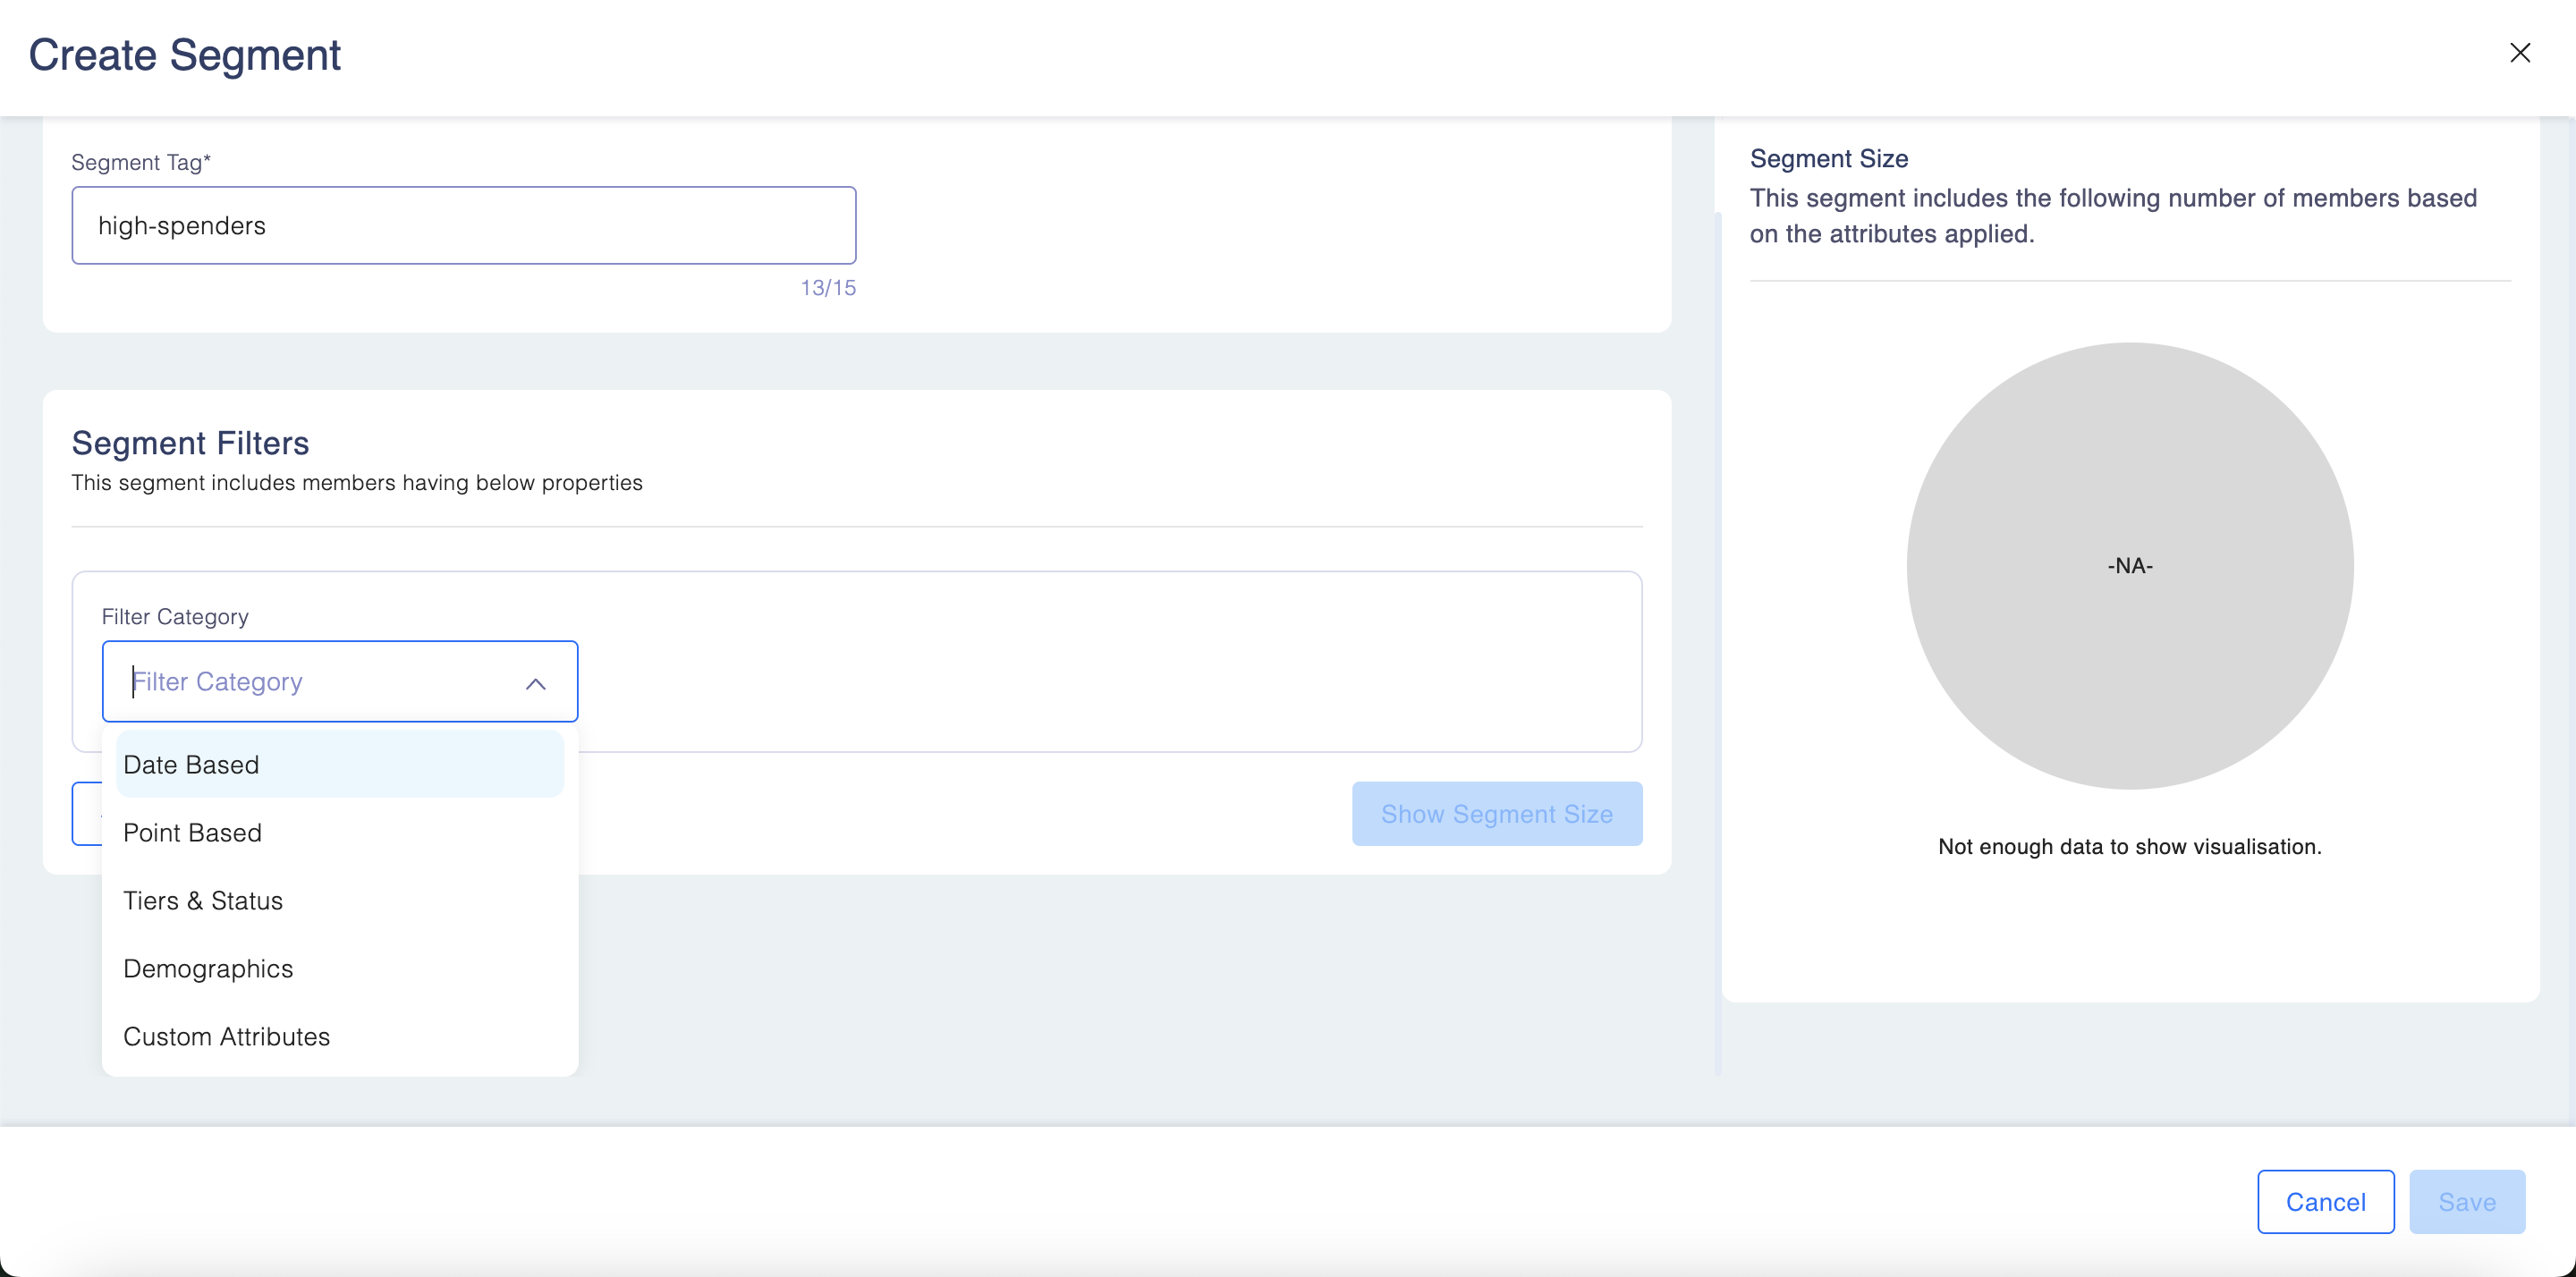
- Once you add the filter category, it will ask you to add further filters using drop down.
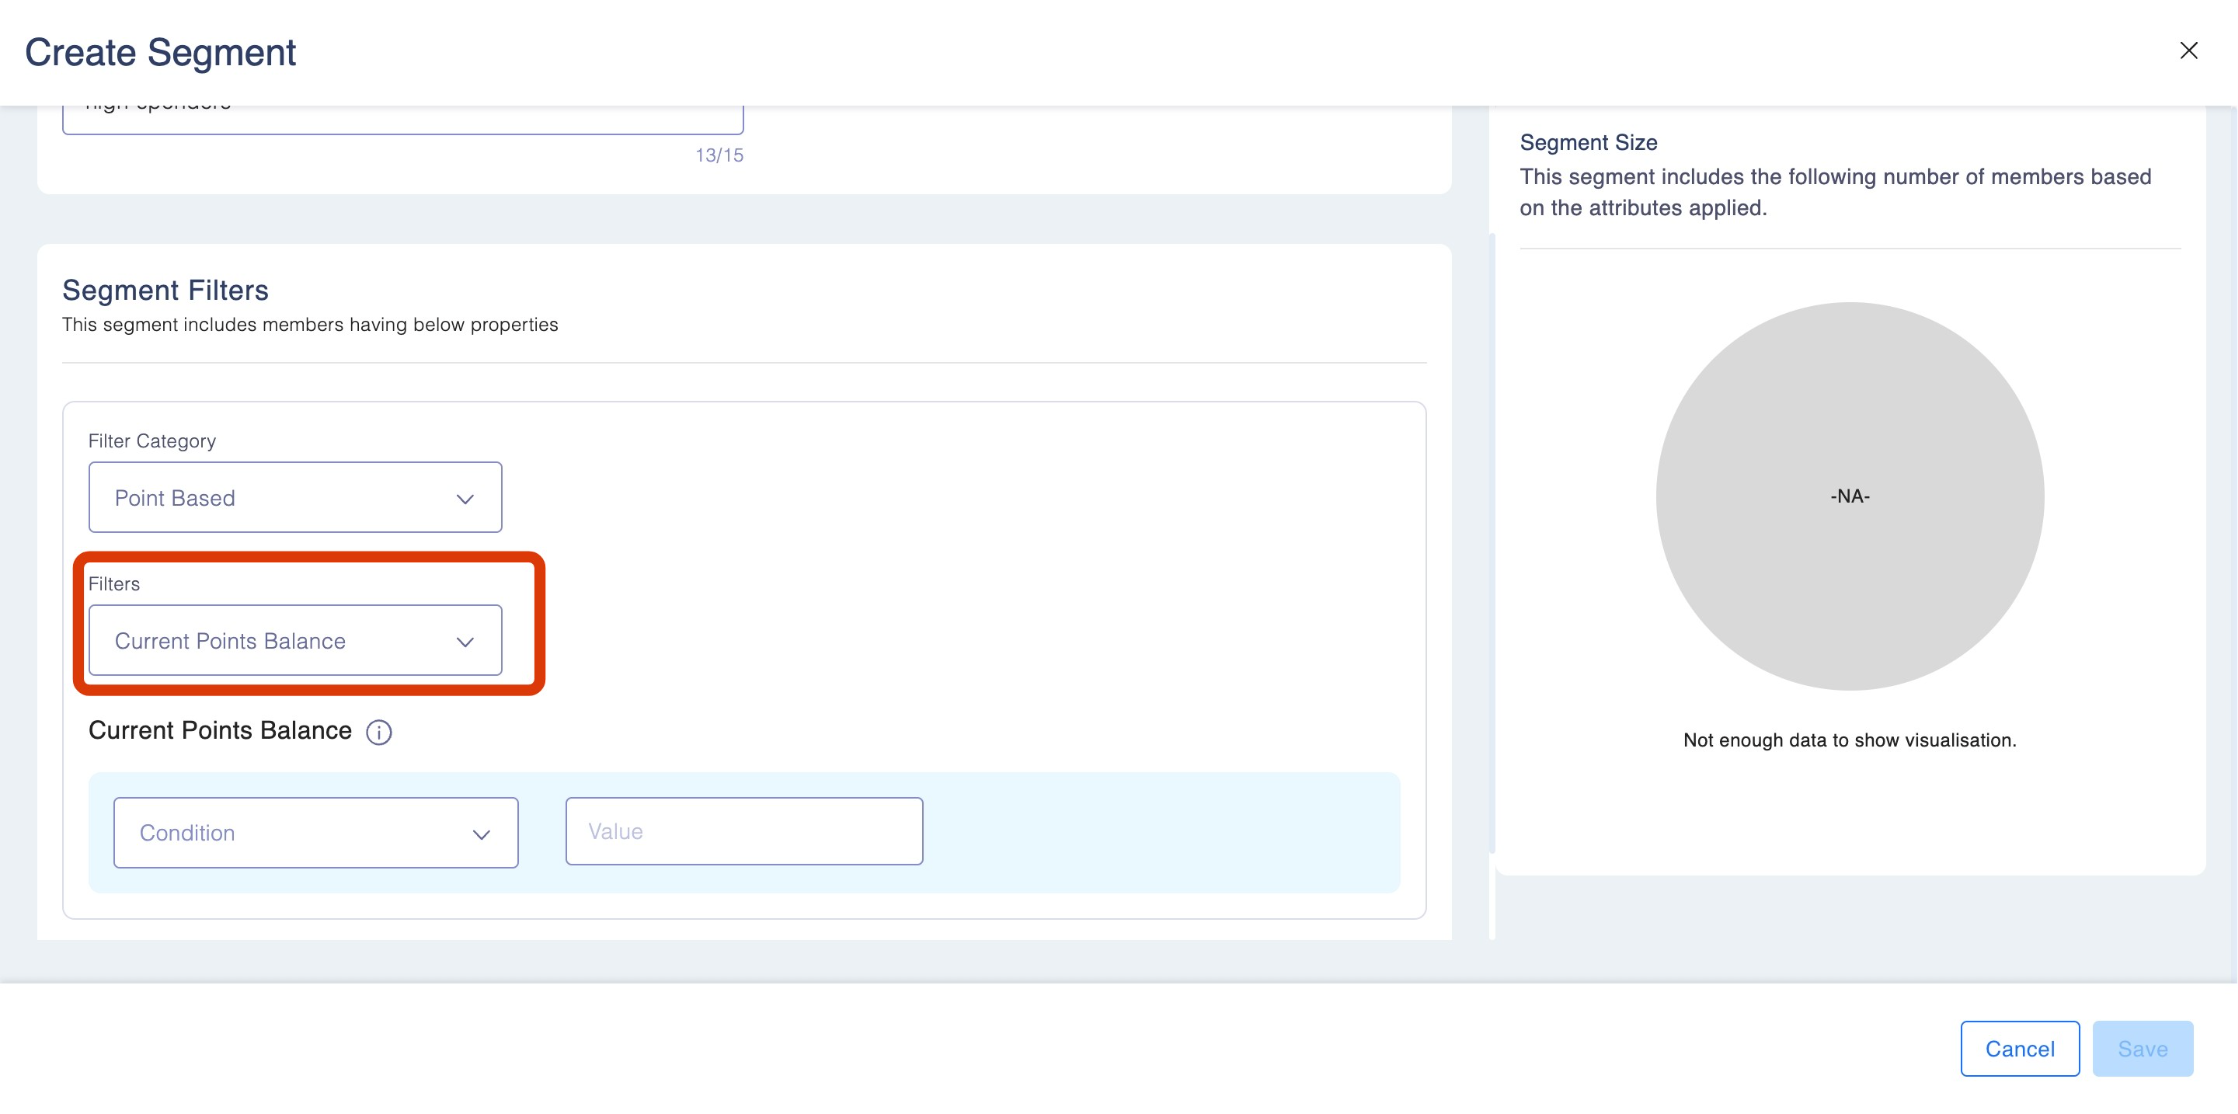
Add more details and click Save once done.
Step 3: You can add new filters using the "Add Filter" icon.
3.2 Follow the steps if you selected Manual Segment:
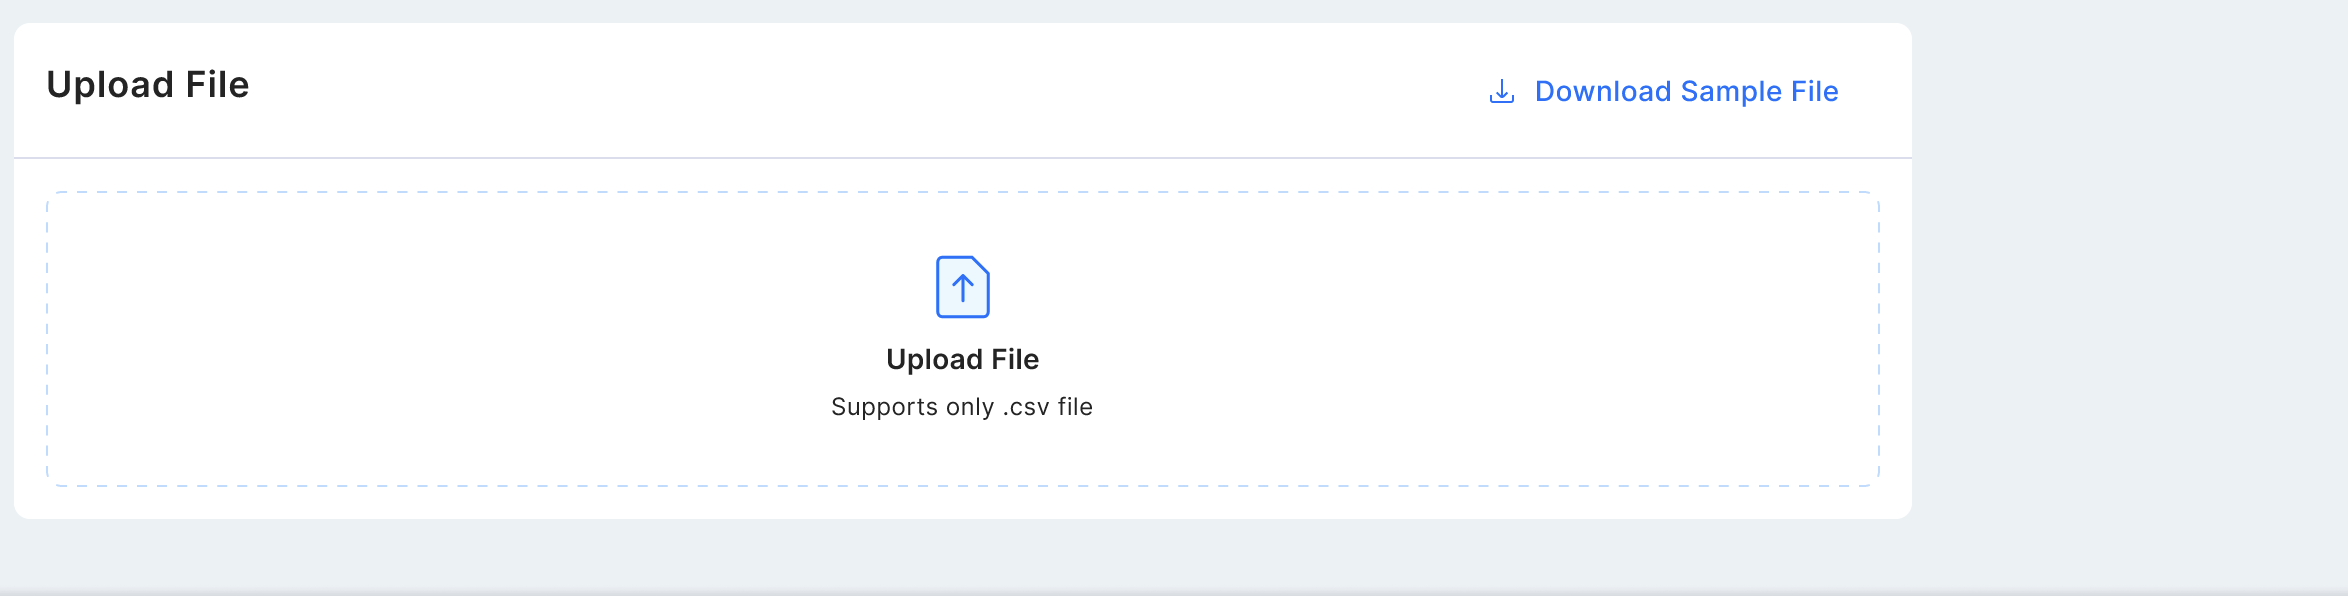
Step 1: Click the upload icon to add your CSV file. Once uploaded, you can view the segment size and details on the right. Use the download button to get a sample file for reference.
Step 2: Click "Save" when you're done. You’ll be taken to the Segments page, where your uploaded segment will appear alongside any manual segments.
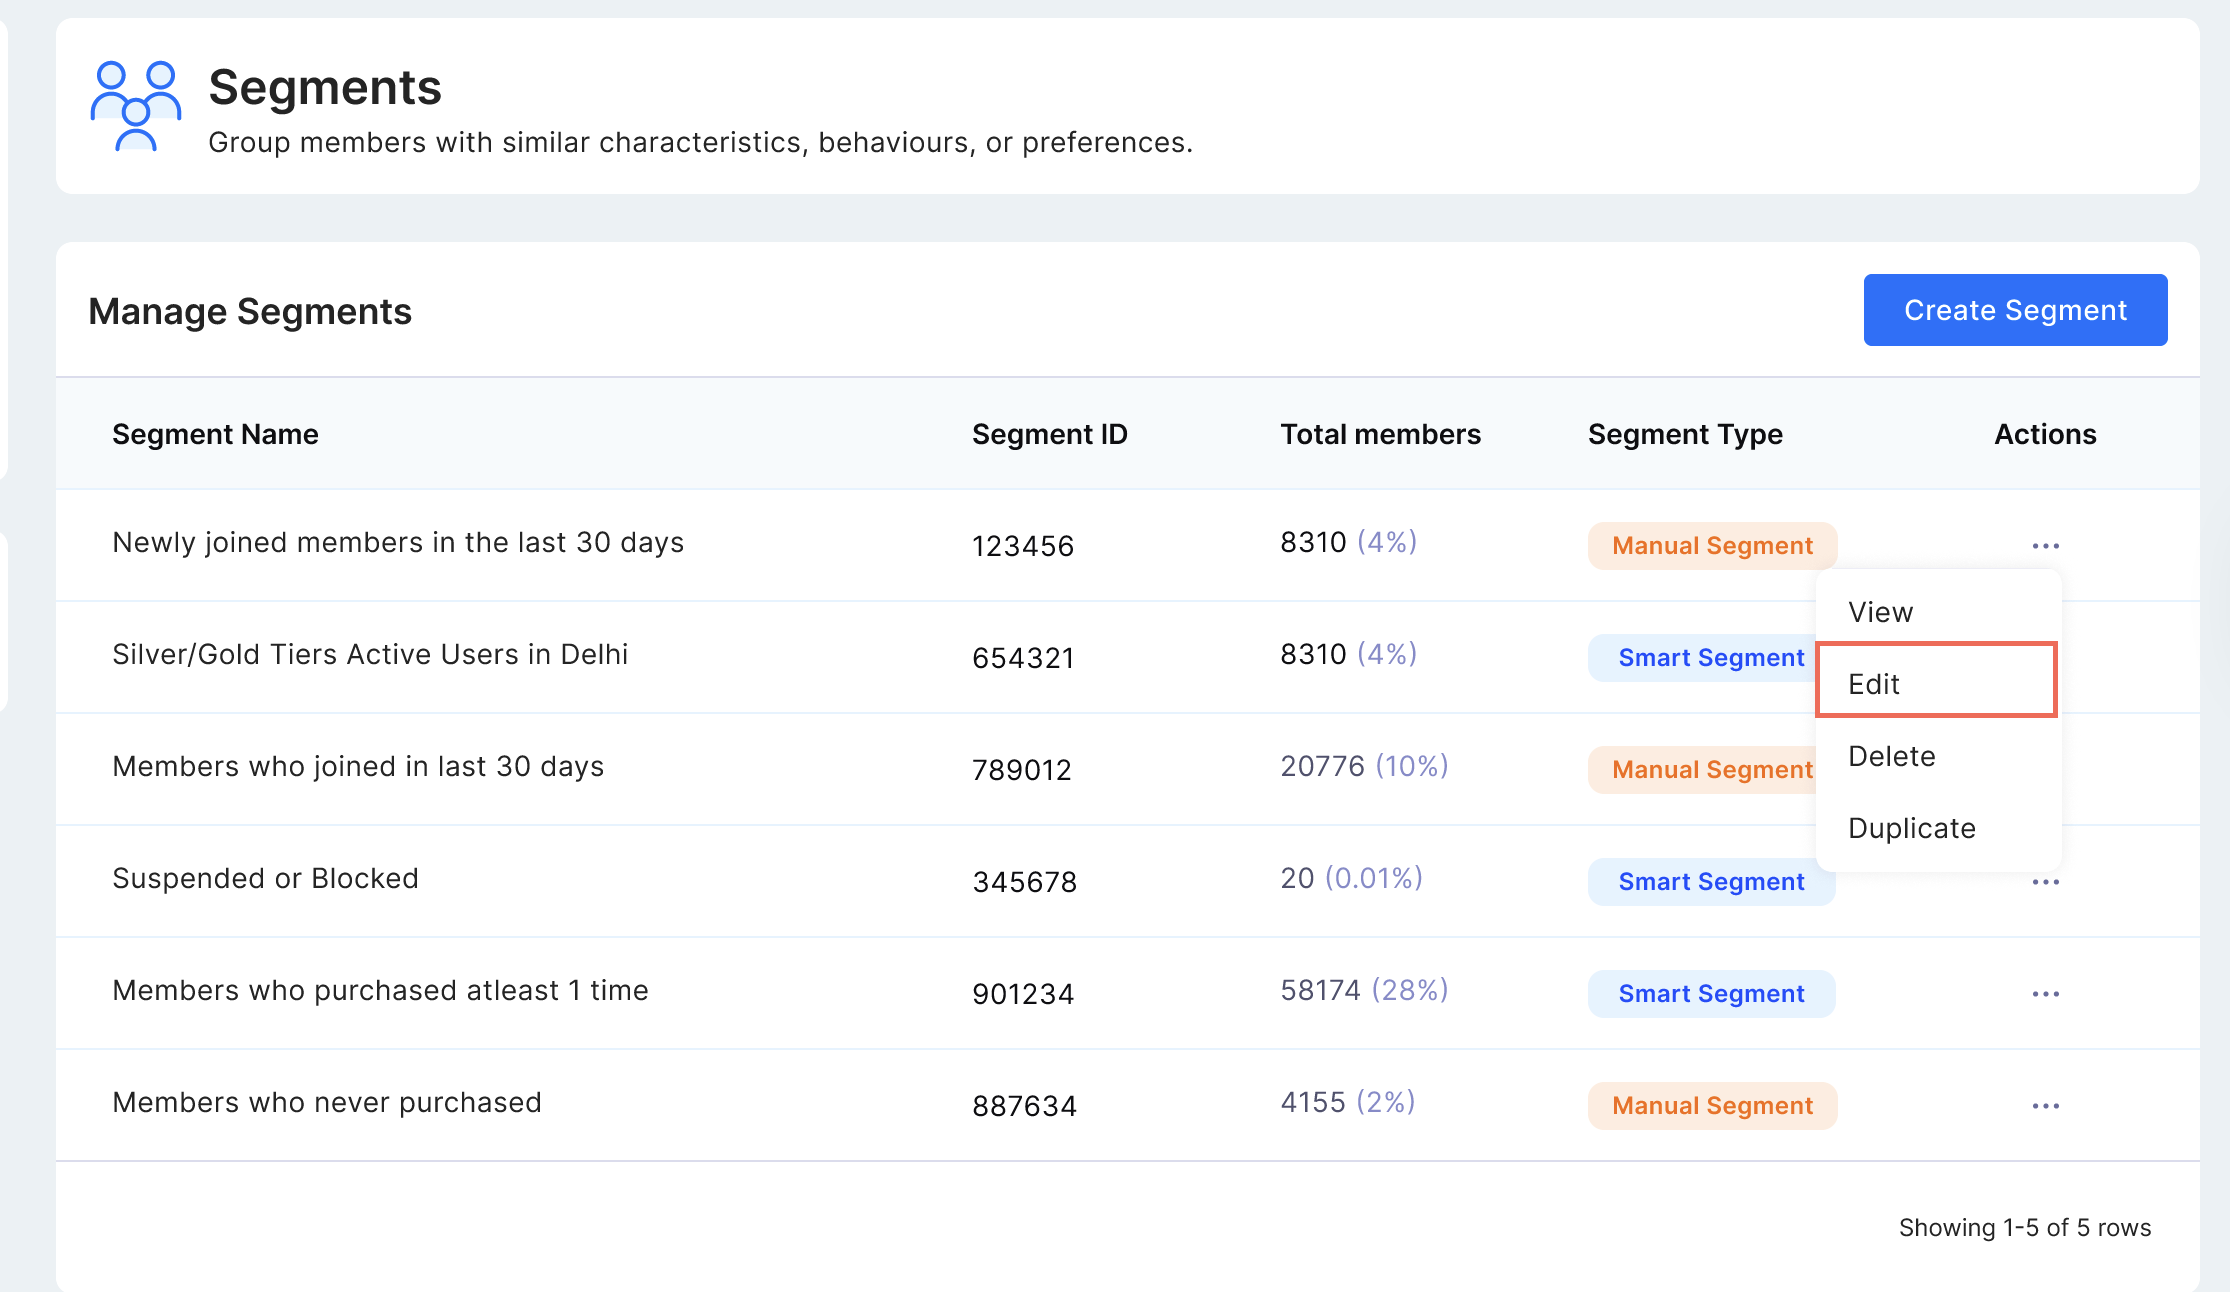
Editing a Smart Segment
Pre-requisiteOnly users with edit permissions can create the segments. Learn more about
permission in User Access Management here: User Access Management
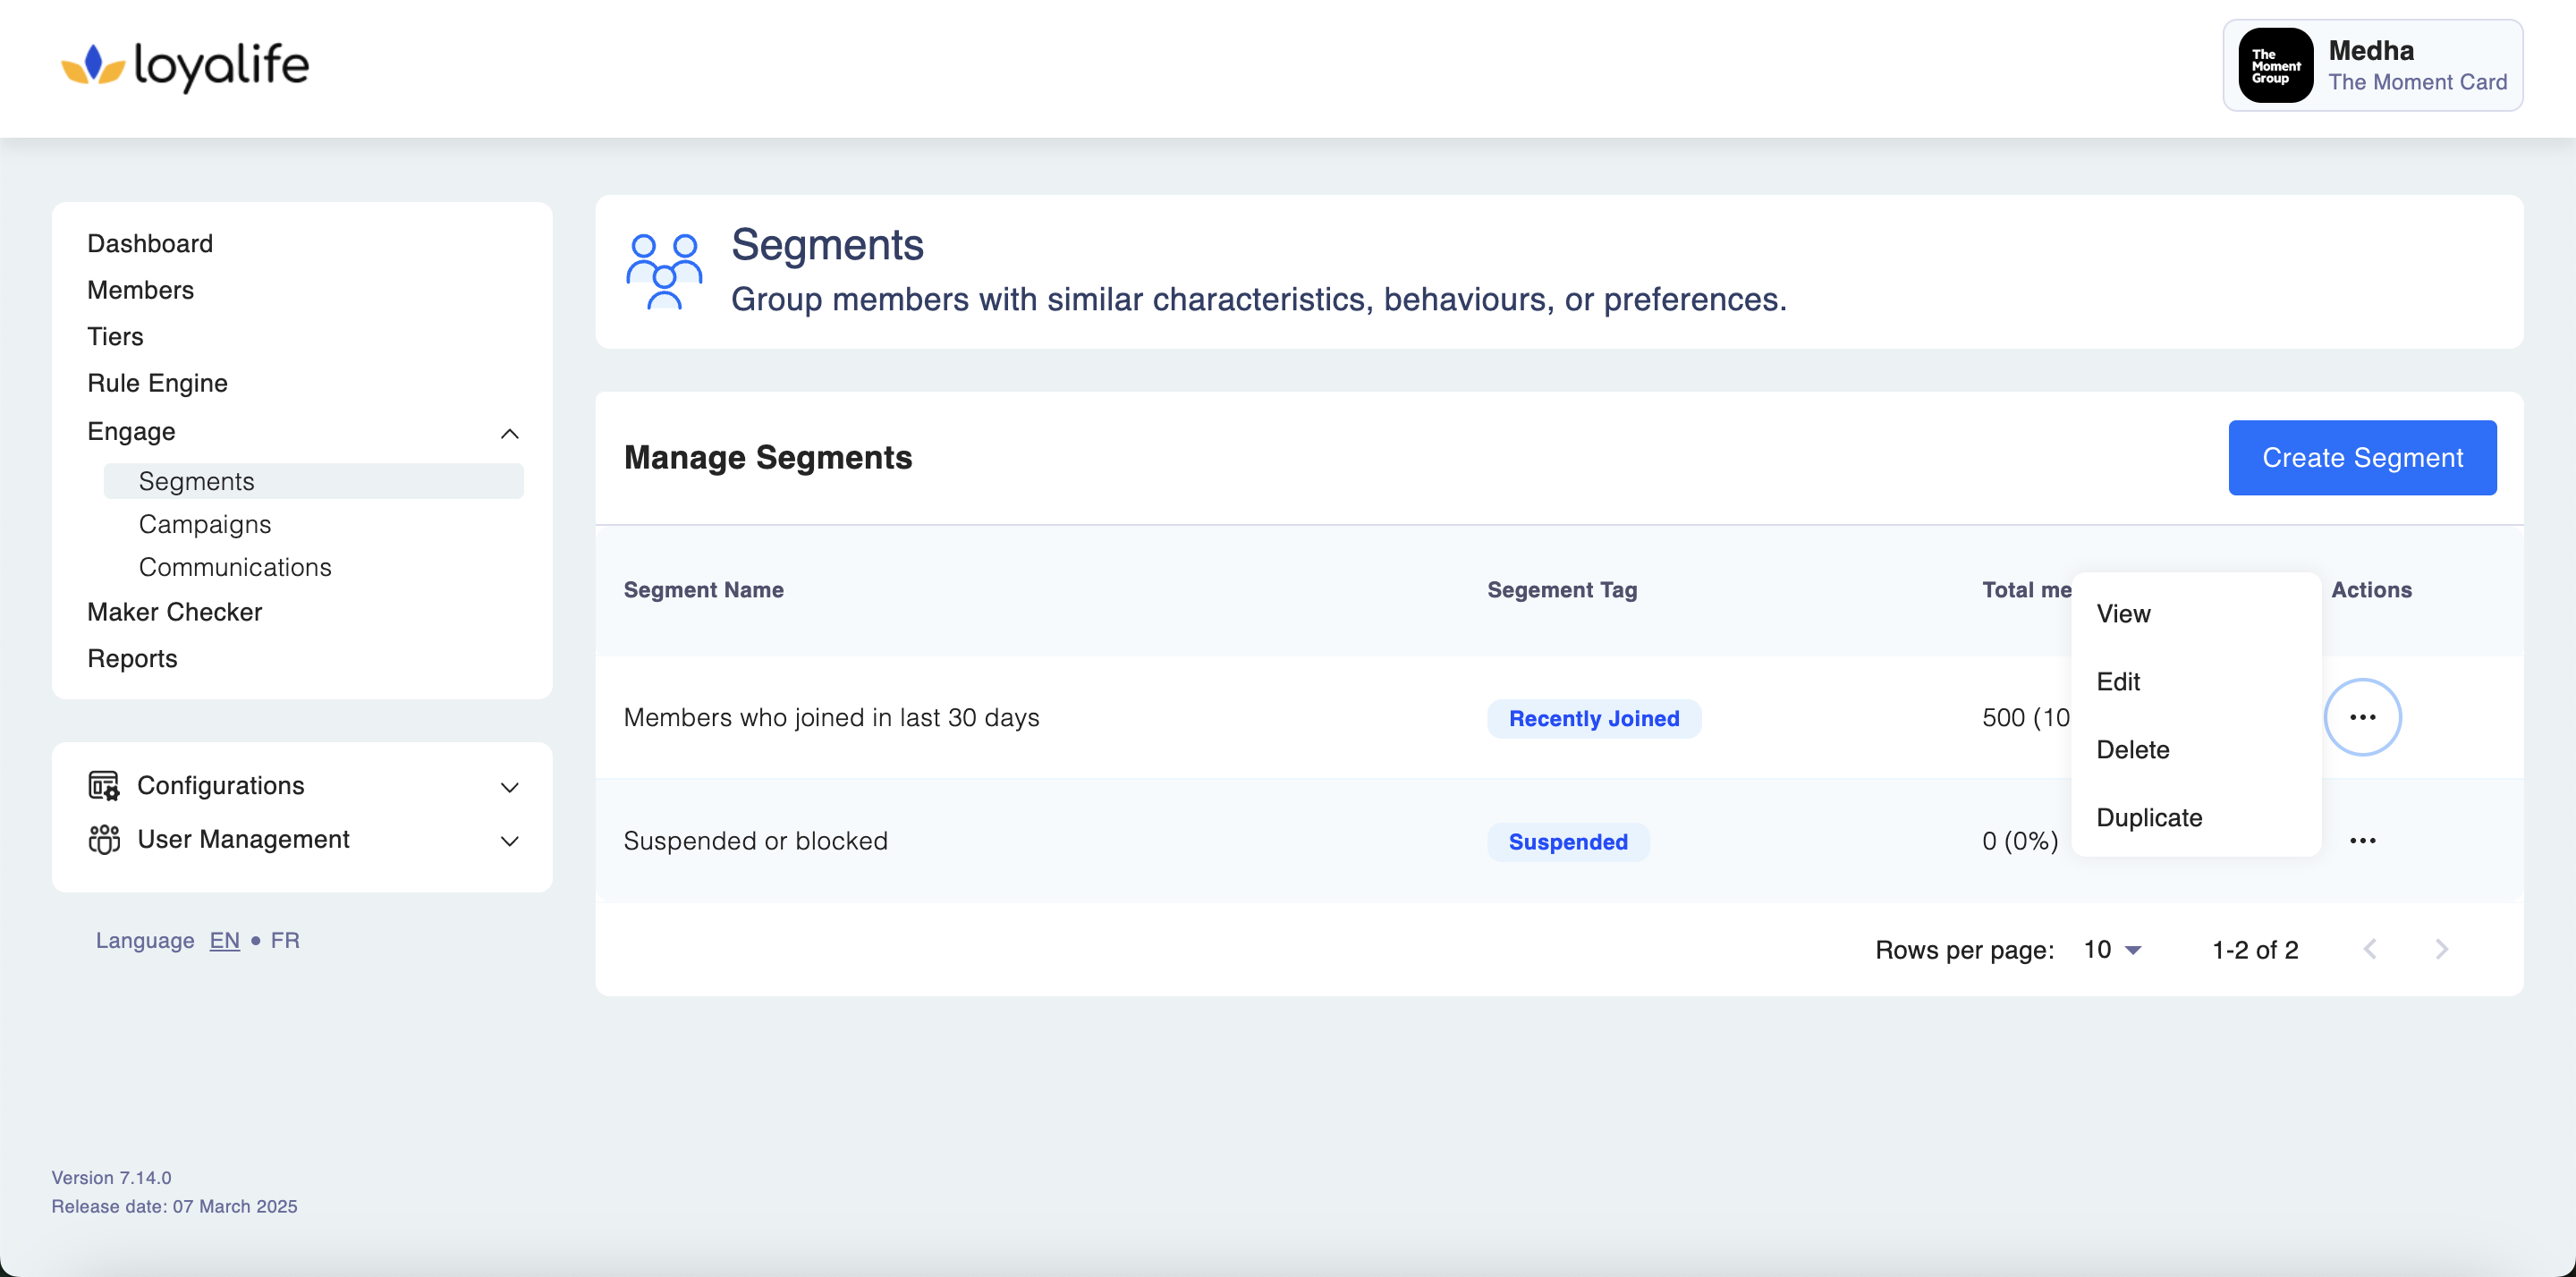
- Go to Engage ➝ Segments
- Locate the segment you want to edit and click on edit
- Modify the criteria or segment name as needed
- Save your changes
Editing a Manual Segment
- Go to Engage ➝ Segments
- Locate the segment you want to edit and click on edit
- Choose the appropriate option. The system supports two update modes for manual segments:
- Append Mode:
- Users can update manual segments by adding new members
- The system displays counts for both existing and newly added members
- Replace Mode:
- Users can update manual segments by replacing existing members
- The system displays counts for removed existing members and newly added members
- Once the option is selected reupload the file using the **upload icon **and click "Save".
- Append Mode:
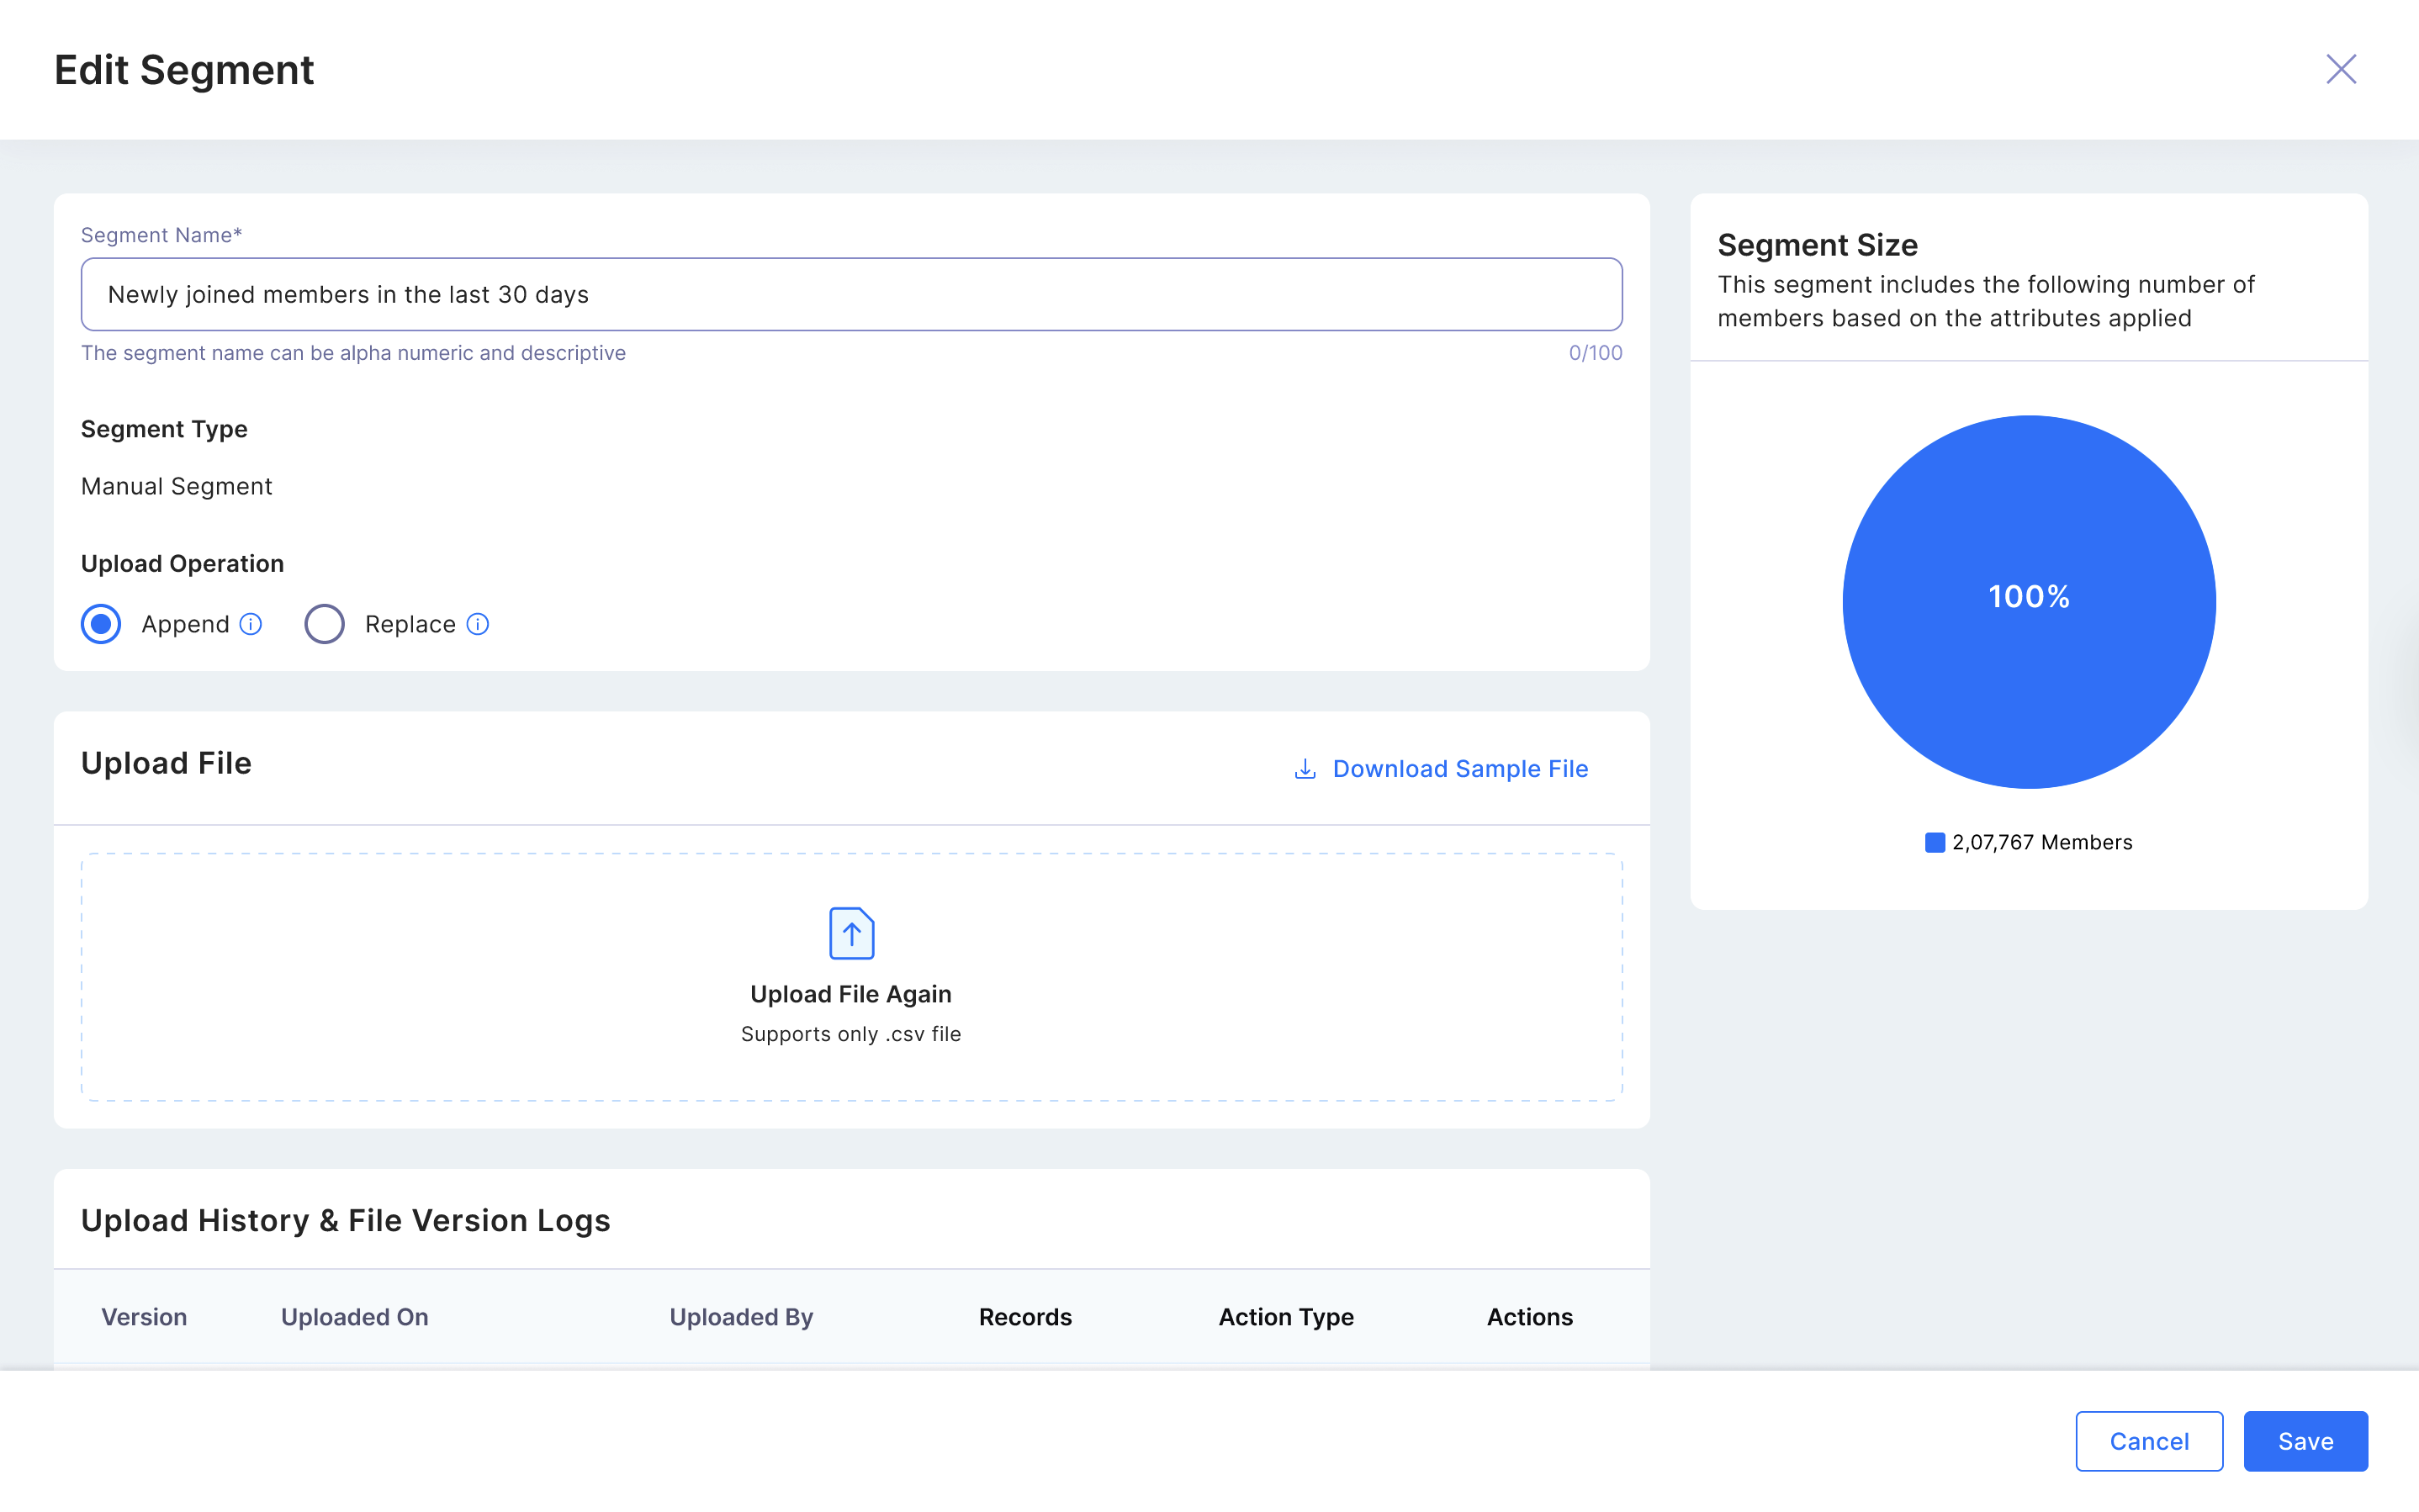
- You can view the Upload History and Version Logs on this page, as shown below.

- Users receive email notifications on successful, failed and Partial success cases.
- Users can upload CSV files containing both existing and non-existing members, with existing members being successfully inserted into the segment.
- Manual segment CSV file uploads are not captured in the audit trail.
- Users can delete manual segments, but deletion is restricted when the segment is actively used in campaigns, preventing accidental removal of segments in use.
For any feedback or question reach out to [email protected]
Downloading Members from a Segment
Users with segment view access can download the member list directly from the segment detail page.
To download:
Step 1: Navigate to Engage → Segments.
Step 2: Click on a segment to open the detail view.
Step 3: Click the three-dot menu (⋮) in the top-right corner.
Step 4: Select Download Members.
A CSV file will download automatically containing the following:
| Column | Description | Example |
|---|---|---|
member_reference_id | CIF or Reference ID | CIF123456789 |
segment_entry_date | When the member entered the segment | 2026-01-15 10:30:00 |
File naming format: segment_{segment_id}_{YYYYMMDD_HHmmss}.csv
Example: segment_42_20260128_134500.csv
Note: No additional permission is required. Any user who can view a segment can download its members. For large segments, the file begins downloading immediately and streams progressively — there is no row limit. Larger segments will take longer to complete (e.g. 1M rows ≈ 1–2 minutes).