Manually add/remove points
Here's how you can manually credit and debit points to a member's account.
Pre-requisitesYou'll need access to add/remove points to perform this action.
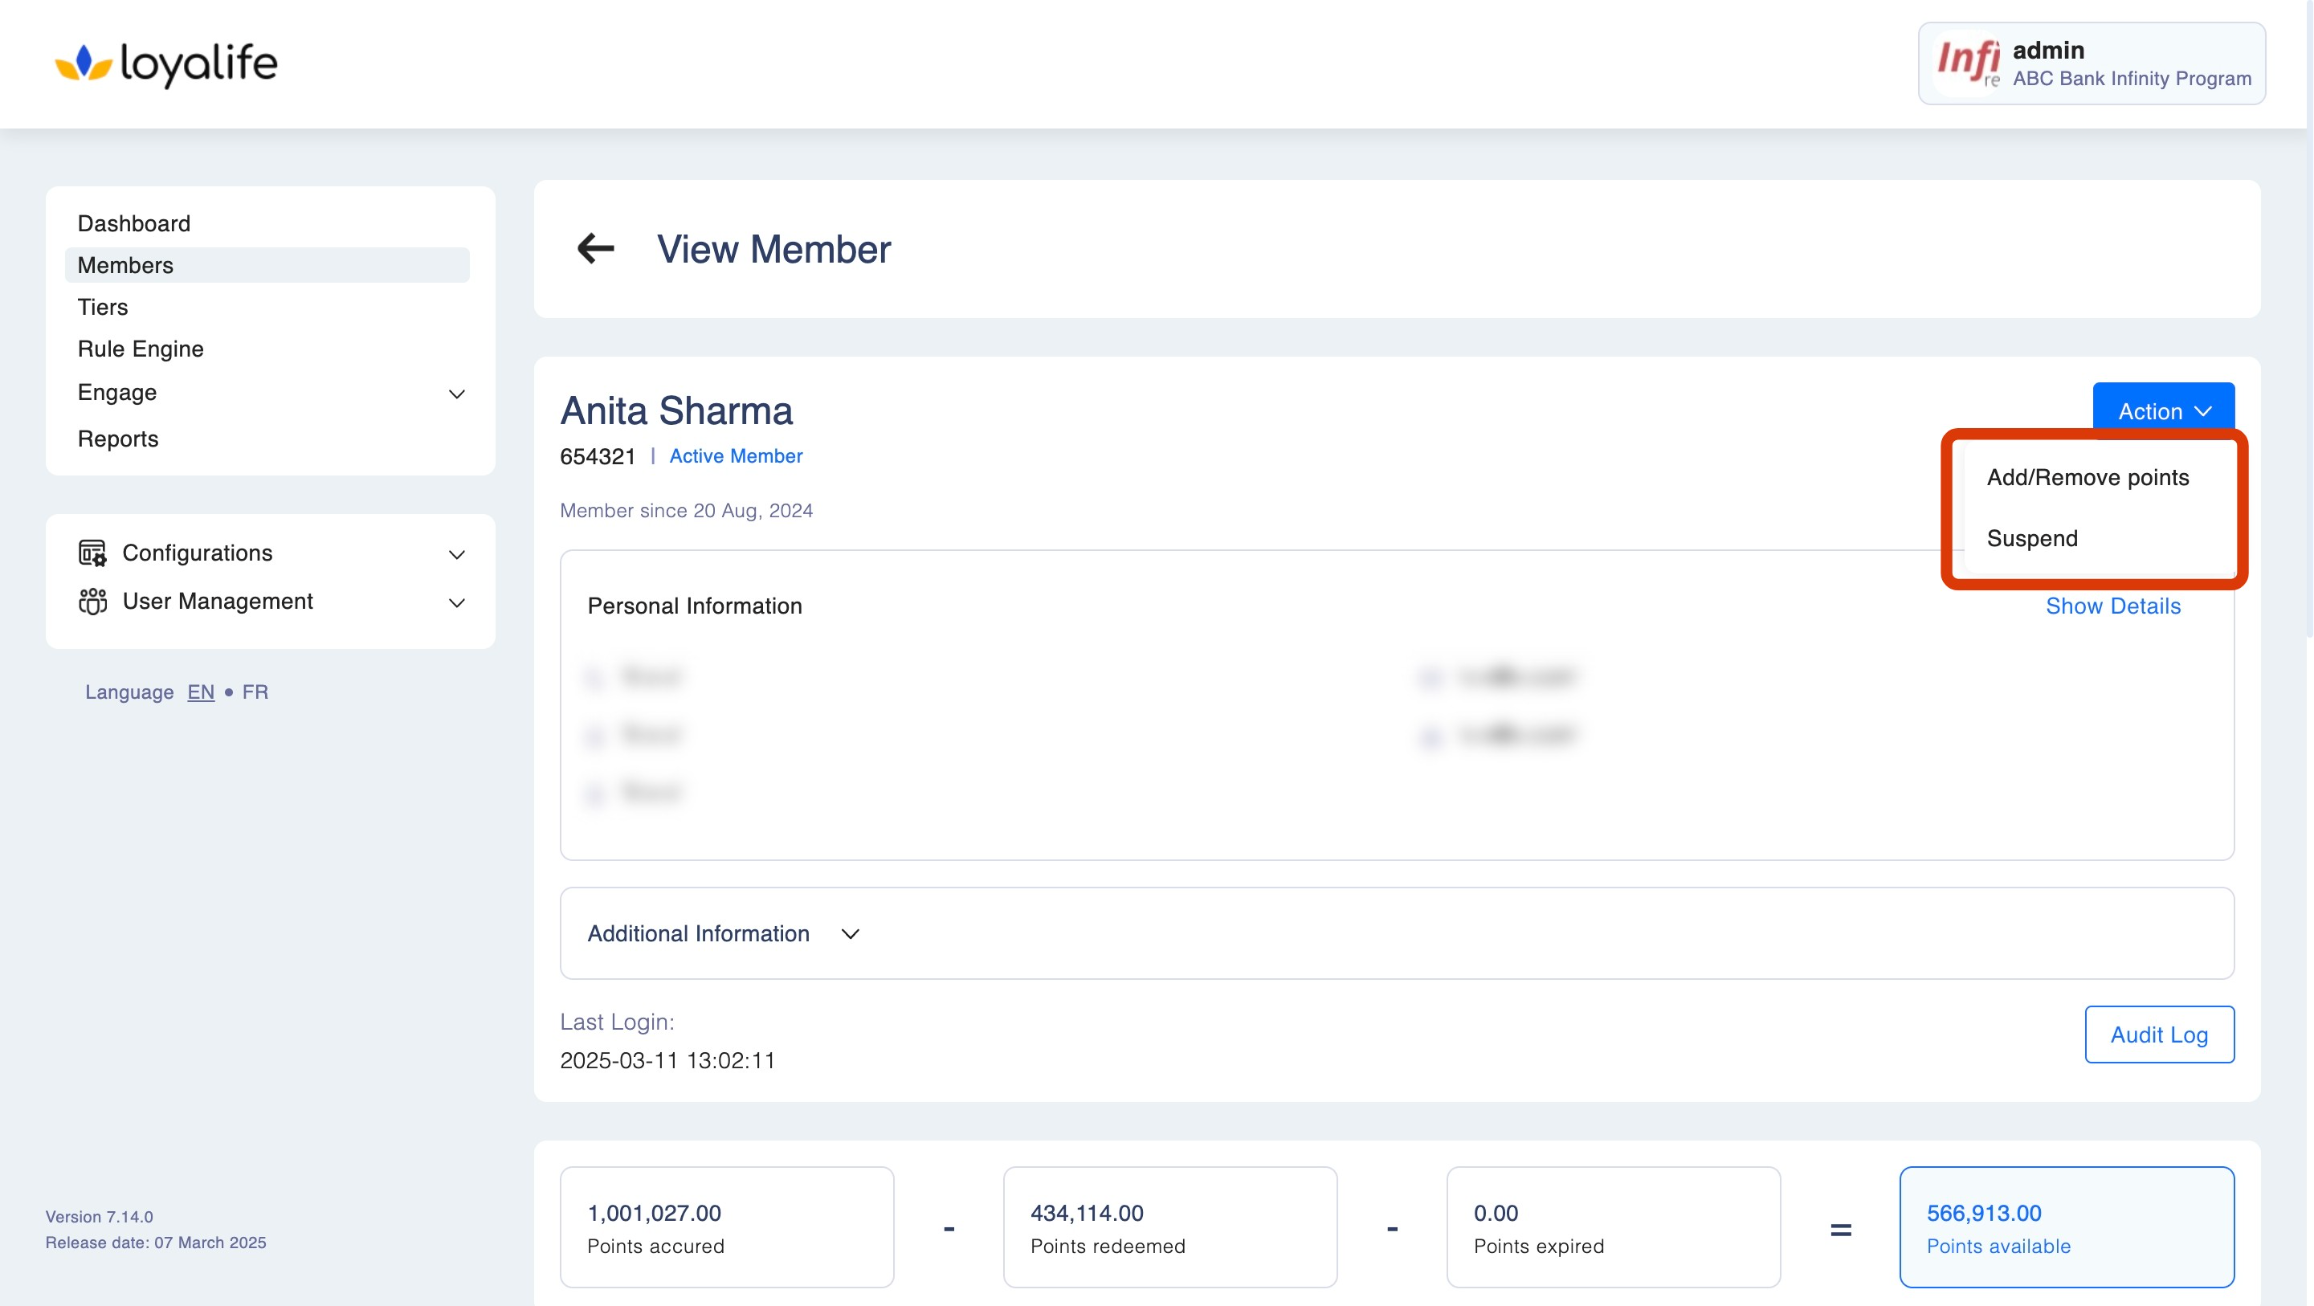
Step 1: To credit or debit points, access a specific member account by navigating to Members → Search Members → Member Profile. Click on Action and select Add or Remove Points.
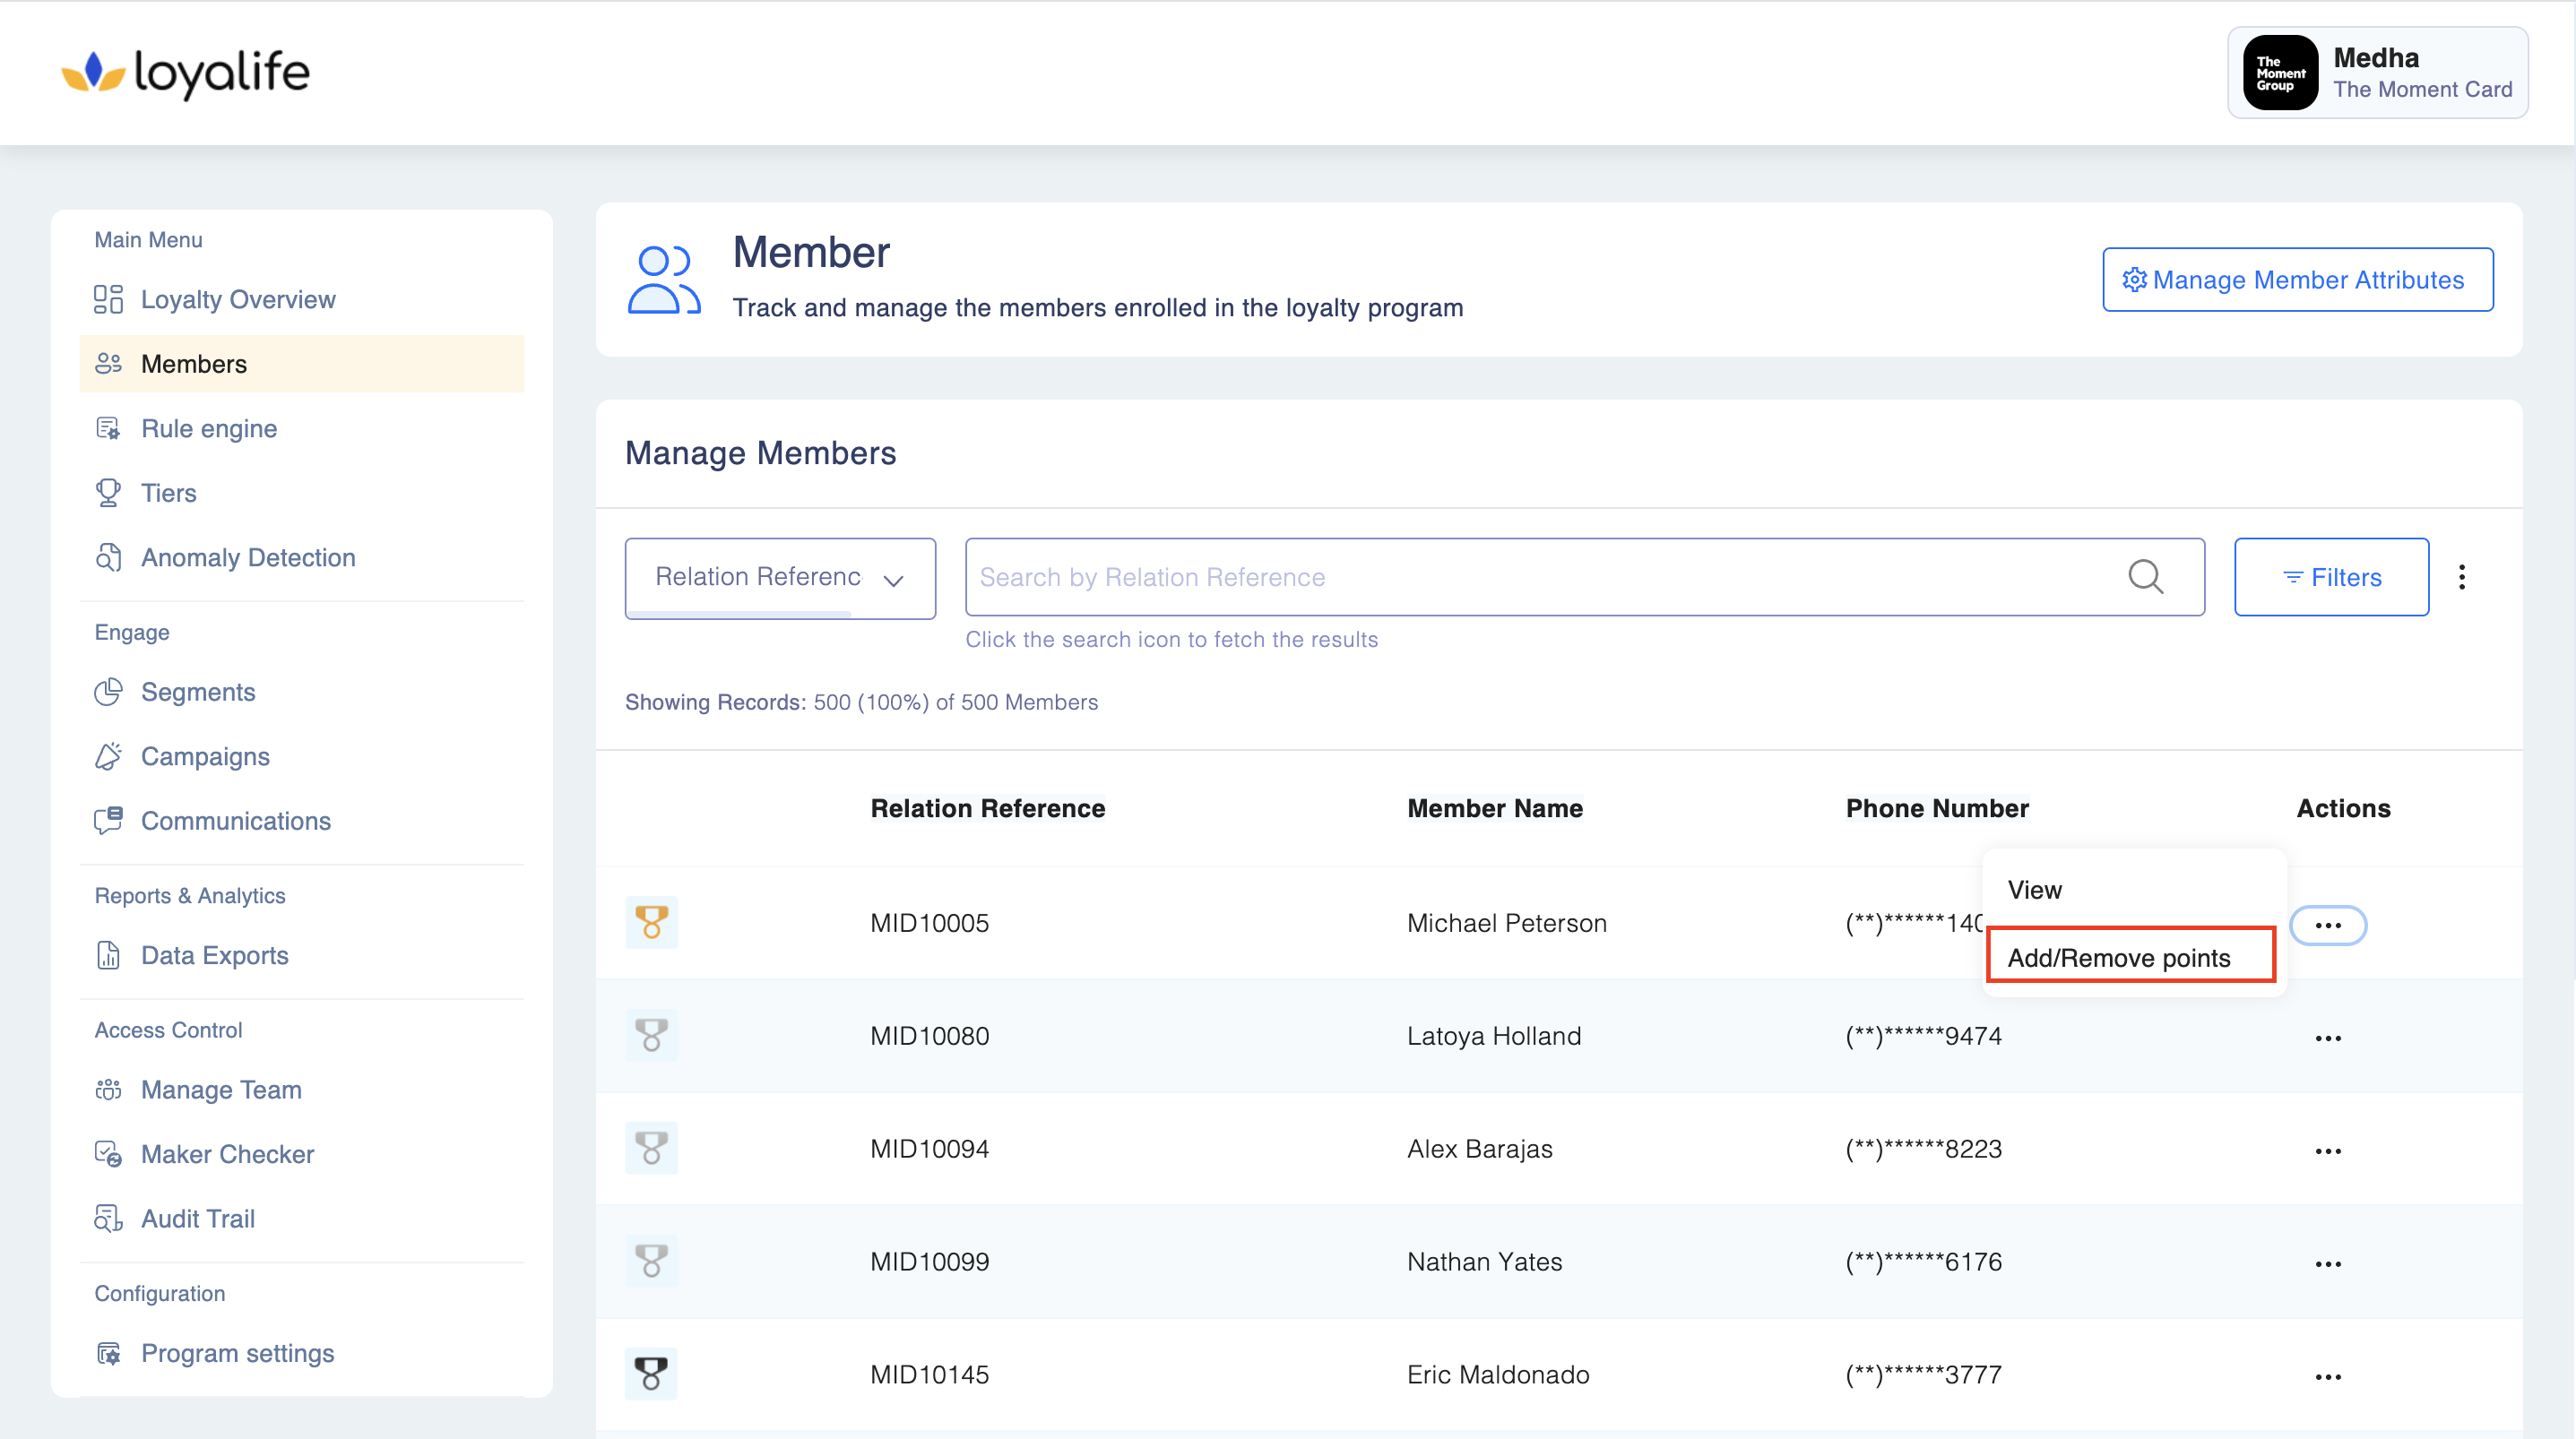
Step 2: Alternatively, you can click on View and select Add/Remove Points from the actions tab.
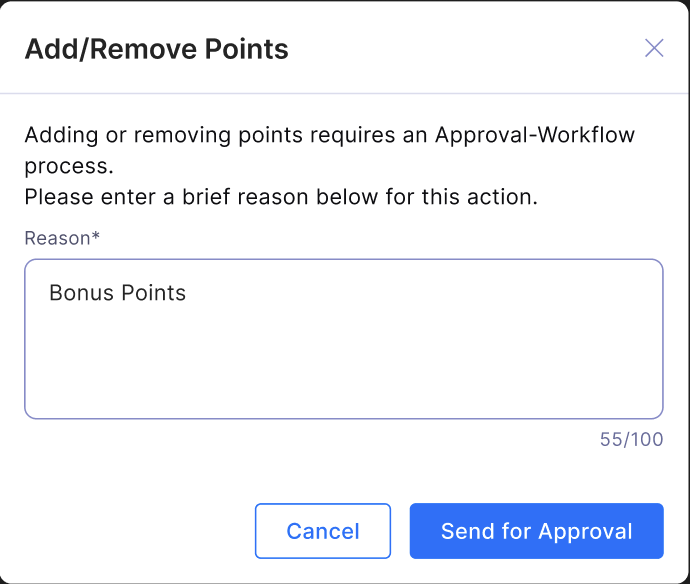
Keep in mindA two-step approval process may apply in case you have Maker Checker enabled. Read the Maker Checker documentation for more info here: Maker Checker
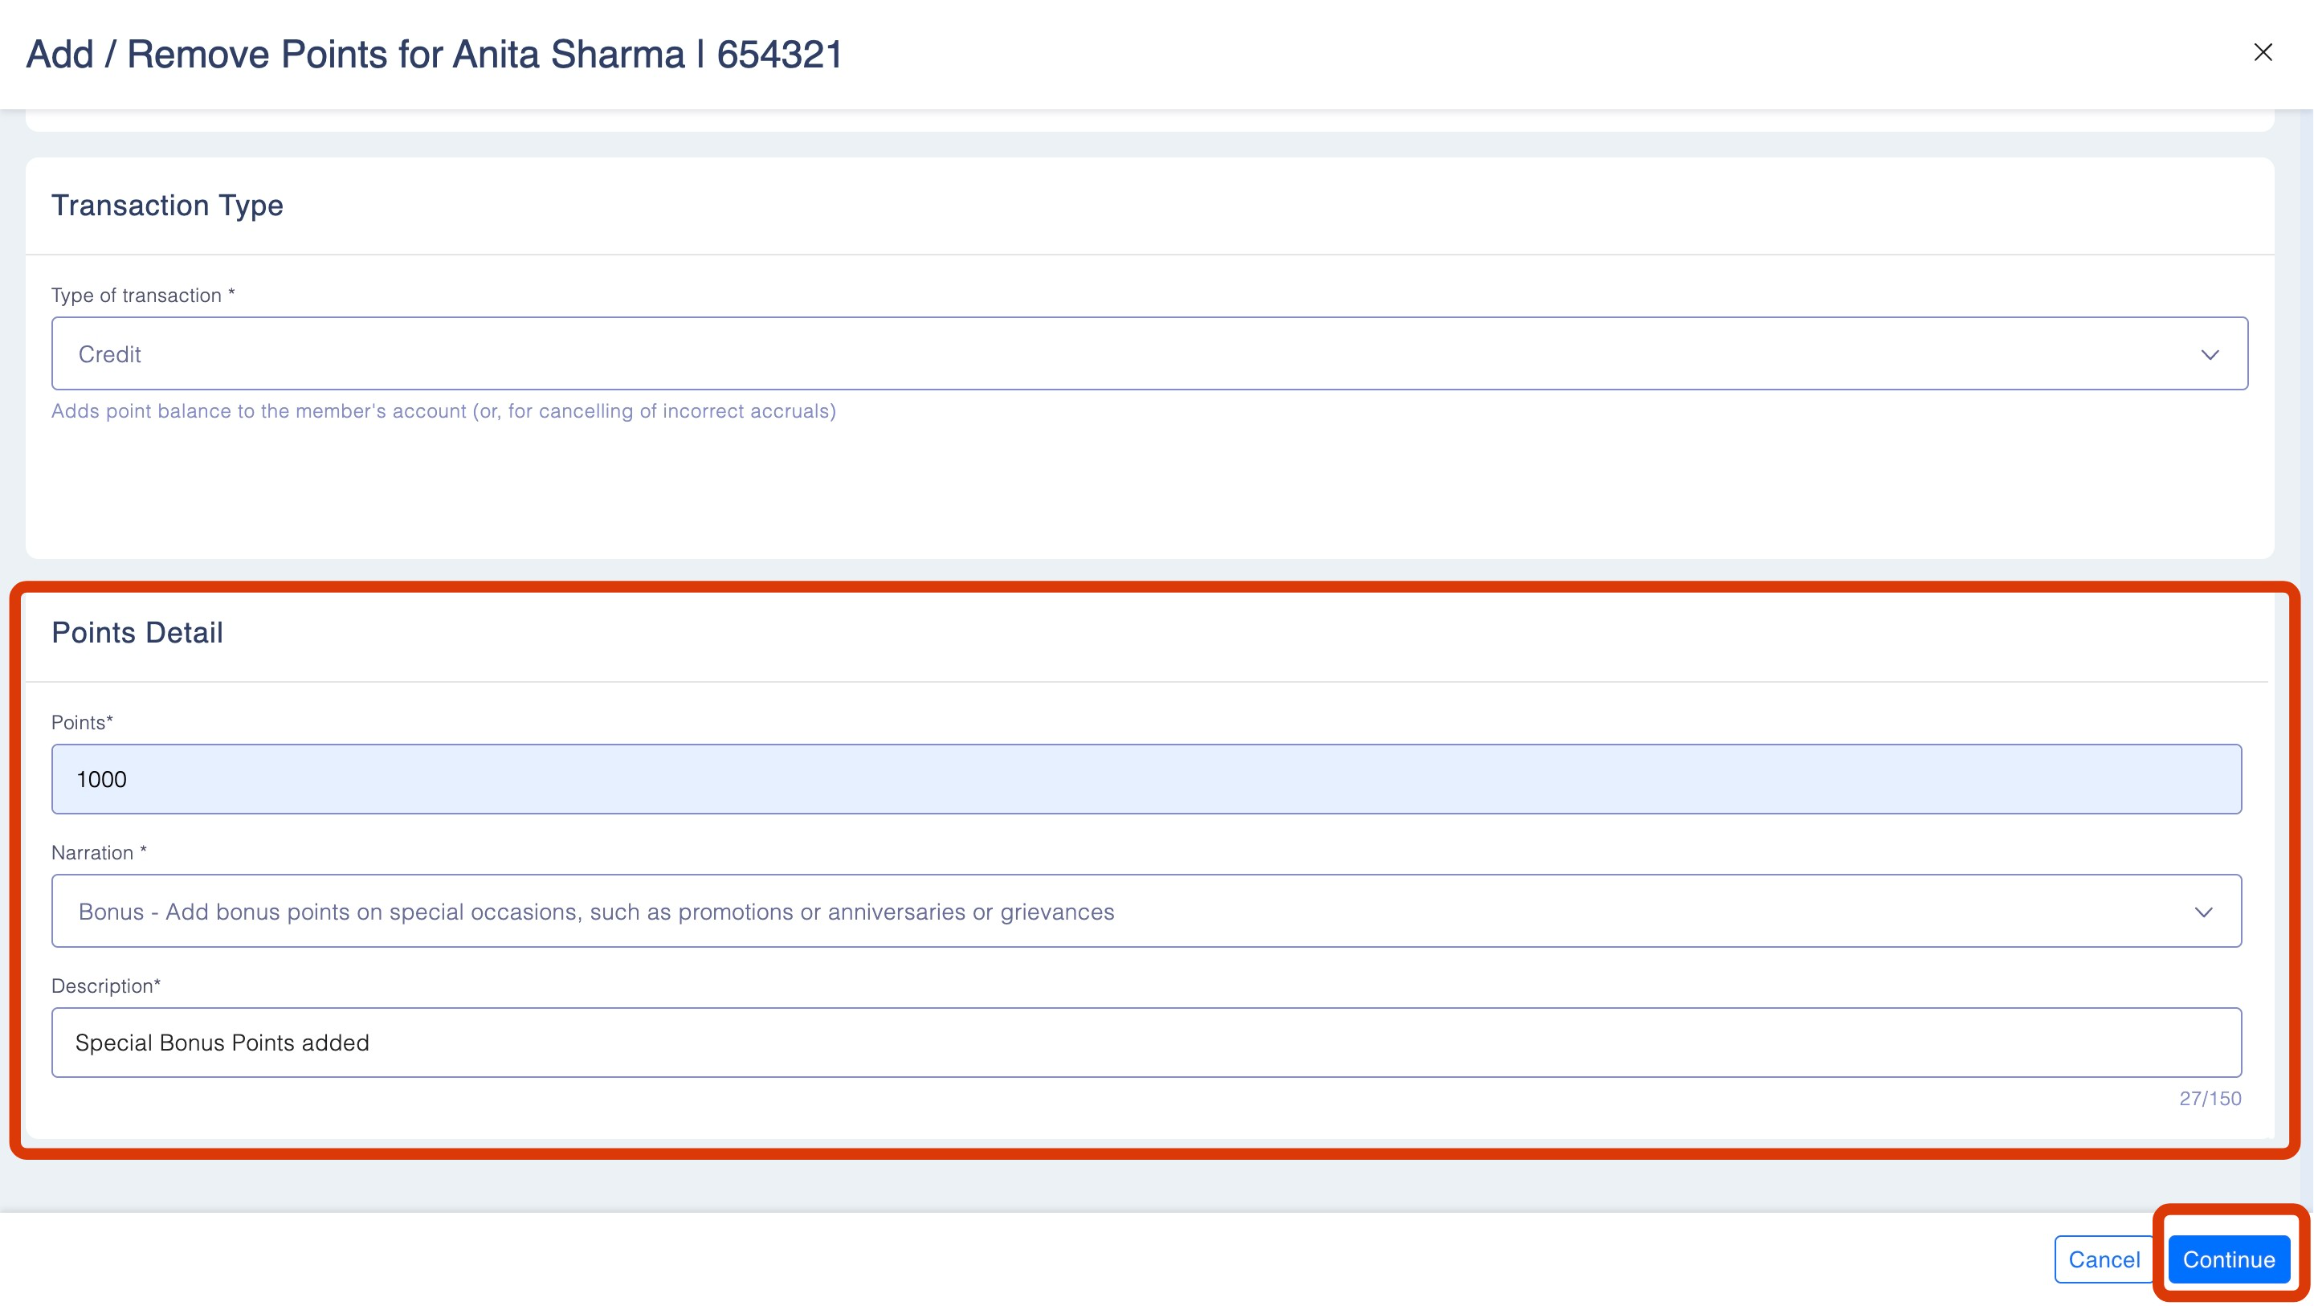
Step 3: Add the primary details:
- Type of Transaction - Defines whether points are added (Credit) or removed (Debit).
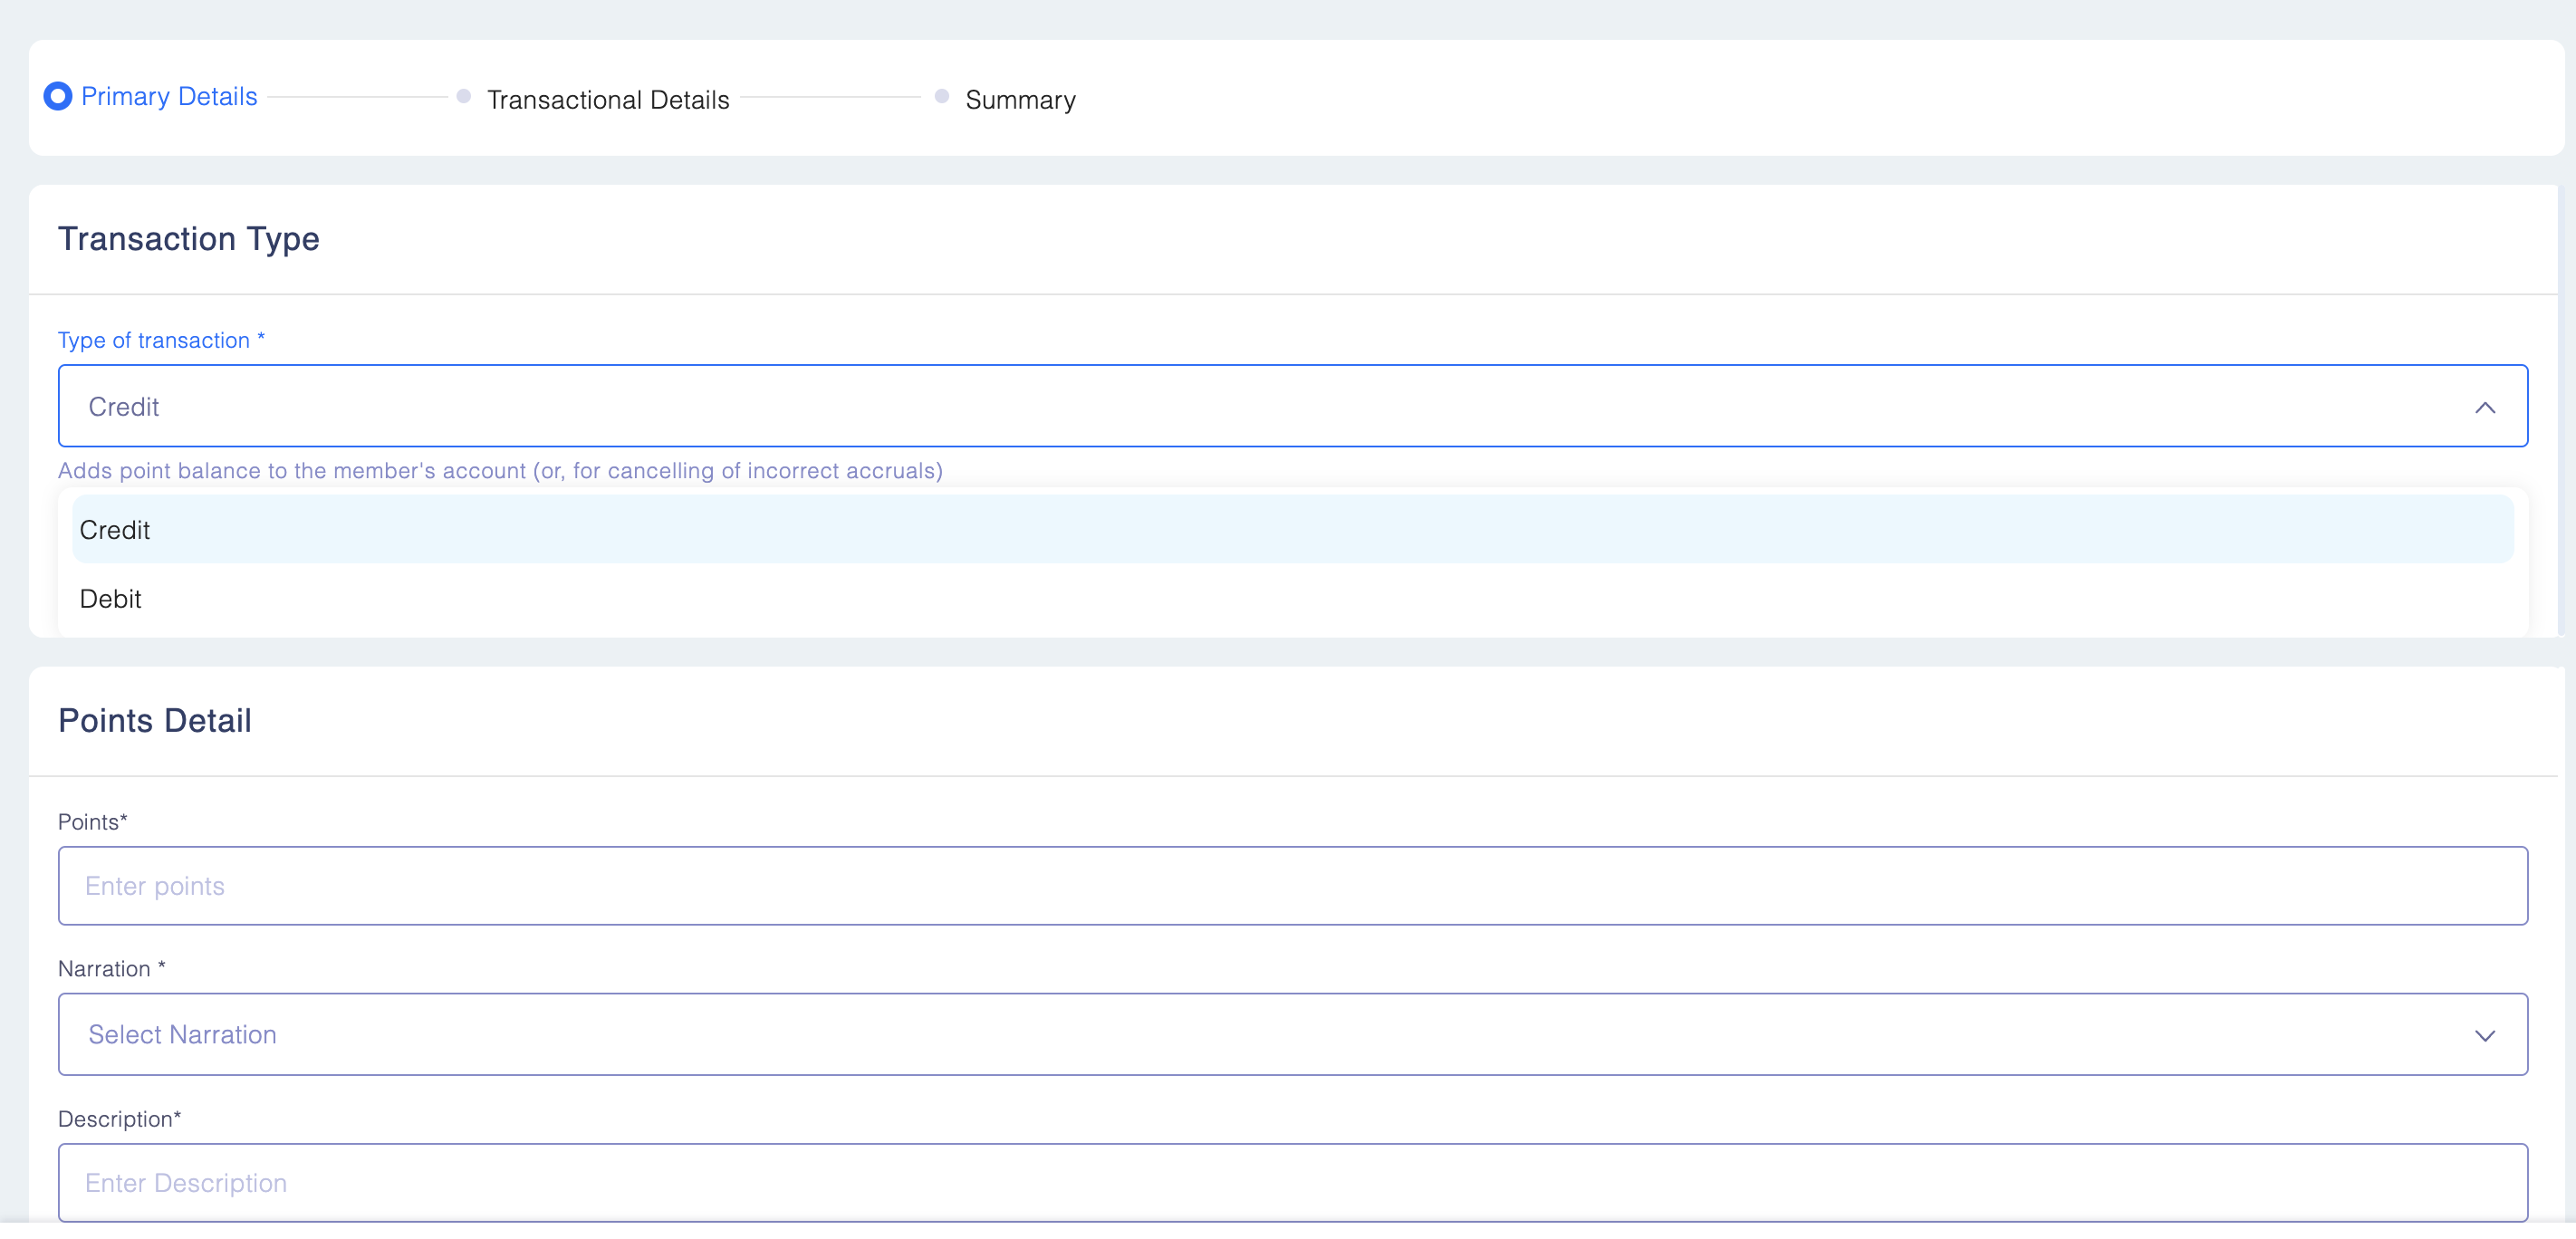
- Points Detail
- Points - Specifies the number of points to be added or deducted.
- Narration - Specifying details about the event and points added.
- Description - Detailed explanation of the transaction for further context.
Narration Auto-Tagging for Manual Adjustments
- When points are added or removed manually, the system now automatically prefixes the narration with “Manual Adjustment –” to clearly identify manually created transactions.
- This helps users and auditors easily filter, validate, and report on manual adjustments across:
- Transaction History
- Reports
- Audit Logs
Examples:
- Manual Adjustment – Bonus Points
- Manual Adjustment – Redemption Reversal
Note:
- Your chosen narration (e.g., Bonus Points, Reversal, etc.) will still appear exactly as before.
- The system simply adds the prefix to indicate that the transaction was created using Add/Remove Points.
Step 4: Next, add the transaction details:
- Product Code - Select the product this transaction will be applied to.
- Transaction Date - The date of the transaction. (By default, today will be selected as transaction date.) You can select the date manually by hovering over to the calendar icon.
- Transaction Amount - The amount of the transaction.
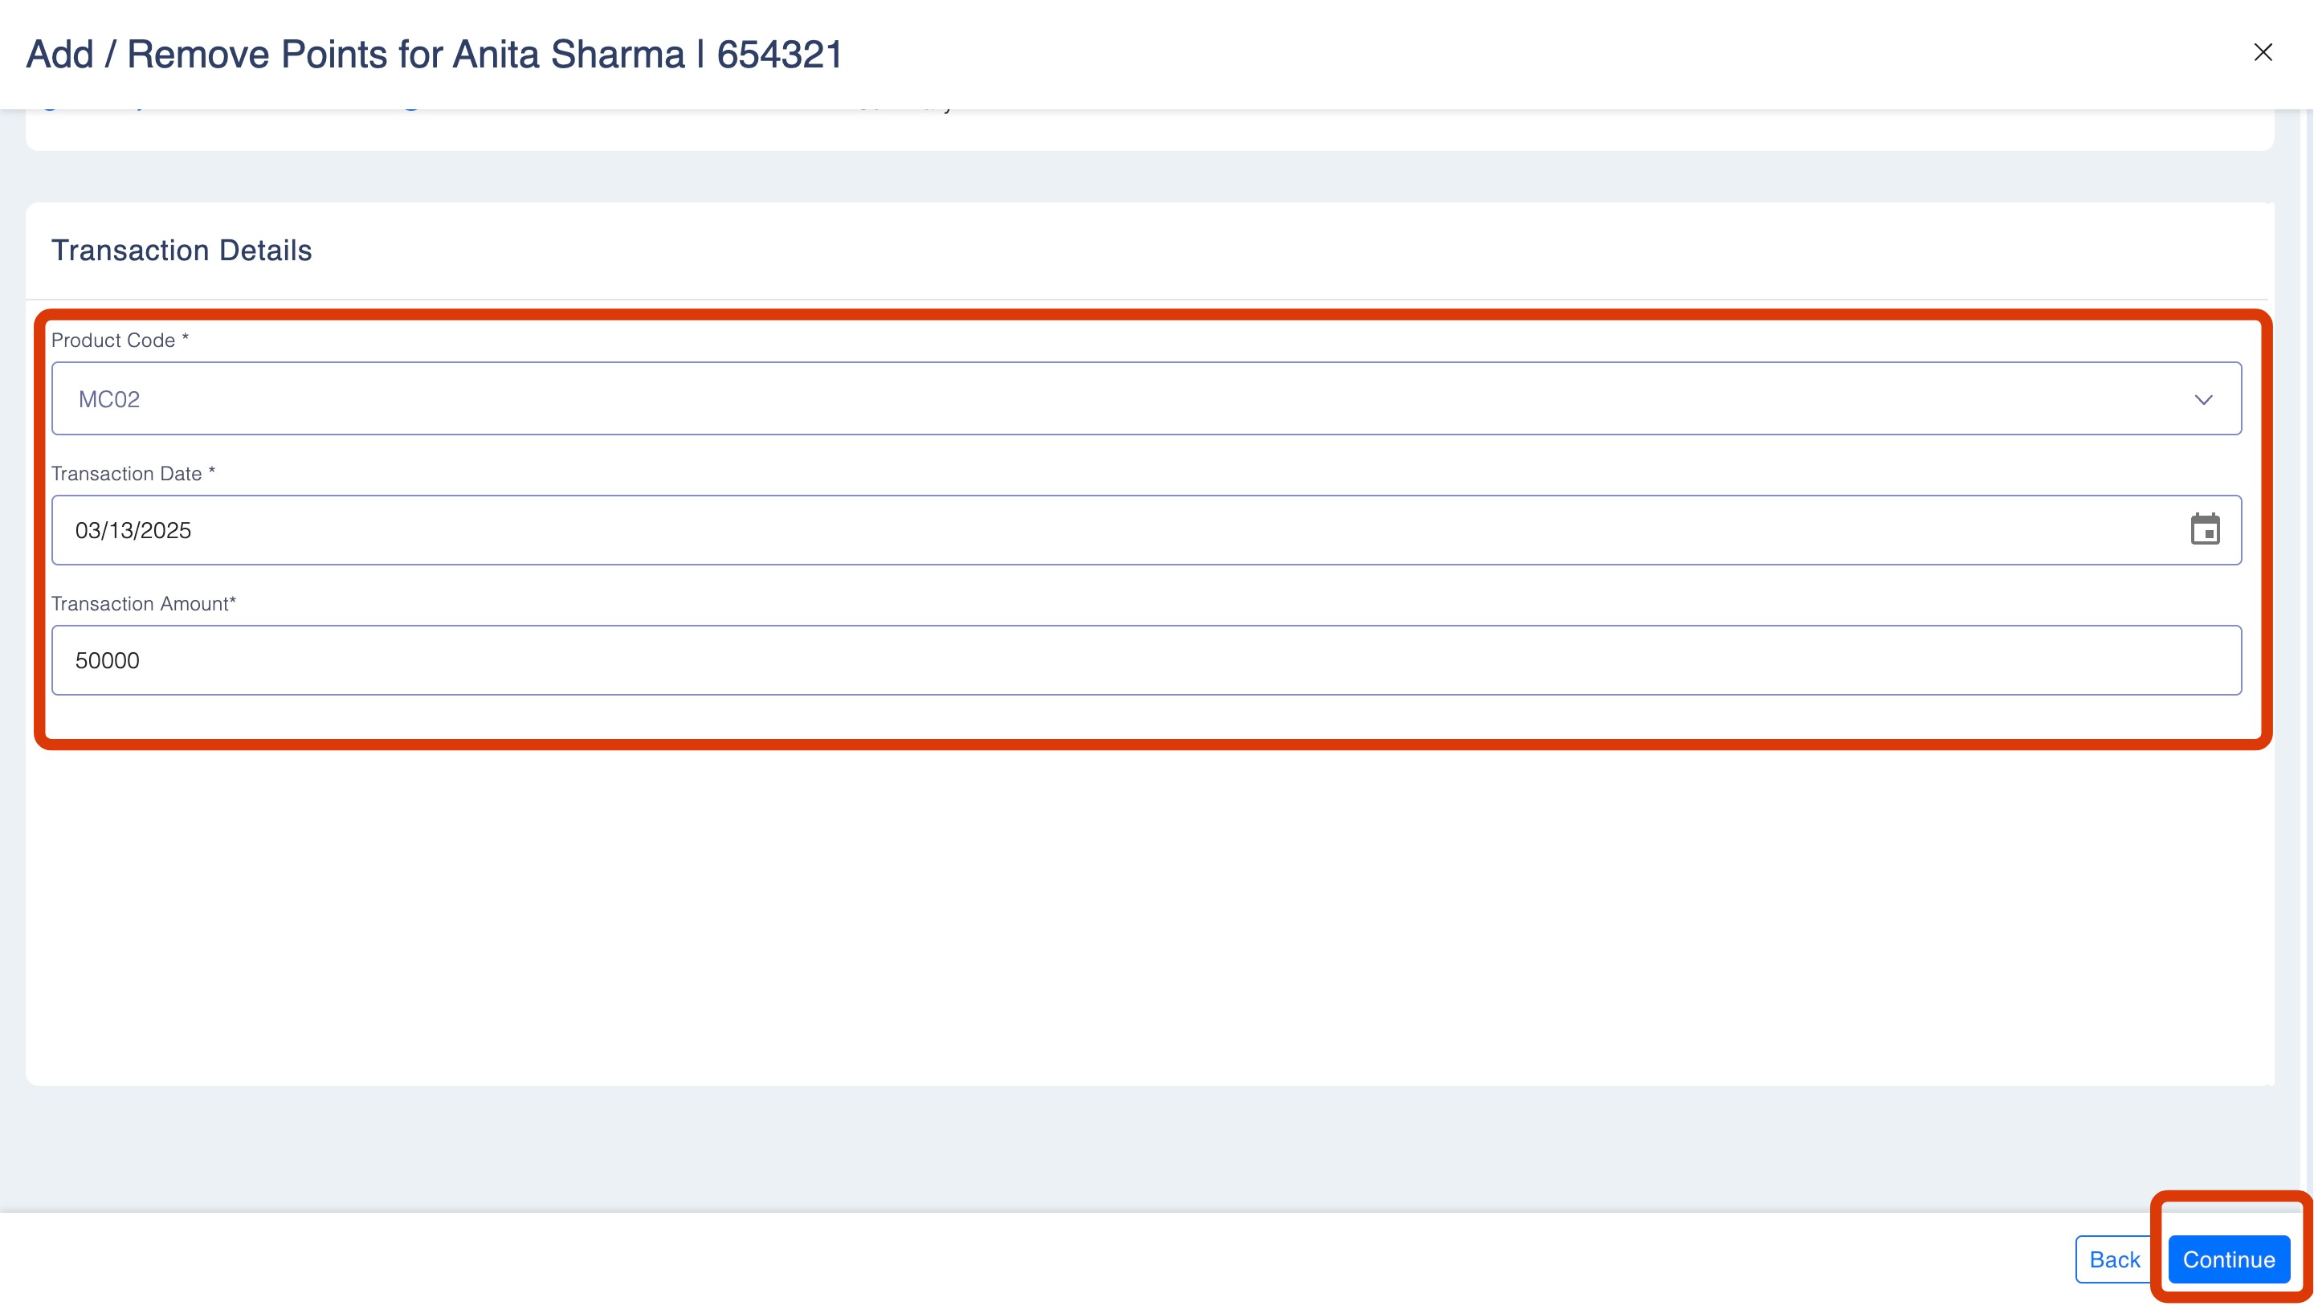
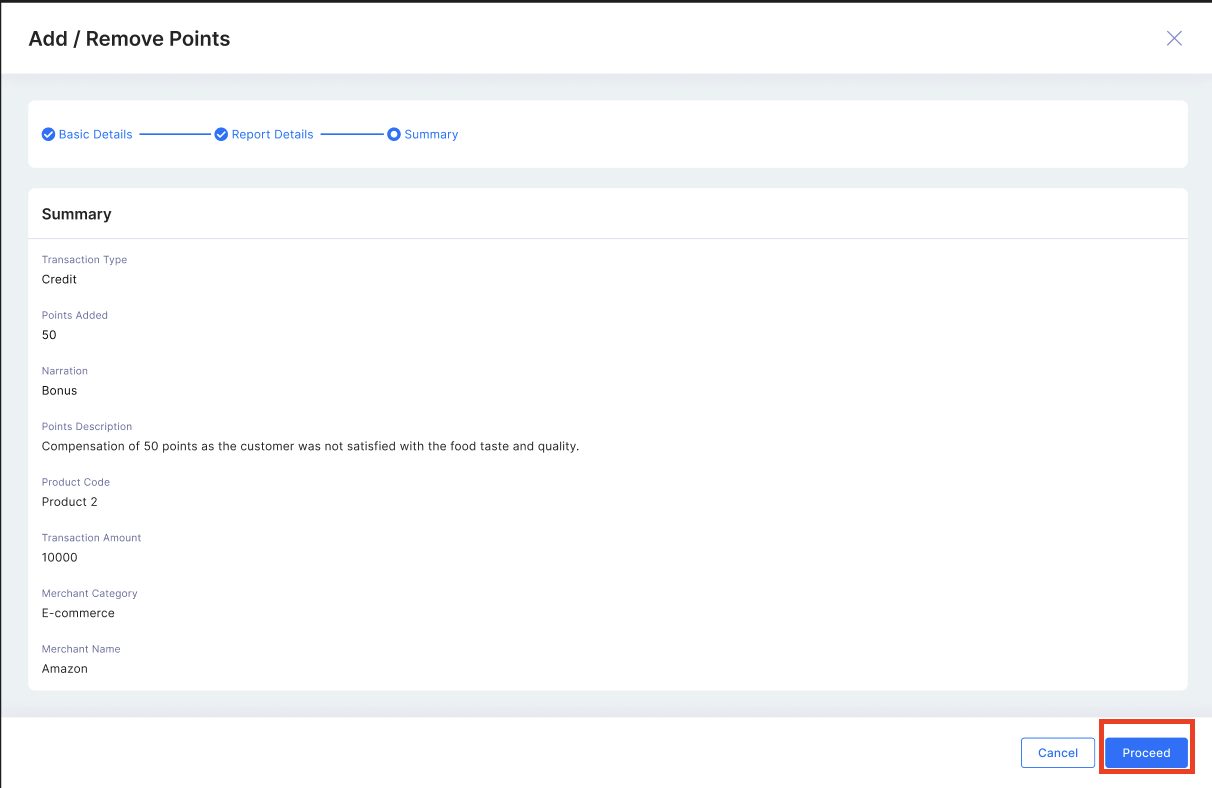
Step 5: Review the summary. Once done, click Save.
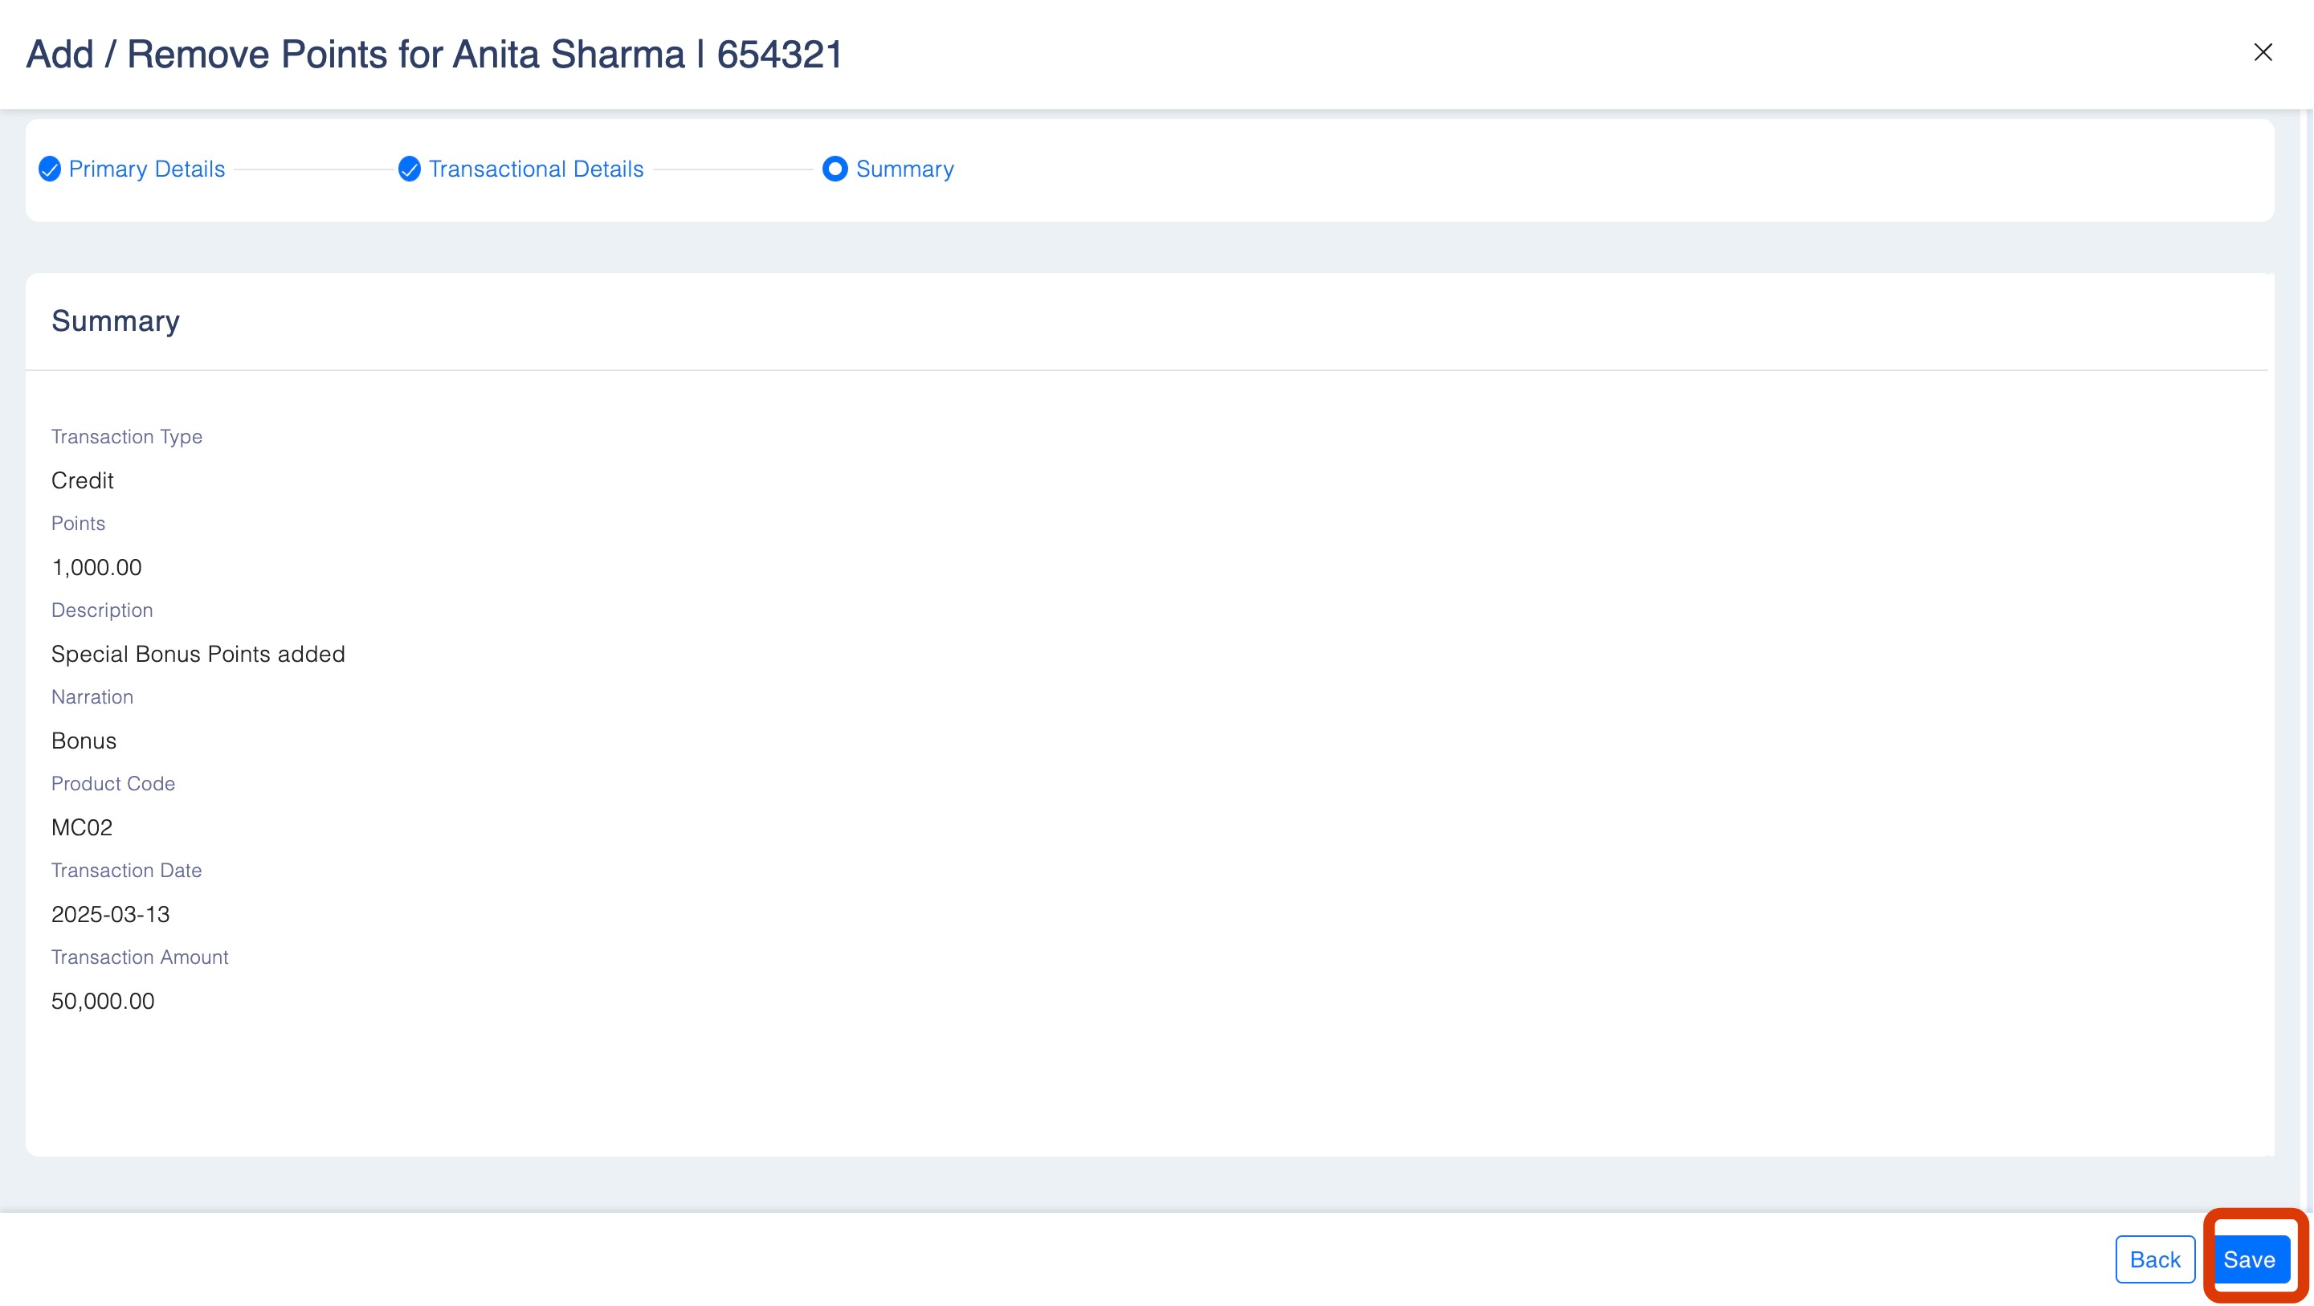
- If Maker-Checker is not enabled, the transaction will be posted immediately.
- If Maker-Checker is enabled, you’ll be prompted to enter a short comment explaining the reason for the adjustment before submitting. Once added, the request will be sent to the Checker for approval.